How to add a Windows 8 Start Menu Tip 2.

This video will show you how to add a Windows 8 Start Menu.

One of the things that annoys people about Windows 8 is the missing Desktop’s Start menu. Microsoft tried very hard to remove the Start menu but fell short as you can use free or paid add-on programs to get the Start menu back.
If your cheap like me and don’t want to spend the money to get an app to put the Start menu back then you can add a Start menu on the taskbar by doing the following steps.

Step 1. Right click the Desktop.
Step 2. Go to New then Folder.
Step 3. Paste the following string.
C:\Users\username\AppData\Roaming\Microsoft\Windows\Start Menu
You need to replace username with the name of the user you are logged in as.
Paste the url above into the Folder bar and you are good to go.
You should then see the new menu bar in the bottom right hand corner of the screen.
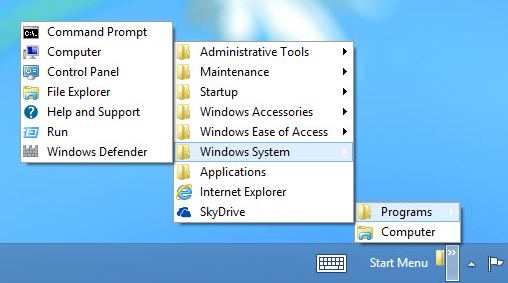
Win8 Start menu

To remove the Start menu you can just right-click and select Toolbars, then untick the Start Menu Toolbar.
When you right click the taskbar and go into Toolbars you will see a whole heap of other pre-built toolbars which you can add to the taskbar.
Here is a list and description of what each one does:

Address: This adds a box on your Taskbar, which allows you to type URLs. Simply type a URL, press Enter and you will go to that website.
Links: This shows your Explorer favorites on the Taskbar.
Touch Keyboard: This shows a keyboard icon on the Taskbar. When you Click on it, it will display an onscreen keyboard.
Desktop: The Desktop toolbar displays every icon on your Desktop. It even displays items such as Homegroup.

How to setup GodMode on Windows 8 tip 1.

This video will show you how to setup GodMode on Windows 8 computer.

The step by step guide on how to setup “God Mode” on Windows 8.

If you have just purchased a new pc you might notice that there is loads of hidden settings where by you can customise Windows 8. However the settings are scattered throughout Windows 8 and it can take time to find them.
This is where “God Mode” comes in. While the term “God Mode” sounds like something from a Doom game, “God Mode” in Windows 8 is really a hidden folder that allows you to get access to all the settings in Windows 8 that are spread out through the Microsoft operating system.

Make sure you have turned hidden files and folders off. To do so go into Explorer, click the View tab and tick “Hidden items” and “File name extensions”. Then follow the steps below.
Step 1. Right click the Desktop.
Step 2. Go to New > Folder.
Step 3. Paste the following string.
GodMode.{ED7BA470-8E54-465E-825C-99712043E01C}

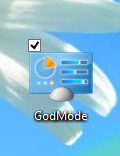
Win8 GodMode
If you have followed the steps correctly you should see the folder icon change to the icon in the picture above.

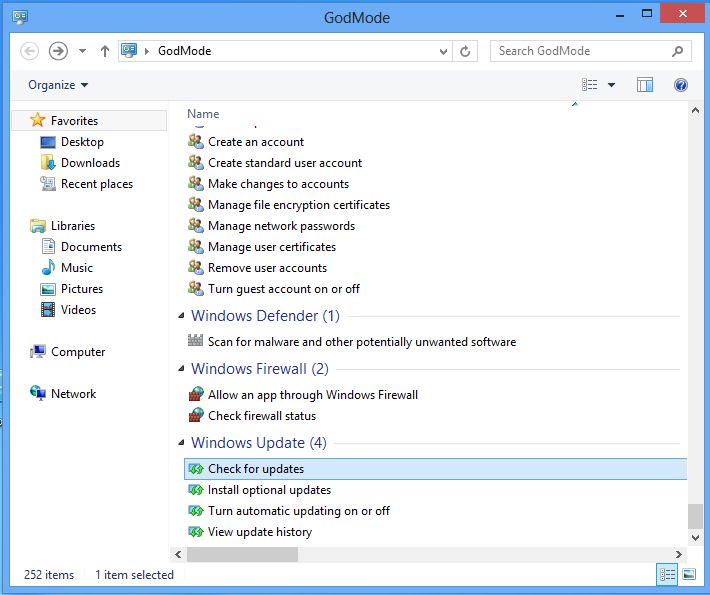
When you double click the GodMode icon you will see a folder full of settings and tools, from “Change User Account Control settings” to “Check for updates.” These settings are organized by category. You can open or close each category by click on the triangle next to it. The category’s have a number in brackets beside them which represents how many settings there are in it.

Inside GodMode settings.

Double click any of the settings and it will take you directly to the setting with in Windows 8. In some cases you will get a wizard screen where you need to follow the prompts. In other cases you will be sent to the control panel or other Windows 8 settings screens.

How to install Windows 8 on a Mac running bootcamp step by step guide.

If my video helps in some way please like it. 🙂
This is a tutorial on how to install windows 8 on a macbook pro running boot camp.
I started adding tutorial’s because some of the tutorial’s on youtube were not comprehensive and helpful enough.