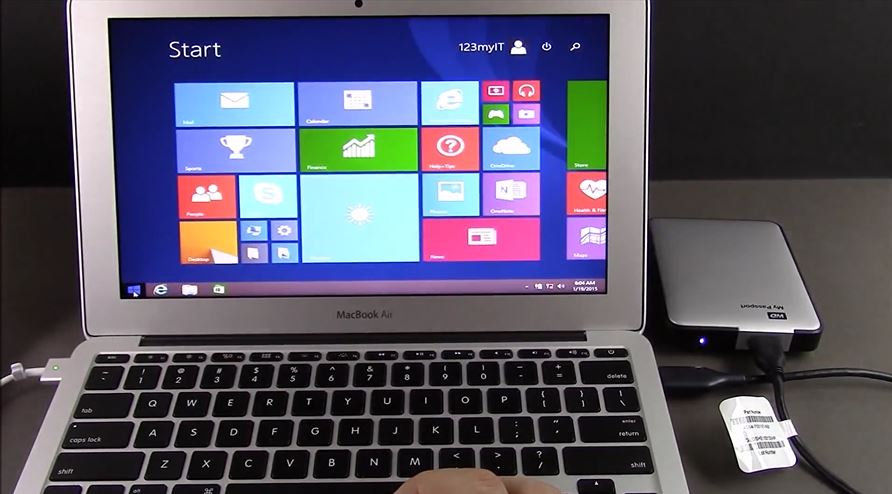
Install Windows 8.1 on an External USB Windows To Go

This video will show you how to Install Windows 8.1 on an External USB Windows To Go.

Hi All,
So I get loads of people on the 123myIT.com website and on the YouTube channel about how can they install Windows on an external drive USB drive so they can just carry that around and use the USB to plug into their Mac or PC hardware.

Well I was able to find a solution for this issue from most people and it is Microsoft’s “Windows to Go”. This allows you to install Windows on an external USB drive to and allows you to run the a copy of Windows basically on any PC or Mac, without having to go ahead and install it locally. Is Windows to go the answer?

Why would you want to do that? Well there are many benefits to this however the main benefits are:
* You can save disk space on the PC or Mac local drive.
* Its very portable, which means you can carry the hard drive and plug it into a friends or work PC.
* Your files stay on the USB so its safer.
* You can also setup the drive to be encrypted, which means if you lose the drive no one will be able to get your data.

Ok so let get into it. What do you need to make this happen.
You will need a few things. The first is you will need to get yourself a copy of Windows Enterprise. This is a special copy of Windows designed to large companies, however I found a place where you can get the Evaluation version.
So to do that watch this video.
Where to Download Windows 8.1 Enterprise Evaluation

The next step is to install that Enterprise copy like you would on a Mac or PC. To help out I made a video on how this is possible to install it on a Mac. Watch the video below.
Install Windows 8.1 Enterprise on a MacBook Air OS X Yosemite

Windows to Go

Once installed you can watch the video above Install Windows 8.1 on an External USB Windows To Go

Of course you will need an external USB drive to install Windows too. I suggest a USB 3 external hard drive with at least 40GB of disk space. You might be able to get away with a smaller drive but I would advise it, because you may want to have some space for App like Mcirosoft Office or some personal data like photos and videos.

Well I hope this helps out guys and good luck!
Matt

Create USB installation media for Windows 8.1

This video is for users that have purchased Windows 8.1 from the 123myIT.com Store or Microsoft and would like to create a USB installation media drive.

Hi All
This is a pretty cool one so I thought I would make a video on it to help people out. If you have purchased a copy of Windows 8.1 software through the 123myIT.com Store or directly through Microsoft, but didn’t buy the DVD or receive the ISO file as a download you will be able to follow this video and create USB installation media for Windows 8.1.
This process uses a tool called “Windows installation Media Creation Tool” and will allow you to download and create a bootable Windows 8.1 USB or ISO file. You can later on burn that ISO file to a DVD if you wish. And 123myIT has a few videos to show you how to burn ISO files to DVDs. See below.
On Windows
How to Burn an ISO to DVD Windows Bootable
Or a Mac.
How to Burn an ISO or DMG file to DVD on a Mac
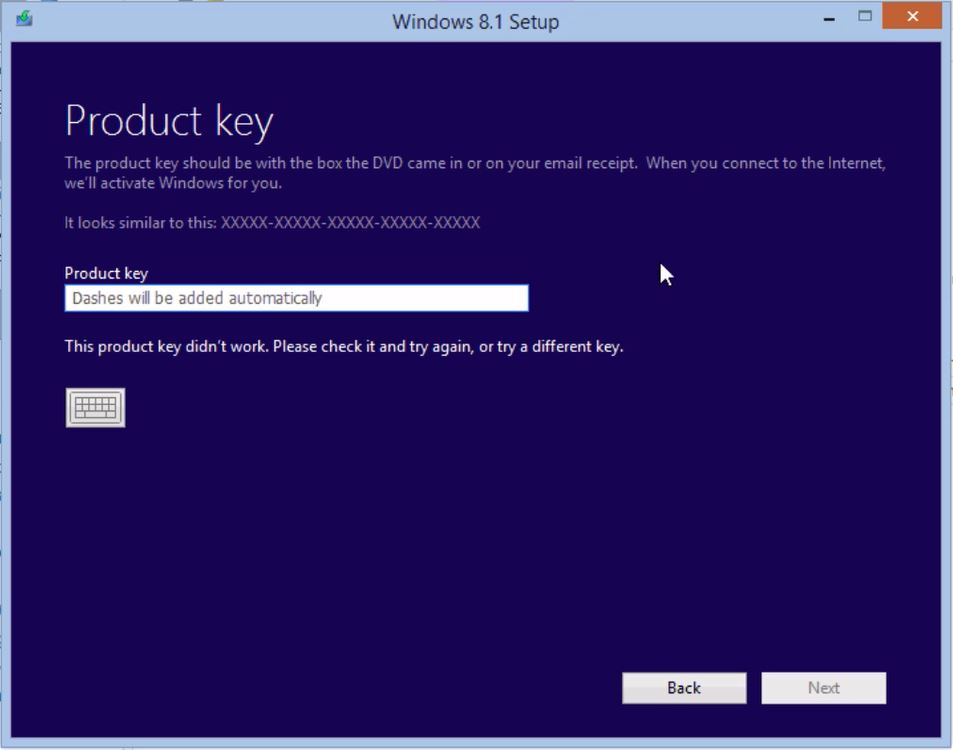
The draw back to this process is you will need a legit product key to install the software. Also this process can only be done on a Windows computer. That can be a boot camp or VMware Mac or just another other Windows PC.

Windows 8.1 Product Key
If you are looking for the link the Windows installation Media Creation Tool, you can find it on the 123myIT Download page here. Or if you want the direct link to the Windows installation Media Creation Tool page you can click here.

You will need an internet connection to download the software and prepare for it to take some time as the 32bit version of the Windows software is around 3GB in size and the Windows 64bit version is around 4GB in size. If you are copying the files to DVD or USB make sure that that have 4GB or large capacity.

I hope that helps out.
Cheers
Matt

How to create a bootable Windows 7 8 USB on a Mac

This video will show you how to create a bootable Windows 7 8 USB on a Mac.
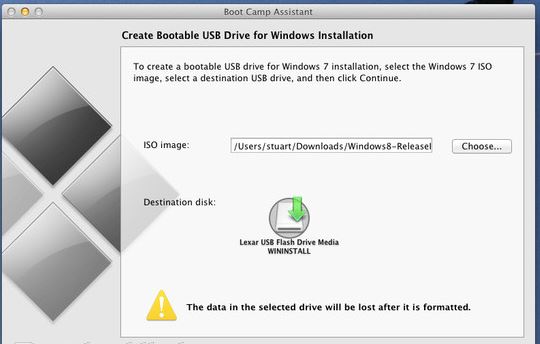
You can use the bootcamp assistant to create a bootable Windows 7 8 USB on a Mac. However the option may not be highlighted in your bootcamp assistant.
To make the option appear you can try the following steps.

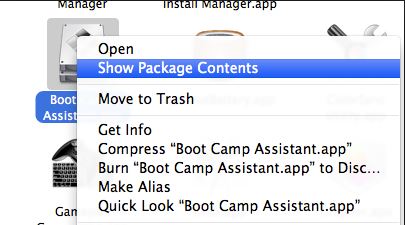
Step 1. Click on Go then Utilities. Find the Bootcamp assistant, right click on it and go to Show package contents and then go into the contents folder.

Bootcamp Assistant Show Package Contents

Step 2.Copy the info.plist file to the desktop and make a backup copy of it and open it.

Step 3. Find the line which says PreUSBbootsupportmodels and remove the Pre from the line. Try running the bootcamp assistant again and this time you should have the Create a Windows 7 or later install disc option.

Step 4 Copy the info.plist back to the contents directory. And start the bootcamp assistant again and see if the Create Bootable USB Drive for Windows installation comes up. If not try this next step.

Bootcamp assistant create bootable usb drive

Step 5 Change the USBbootsupportedmodels in the info.plist file.
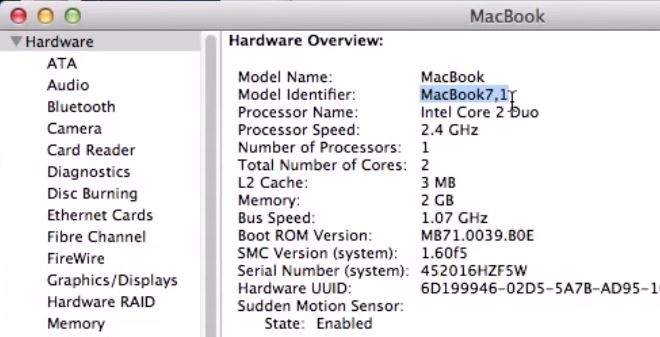
You can find the model on the Mac that you are using by going into the Apple menu then click on About This Mac and then click on More info. Next click on System report and under Hardware Overview look up Model Identifier.
In the example in the video my MacBook model was MacBook7,1.
In the info.plist file I had to change the USB supported models to my MacBook model so that I could create a Windows USB on a Mac.

Hardware Overview Mac

Hope this works guys. Feel free to leave some feedback.

Cheers
Matt

For more into you can check out Apples discussions page here.

How to create a bootable Windows 8.1 USB

Microsoft has released Windows 8 and 8.1 in digital and physical formats. You can install the new Windows operating system by either downloading the ISO file or by a DVD. But what can you do if none of these options are suitable for your situation? You can create a bootable Windows 8.1 USB drive.

The main benefits to using a bootable Windows 8.1 USB drive is that its compatible with every device that runs Windows. You don’t need to have a DVD drive on your hardware to install it, just a USB port. Its easier to store and carry and installs times are much faster than a DVD.

So what do you need to set up the USB?

You will need the following to create a Windows 8.1 USB drive:
* A 4GB USB drive or larger;
* Windows 8.1 ISO file or DVD, you can download an ISO file from the downloads section of 123myIT website here.
* Any device that can run Windows.
* Windows product key. You can find it on the 123myIT Downloads page here.

I already have a Windows 8 Product Key, can I update it?
The answer is yes. If you own Windows 8 or Windows 8.1, you can download and install Windows by using your product key. Click here.

How do I create the Windows 8.1 USB drive from a DVD or ISO file?
After downloading the Windows 8.1 ISO follow the steps below.
1. Insert your 4GB USB drive.
2. Open the Command Prompt by pressing Windows Key + R and type “cmd” of go to Start Run and type “cmd”.
3. In the black command windows type “diskpart” and this will open the partitioning software, so that you can start to format the USB drive.
4. Run the following commands.
* DISKPART> list disk
“list disk shows all of the active disks on your computer”
* DISKPART> select disk #
“# represents the number for your USB flash drive”
* DISKPART> clean
“deletes any existing partitions on the USB flash drive”
* DISKPART> create partition primary
“creates a primary partition on the USB flash drive”
* DISKPART> select partition 1
“selects the partition you just created”
DISKPART> active
“makes the partition active”
DISKPART> format FS=NTFS quick
“This command will format the USB with the NTFS file system”
* DISKPART> assign
“assign a volume and drive letter to the USB drive”
DISKPART> exit
“exit Disk Partition”

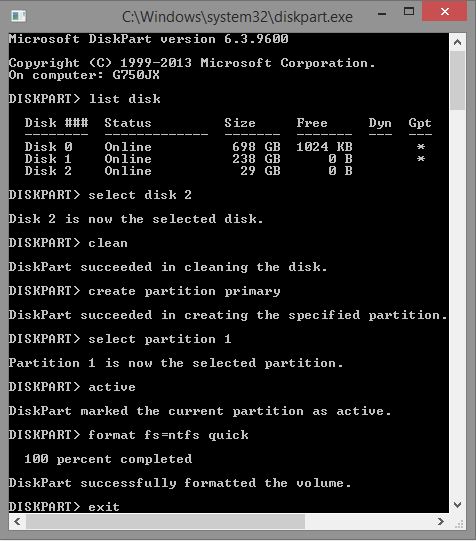
Once complete your CMD or command window should look something like this.

Diskpart Commands

Copying the Windows 8.1 files from the ISO file or DVD drive to your Windows 8.1 USB drive.

The next step is to use XCOPY to copy all the files on your ISO file or DVD to the Windows 8.1 USB drive. Use the command below to get started. Change the “H and F” drive to suit the letters of your ISO file or DVD drive and USB drive. For more info watch the video above.

XCOPY H:\*.* F:\ /E /H /F

Once you finished typing the command it should look like the screen shot below.

Xcopy Commands

And the hard part is now done. Simply plug in your bootable Windows 8.1 USB drive into any Windows PC and you will be able to boot and install Windows 8.1.

Good Luck.

How to Backup a Mac with Time Machine

This video will show you how to Backup a Mac with Time Machine.

Hi All
I thought I would do a video on how to Backup a Mac with Time Machine. For those that don’t know what Time Machine is, its a free app that comes with Mac OS X and it allows you to backup all the data on your Mac to an external hard drive.
Usually a USB drive is used to back up too, however some Mac’s have a Firewire port and a Firewire drive can be used for a backup in this case. You can also backup to a network server drive or any non-bootable volume which has been formatted with Apple’s HFS Extended format.

When you buy an external hard drive to backup the data, make sure you purchase one with allot of storage space. If the drive is new it will pop up with a prompt and ask you if you want to use this drive as a backup drive?
At this stage you can just hit the backup now and Time Machine will do the rest.

To start it Manually. Go into System Preferences and click on the Time Machine app.

How to fix the redsn0w USB Communication Error

Hi Guys
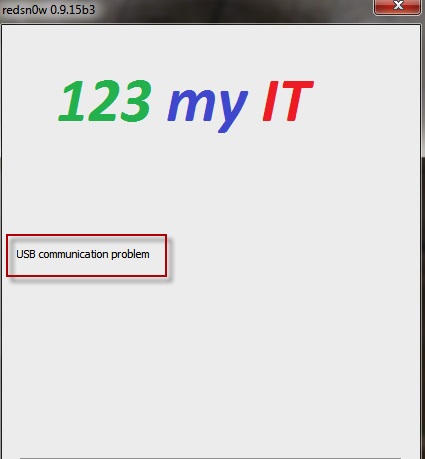
So I have been having this issue on and off with the redsn0w USB Communication Error. And I have had a few people ask me about it.

Redsn0wUSB communication Error

In this video I will show you how to fix it.

Step 1.Restart your PC.
Step 2. Check your Cables.
Step 3.Try a different USB port on your PC.
Step 4.Try DFU mode again.
Step 5.Disable your virus scanner.
Step 6.Close any open programs or web browsers on your PC.
Step 7.Check your device manager and make sure the USB driver is installed correctly and doesn’t have a ! next to it.
Step 8.Try an earlier version of Redsn0w.
Step 9.Download and use the correct IPSW firmware version for your iPhone.

You can find a list of all the firmware for the iPhone here.
I hope that helps.
Cheers
Matt