Clean Install MacOS Big Sur

Hi guys and welcome to 123myIT. In this video, we will show you how to do a clean install of MacOS Bug Sur.

Guys in a previous video I showed you how to create a MacOS Big Sur installer USB. I will put a link to that in the top of the video and it the description below. Once you have followed that video and created your USB, we can now show you how to do a clean install on any Mac. Lets get started.

One more thing to mention its good to have a USB type A and USB type C this allows you to do a clean install on any Mac that has USB type A and USB C ports. I will leave an Amazon link in the description.

First Step – Install Mac OS Big Sur

So, the first step is to shut down your Mac. So go to Apple menu and hit shutdown. Ok just go ahead and plug in your MacOS Big Sur USB. Next up press and hold your Alt Option key on your keyboard.

And press your power button to turn your Mac on. You should then see the boot menu with install MacOS Big Sur. Use the arrow keys to select the drive. It will eventually boot you into the MacOS Utilities menu. IF you want to upgrade or install a new copy of MacOS select the install MacOS option. I want to show you how to do a clean install so I am going to wipe the hard drive first. So click on disk utility. Go to view and then show all devices. Select your Apple Hard disk or SSD and click on erase. Type a name for your Hard drive and click erase. I will call mine Macintosh HD.
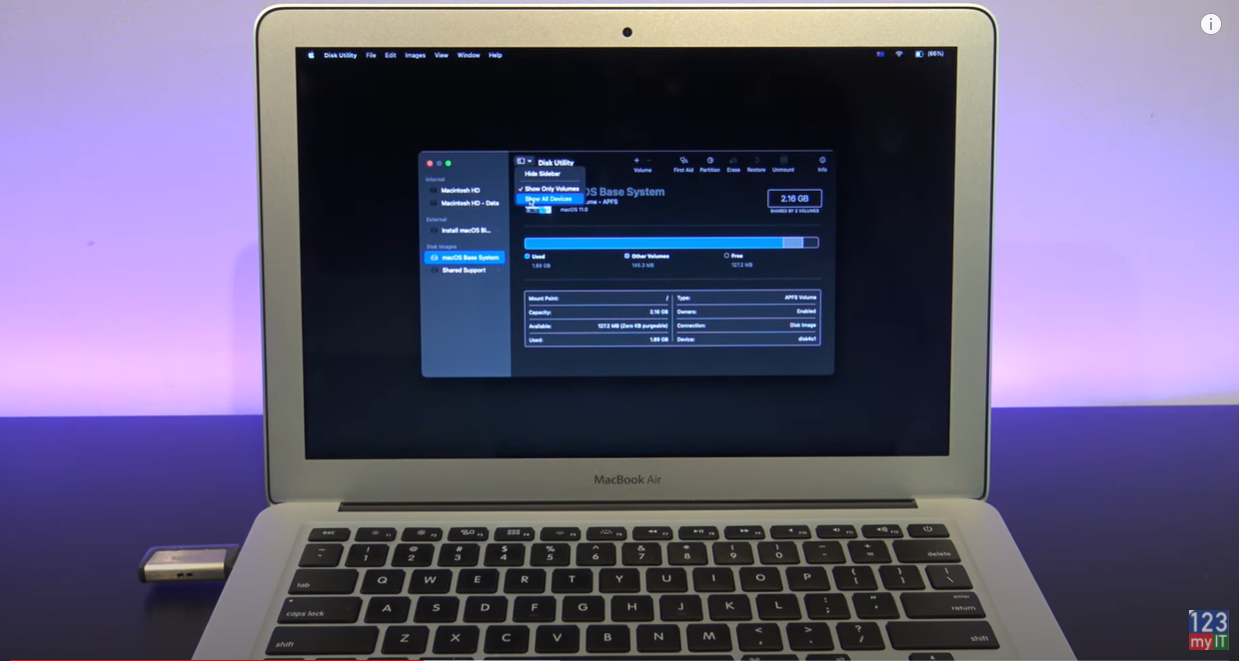
Install Mac OS Big Sur
Using Disk Utility to format the disk.

Once that’s finished just click done. If you have an older Mac go to partition and partition again. And under the Format menu you will have other options. For newer Macs use APFS. For older Macs try Mac OS Extended Journaled.

Disk Utility

Once you are finished just close the disk utility and click on install MacOS. Click continue continue again and then agree. Select your Macintosh hard disk and click continue. Ok so that’s going to take a little while to install so while you are waiting why not hit that subscribe button for me and smash the bell icon!  And also I will put a play list of all my Mac videos in the top of the video now.

By now you Mac would have rebooted and you should see the welcome screen where you select the country you are from. You have now done a clean install of MacOS Big Sur. And you can just go through the Mac setup prompts very similar to when you first purchased your Mac. 

Dark Mode

Don’t forget to choose your look. You can choose your look, so you have the options of light or dark or auto. If you select auto it will change depending on the time of day. Pretty cool.

Guys you have just completed a clean install of MacOS Big Sur and its ready to use.

Guys don’t forget to check out my other videos such as create a MacOS Big Sur usb drive. And do me a favour if you know anyone who might need this video please share it will them, hit the subscribe button and smash the bell icon.

Transfer Data iPhone to Huawei

Everything Huawei P40 Pro in 3 Minutes

Apple Shutting Down iTunes

Hi Guys
I want to show you guys what will happen to your iTunes when Apple upgrade you to the new MacOS Catalina which is due to be released around Monday 23 September 2019. I am getting a few people asking about what will happen to iTunes and their music files. Is Apple shutting down iTunes? Watch the video to find out.

In this video I have added one MP3 file to test with. One video file and a pods cast.
Alright so the version I am currently running is MacOS High Seirra. Version 10.13 and we will upgrade that to MacOS Catalina 10.14.

I am going to do the upgrade with my MacOS Catalina USB installer that I created in a previous video and I will put a link to that video here.

After the upgrade – Shutting down iTunes

Ok the upgrade has finished and now you can see iTunes has been replaced with three new icons. Apple Music, Podcasts and Apple TV.
If you start by opening Apple Music this is where your Music files should now be stored.
If we check for our test MP3 we can see it now shows up under the recently added menu in our Apple Music app.

Next up you can check out the Podcasts app. If you open that you should see your podcasts list. And theres the one we added earlier.

And the last app to check will be your Apple TV app. All your video content will be added here.
And theres our 123myIT video I added.

shutting down itunes
3 new apps Apple Music, Podcasts and Apple TV.

Your probably wondering what about iTunes for Windows users. Well apparently it will stay the same.
Also guys don’t forget t check out my other video, Low power mode on iPhone, hit the subscribe button and smash the bell icon.
Low Power Mode on iPhone

Backup Samsung to PC or Mac

Enable Window Zoom on iPhone or iPad

Create macOS Catalina USB Installer Drive

Create a MacOS Catalina USB installer drive

This video will show you how to create MacOS Catalina USB installer drive. This installer drive can be used to do a clean install of MacOS Catalina on any Mac.

Step 1 – Download MacOS Software

You will need to open up a Safari browser and navigate to beta.apple.com. Click on Sign in or join up if you haven’t already. Type in your Apple ID when prompted.

Next up you want to scroll down to where it says “Get Started” and Enroll your Mac. Then the next menu to look out for is the Download the MacOS Public Beta. You will be able to upgrade this version to full version when its released, some time in September 2019. Once downloaded open your beta file and run through the prompts.

Close the installer windows by going to the Apple menu and into the Install MacOS Beta and then quit Install MacOS.

Step 2 – Create MacOS Catalina drive

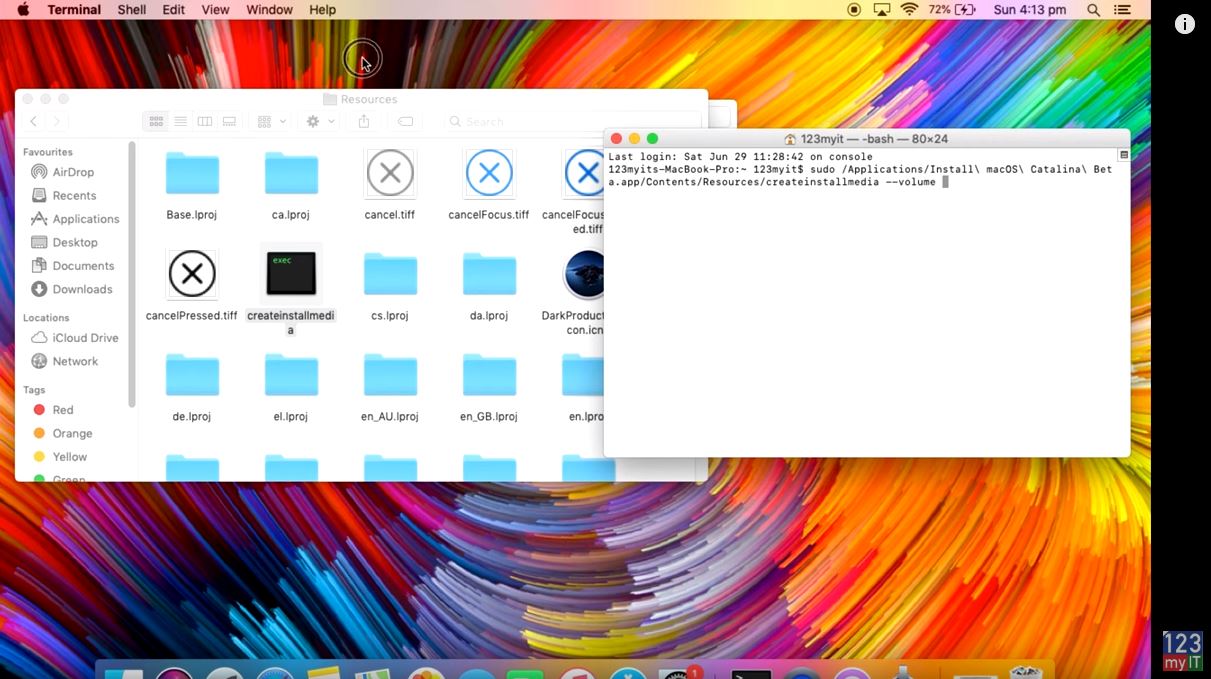
Go into your Finder menu, then click on Go. Then go down to Applications, find your Install MacOS Catalina app. Right click it and go to show package contents. Go into Contents and go into Resources folder. Then find the create install media file. Drag that Windows to the left side of the screen to give yourself some space.

Go into Finder and do a search for Terminal window. Move your Terminal window to the right so you can see both windows. In the Terminal window type sudo space. Then drag your create install media file into the Terminal window. It should look something like the picture below.

Create macOS Catalina USB
Using the Terminal to create the USB drive.

After that type in –Volume and then press space again. Next go back up to the Go menu then down to Go to folder. In the text box type /Volumes and click on Go.

Plug in your USB to the Mac. I use a SanDisk version but you can buy your own version here. 🔥 Do you want a USB drive like the one in the video? Click here. https://amzn.to/2NqJI5k

Step 3 – Create MacOS USB

Go back into your Volumes folder and you should see your SanDisk USB or whatever USB you are using should appear. Click and drag it into your Terminal window. press Return and the next step will wipe and data on the USB. Type Y and press Return again on your Keyboard. Double click on your USB drive and you should see the installer file. Your drive has been created and you are ready to do a clean install of MacOS Catalina.

Also guys if you want to see more of my videos like share files iPhone to Mac click the links now and help me out by hitting the Subscribe button and smashing the bell icon.

Share files iPhone to Mac with AirDrop

Must have iPhone & Android Accessories

Fix MacBook by resetting SMC

Create MacOS Sierra Install USB

Create MacOS Sierra Install USB

Hi guys and welcome to 123 my IT’s video on how to create an MacOS Sierra Install USB.
Ok guys recently I did a video on how to download Mac OS Sierra and to see that video you can find it on the following link. How to download Mac OS Sierra.

That video shows you how to download this app and now the next step is to show you how to actually create a MacOS Sierra Install USB from this app. So the USB thumb drive has to be a minimum of 8 gigabytes in size for you install the OS X Sierra software on the USB and then you can do a fresh install of Mac OS Sierra from this use to any Mac.
Lets for example say you wanted to sell your old Mac or you had a problem with your Mac like you had a virus on there any need to do a fresh install. You can use this USB to format the Mac and install a fresh copy of OS X.

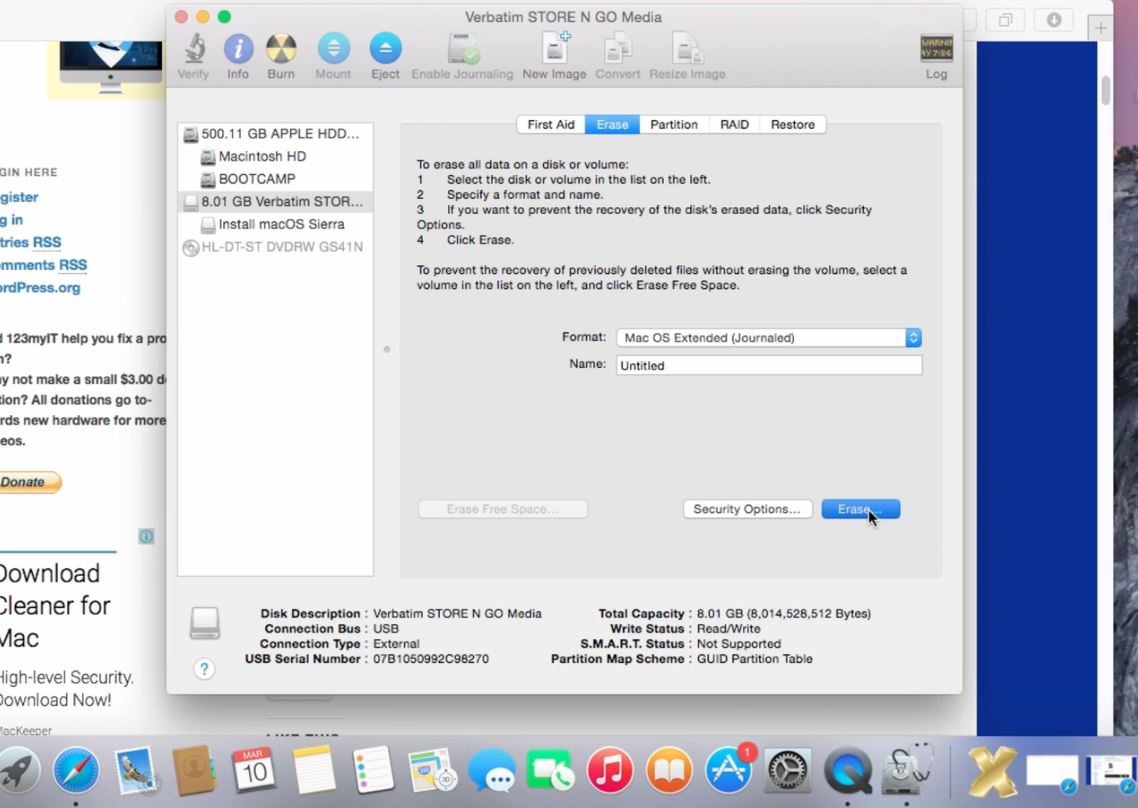
So the first step you will need to do is format the USB and you can do this by plugging your USB thumb drive and then go to go in the Apple menu and then go down to disk utilities.

Create MacOS Sierra Install USB

Click on the USB that you want to format and make sure it’s set to Mac OS X extended journaled and keep it as untitled for now you can change this around but if you change this around you have to actually change the untitled part in the code there so let’s just leave it as untitled for now.

Make sure you have no important data on the USB because the next step will delete any data that was on the USB.
Once you have done this just click erase and then erase again. The USB will disappear and it will start to format the USB.

The next step is to download the install disc creator app you can get the install disc creator app from the 123myIT.com website, under downloads or simply click the link here.
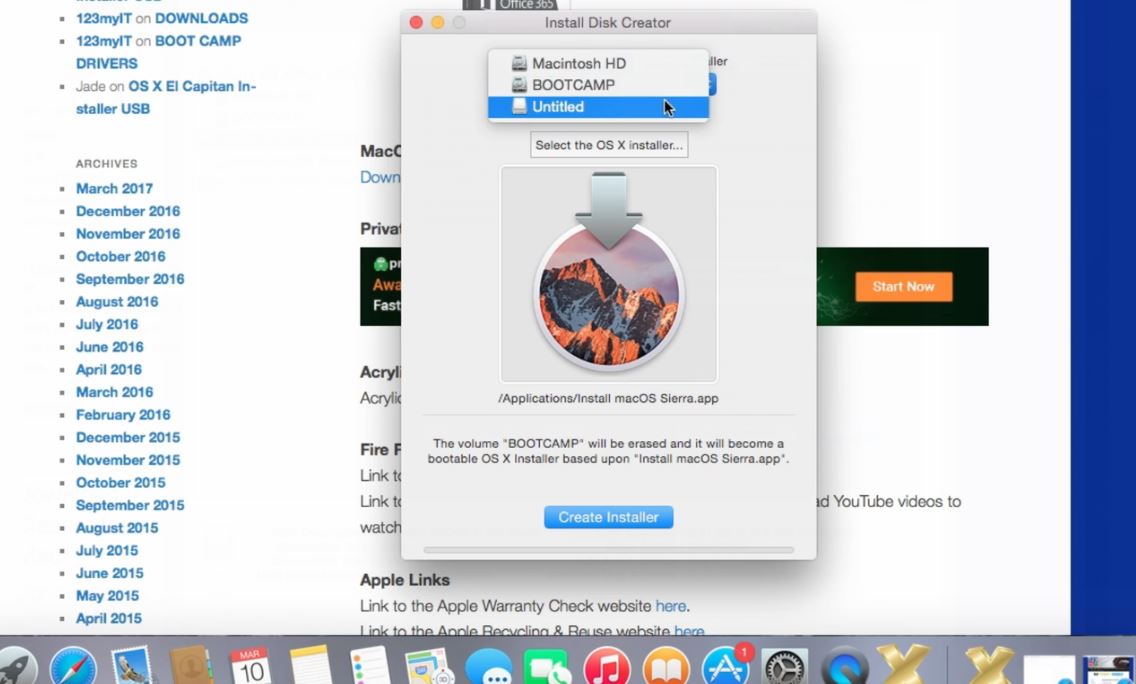
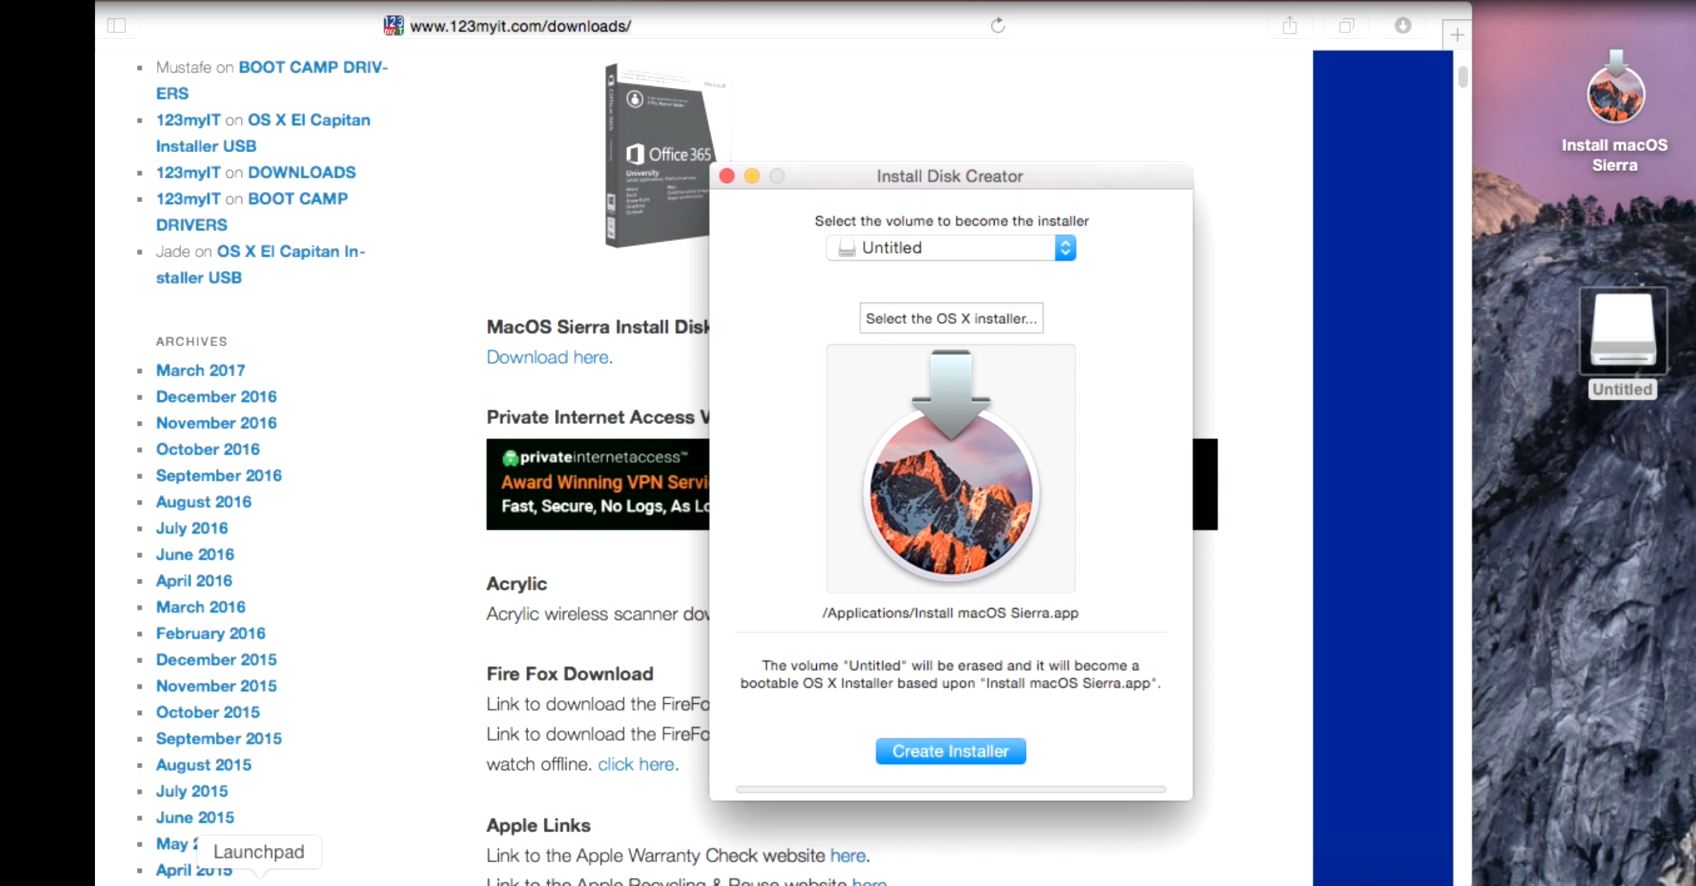
Open up the install disc creator you will need to select the untitled USB from the drop-down menu. Make sure the OS X Sierra app is selected below then click create installer button. You may be prompted for a password this will be the administrator password type in the password and then click ok. This process can take about 5 to 10 minutes depending on the speed of your Mac.

Install Disk Creator

To do this same process with the terminal code copy the terminal code below then open up a terminal Window by going to finder and then type terminal and then hit return.

sudo /Applications/Install\ macOS\ Sierra.app/Contents/Resources/createinstallmedia --volume /Volumes/Untitled --applicationpath /Applications/Install\ macOS\ Sierra.app --nointeraction &&say Done

Simply right click and paste the command into the terminal window, press return again and you will be prompted for your administrator password type in your administrator password.

Terminal command MacOS Installer Disk

if successful you should see the terminal window start to erase the USB and copying installer files to the disc. Once this is done you should be able to then use the USB to do a clean install of any Mac.
I hope that helps guys ! 🙂

How to Download macOS Sierra

How to Download macOS Sierra

This video and article will show you how to download MacOS Sierra, which can be used at a later date to install on any Apple Mac computer.

Why would you want to download a copy of OS X Sierra? When you have an offline copy that means you can then install it on any Mac, so let’s say you wanted to sell your Mac wipe all the data that was on the local hard drive before you sold it you can go through it and reinstall the operating system with macOS Sierra.
Another good thing about having the offline copy is you can actually install it on other Mac’s, also Apple tends to update this software once a year so if you don’t download a copy at some stage and you wanted to reinstall this particular version of macOS you won’t be able to.

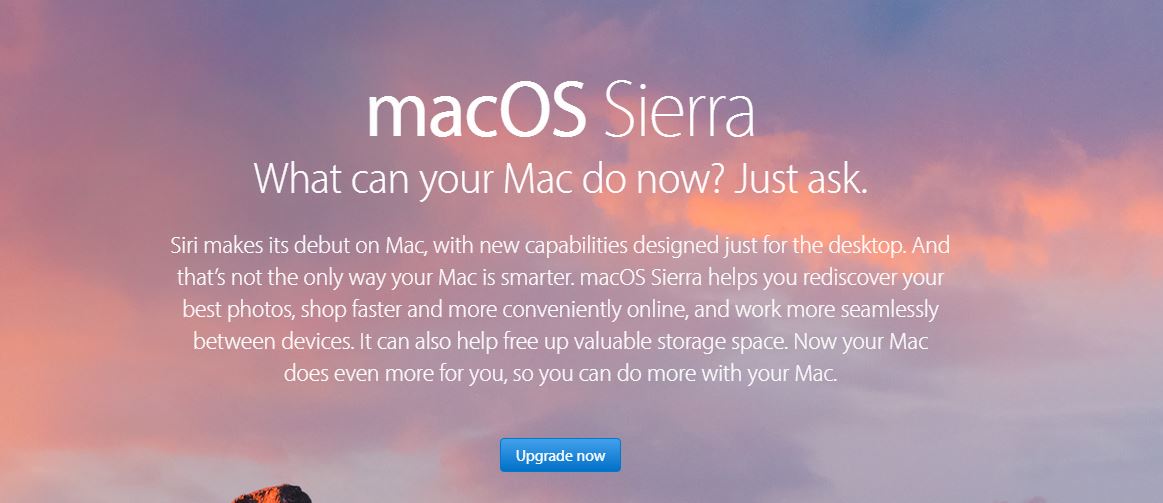
So to download macOS Sierra it’s straightforward all you need to do is open Safari and then go to the Apple website. Or you can use this link as a quick link. http://www.apple.com/macos/sierra/

Download macOS Sierra

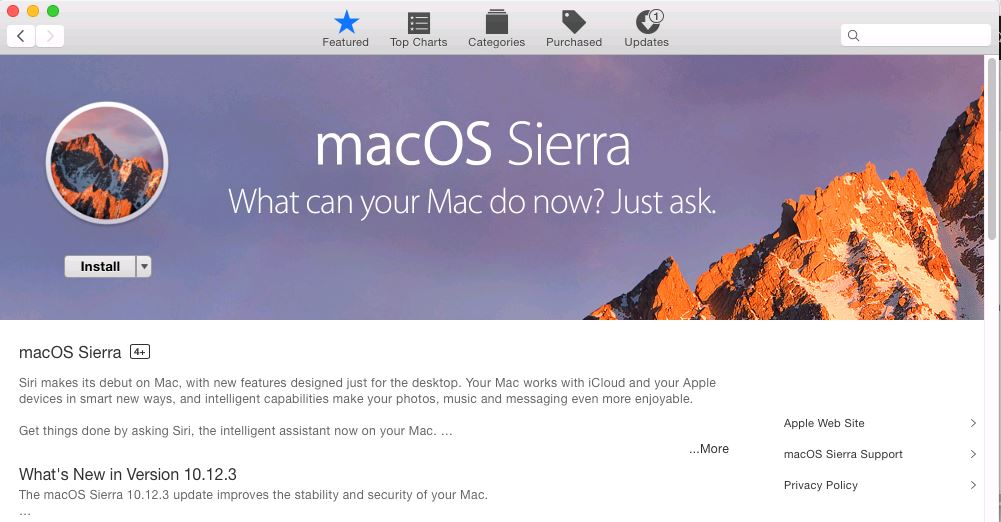
You should then have a download or upgrade button. Click that and download the macOS Sierra app.

Download or Install MacOS Sierra

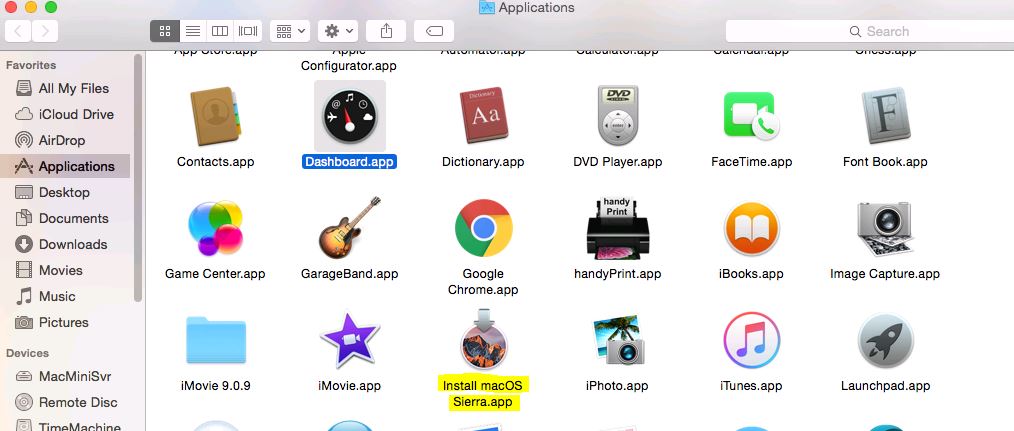
Once downloaded you should see the macOS Sierra app in the Applications menu. This is good news because you now have a copy of the software and its ready to be installed on to a USB.

macOS Sierra app

I will do a video of how to install macOS Sierra on USB too shortly, but basically if you wanted to install this on the USB lets say you had some problem with your Mac any wanted to do a fresh install, maybe it got a virus or something like that.
What you can do is follow my video will be on the 123myit.com website on how to extract this and put it onto a USB and then I’ll show you how to basically reload a Mac with a clean install with the new version of Mac OS X Sierra.

I hope this helps guys.
Cheers
Matt

How to change the lock screen timeout on a Mac

This video will show you how to change the lock screen timeout on a Mac.


So you have setup a password on your Mac, but the annoying thing is the screen times out too fast. You can change the amount of time the Mac takes for the lock screen timeout.

Why does the Screen Timeout on a Mac?

Sleep mode is designed to save battery life and will start after a very short time. When you wake your Mac up from a lock screen timeout you will be prompted for your password.
the good news is you can tell your Mac how long you want this time out to be.

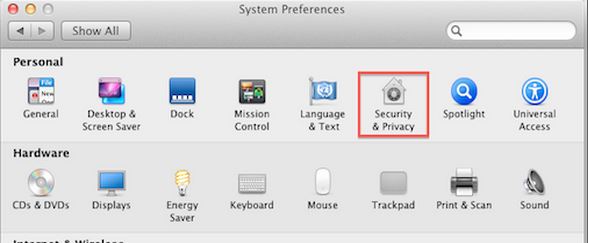
The picture below is of the Security and Privacy settings in your Mac settings.
Security and Privacy

Step 1 – Security and Privacy

If you want to change your time out you will need to go into System Preferences and then Security and Privacy. To change the settings in here you will need the Admin password and this will prompt when you click the Pad Lock icon. Next up enter you Admin password. So where it says Require password immediately, click the drop down menu. And then select a time that’s suitable. Remember you want to try and find a nice balance between annoying and helpful time outs. Also remember that having a time out set for too long will have an effect on your Battery life.

Step 2 – Turn lock screen off

To turn your lock screen off, simply reverse the steps taken above. You will be able to test the time out settings by going to Apple menu and sleep. I hope this helps.

Ok Guys, Don’t forget to check out my other videos.

Clean Install MacOS Catalina on any Mac

Create macOS Catalina USB Installer Drive

Share files iPhone to Mac with AirDrop