Hi All
So I thought I would post up and easy guide on how to resize a picture on a Mac.
I want to try and spread out the Tutorials evenly so I will try and do one per day on each topic.
When sending emails with images via email, most free email servers like Yahoo or Google have a limit on how many images you can send at once. Usually it’s around 10 meg in size. To get around this you can resize your image to make them smaller so that you will be able to attach more images to the email.
Making the pictures smaller will also allow you to upload and download them faster and when adding images to a website will allow them to load faster in the viewers web browser.
Resizing a picture on a Mac is quick and painless when you know how to do it and it the software is already built into your Mac OS X. So you have no reason not to be able to this yourself.
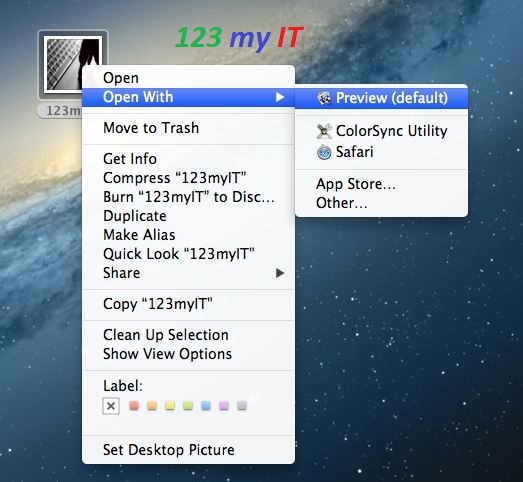
Step 1. Once you have the image you want to resize. Right click and select Open With. Then click Preview Default.
The image then should open up and you can then go to the next step.
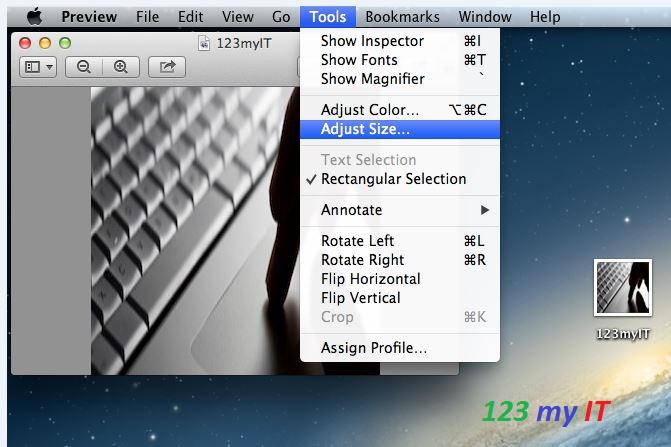
Step 2. Once you have the image previewed, the next step is to click on Tools in the Apple menu bar then click Adjust Size.
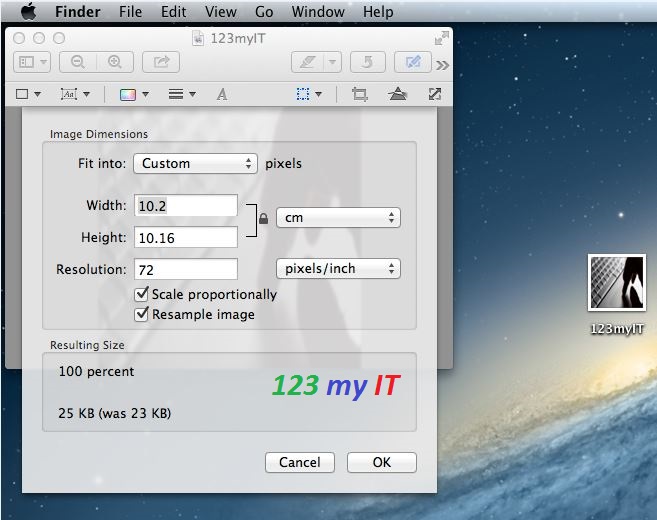
Step 3. You will then have a screen that you can change the details of the image. For example if you wanted to change the width and height of a picture your can select the number in the Width field and the results of the change you make will display below under Resulting Size.
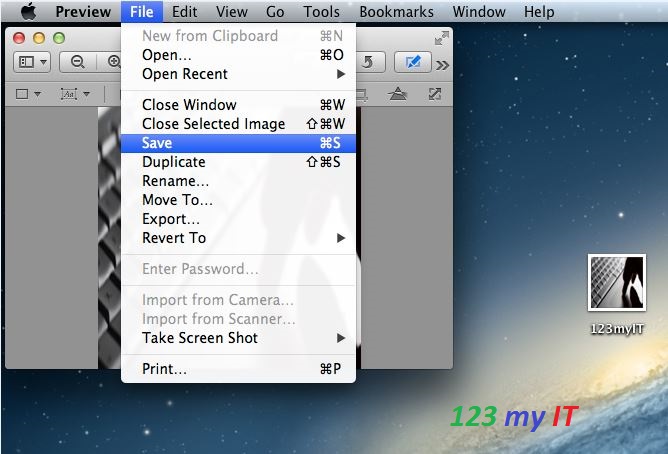
Step 4. Click ok to apply your changes to the image and then to save the changes go to File and then Save. Once you have made this change you’re done!
Step 5. Go to Preview and Quit Preview and you have now closed the Preview software.
Things to Note If you want to resize an image for webpages 100-200 KBs is usually the best size to use.
Warning if you select Save instead of save as it will save over the top of your current image.
Setup Yahoo mail on a Mac using Mac Mail
Clone OS X Lion and Mountain Lion to a USB drive

