Windows 10 Release

This video will talk about the Windows 8.1 and 10 links on the 123myIT website, why Microsoft has removed them and some info on Windows 10 release.

Hi All,
So its been a pretty exciting week on the Microsoft front, with the Windows 10 Release. On Wednesday 29th of July, Microsoft started preparing for the full version of Windows 10 to be released.
And I have had to scramble to remove the old Windows 8.1 and Windows 10 preview version links for the Downloads section of the 123myIT.com website. Which thanks to Microsoft no longer work.

To all those 123myIT subscribers out there that were lucky to get the preview copy. Maybe make a back up of it to USB so that you always have that copy in the future. Link below for video on how to do that.
How to create a bootable Windows 8.1 USB
Its the same process for Windows 10 Release as well.

For those that did miss out on the preview versions there is other options for you.
The first option and probably easiest way to get your hands on Windows is to buy and you can buy it through the links in the 123myIT.com Store. Once you have your product key, you can use the Media Creation Tools to download Windows as an ISO file or directly to a USB key.
Download the Media Creation Tools from the Downloads part of the 123myIT.com website.
Create installation media for Windows 8.1 link here. Create Media
Windows 10 Media Creator Tool 32 bit link here. Create Media Tool 32 Bit
Windows 10 Media Creator Tool 64 bit link here. Create Media Tool 64 Bit

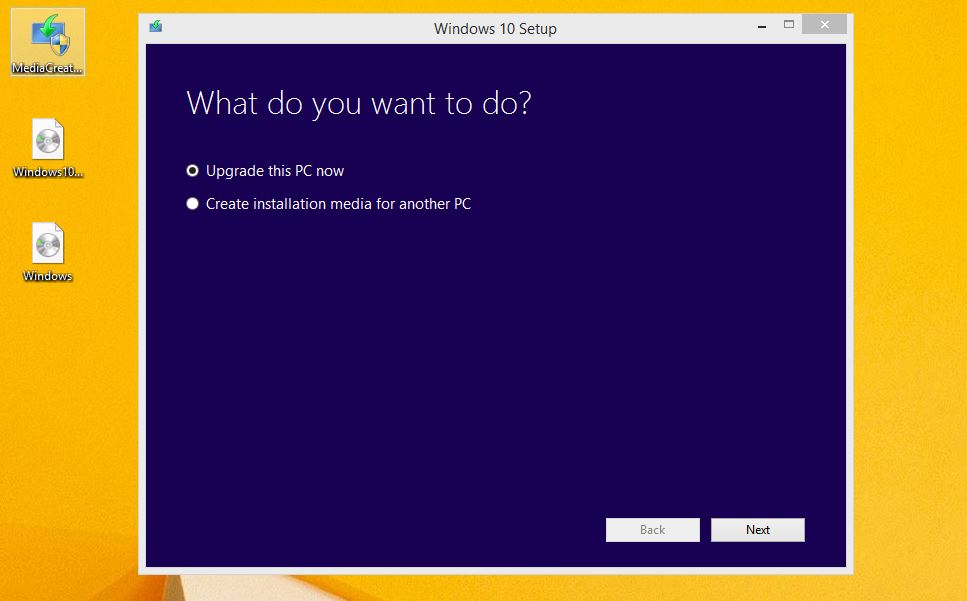
The picture below shows you what you can expect from the Media Creation Tools.
Media Creation Tools

The second option is to upgrade the versions that you already have, so if you have a Windows 7, Windows 8 or Windows 8.1 computer you can simply upgrade that computer. And I go into more detail about that in this video.
Windows 10 FREE Upgrade

So if you have an older computer boot it up and make sure you are getting your Free Windows upgrade. Windows 10 Release seems to have gone pretty smoothly so far some people seem to be having issues getting drivers to work. But that will come along once manufactures have time to create suitable drivers.

Cheers
Matt

Burn ISO files to DVD Windows Bootable

This video will show you how to Burn ISO files to DVD and make Windows Bootable DVDs.

Hi All
This is the second video of its type. I put a video the first video up to help people creating and burning ISO files on a Windows PC. However the programs that I was recommending to 123myIT readers recently had some malware installed in it.
So this is a follow up video to show 123myIT users how to Burn ISO files in Windows without having to install the IMG Burn program and get stuck with the malware.

I have to say I think its a real shame that the programmers owners of IMG Burn have decided to go down this path because the program was an excellent easy to use tool that allows you to burn and create ISO files with ease.

Anyway to burn an ISO file you don’t need any extra software, this can be done directly with Windows software.
Simply download your ISO file. You can get the preview versions of Windows from the 123myIT.com webite under Downloads here.

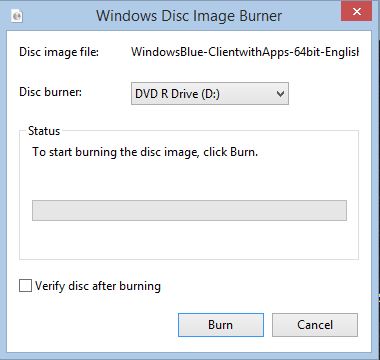
Once you have downloaded your ISO file, copy it to your Desktop or navigate to the location where you saved the ISO file. Simply right click the ISO file and click on Burn disk image. You should then get the following Window.

Burn iso files

Once you see this Windows select Your Disc burner that you want to burn the DVD with. Put a tick in Verify disk after burning and you should be good to go.
Depending on the side of the file and the speed of your hardware it should take around 5 to 10 mins to burn a full sized DVD.

If you are looking for more information on the steps above or you for other resources you can check out the official Microsoft web page for burning ISO files to DVD here.

How to create an ISO file on a Mac

This video will show you how to create an ISO file on a Mac.

An ISO file is the Windows equivalent to the cdr file created by MAC systems.

Creating an ISO file on a MAC is a two step process. The following steps, outlined in the video, will guide you through the both steps of the process.

Creating the cdr file

Step 1: Insert the DVD

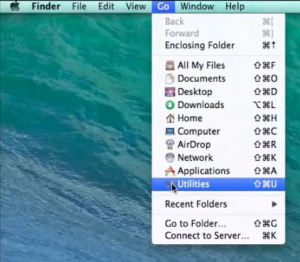
Step 2: Select Go / Utilities at the top of the window

create an ISO file on a MAC

Step 3: Open ‘Disk Utility’

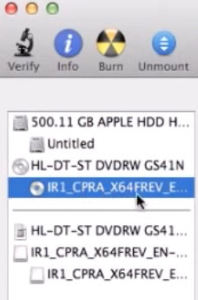
Step 4: Click on Windows 8 DVD drive on the left of the window

create an ISO file on a MAC

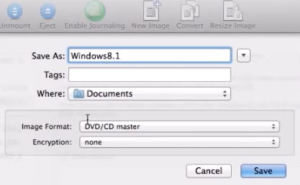
Step 5: Click on ‘New Image’ at the top of the window

Step 6: Change the following;

  • ‘Image Format’ to DVD/CD Master
  • ‘Save As’ to desired output filename
  • ‘Where’ to desired destination for output file

create an ISO file on a MAC

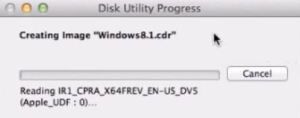
Step 7: Click the ‘Save’ button on the bottom right of the window

create an ISO file on a MAC

The following steps will guide you through converting the completed cdr file to an ISO file.

Creating the ISO file on a MAC system

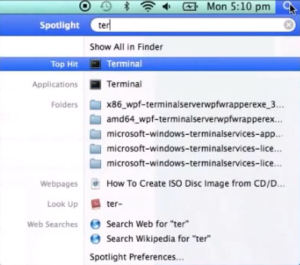
Step 1: Go to ‘Finder’ and type in terminal at the top of the window

create an ISO file on a MAC

Note: the following will require administration rights to complete.

Step 2: Type cd desktop and hit Return

Step 3: Type or copy/paste the following command *

hdiutil makehybrid -iso -joliet -o [filename].iso [filename].cdr

*Note: you will need to change both occurrences of [filename]. The first is the output filename, the second is the filename of the cdr file you just created.

create an ISO file on a MAC

Once the process in the terminal window is complete, simply click on the ISO file in your chosen location to view the contents.


How to Burn an ISO to DVD Windows Bootable

WARNING: Malware has been added to the IMG Burn software. This is out of the control of 123myIT.com. So please don’t use this software any more. If you still need to burn an ISO file please see the new video here.
Burn ISO files to DVD Windows Bootable
Thanks
Matt

This video will show you How to Burn an ISO to DVD Windows Bootable.
If you want to see how to burn an ISO file on a Mac click here.