Setup XBOX controller on Apple TV, iPad or iPhone + Games

Setting up the XBOX Controller on Apple TV

Hi Guys and welcome to 123myIT, in this video we will show you how to Setup XBOX wireless controller on Apple TV, iPad or iPhone.

One of the new features with iOS 13 is that you can pair XBOX controllers with Apple TV, iPad and iPhone. This means you can use the XBOX controller to play games on Apple Arcade as well as iOS supported games.

All right let’s get started its pretty simple on your Apple TV go to Settings > Remotes and Devices.
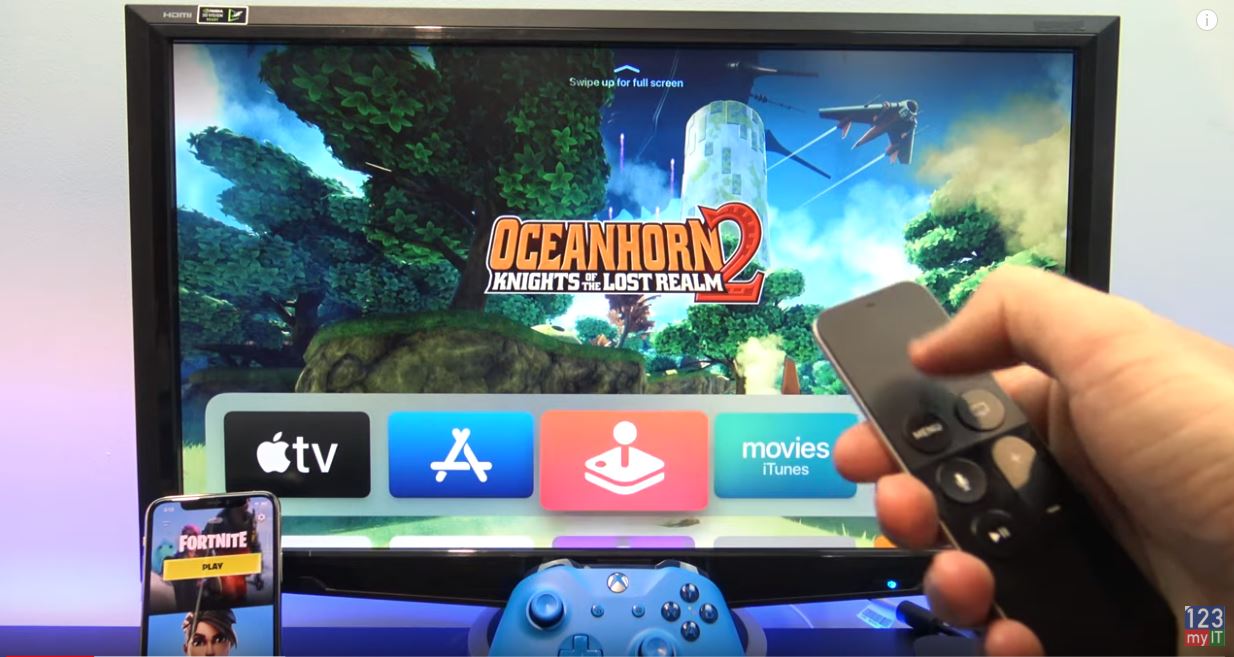
setup xbox controller
Getting started, use the Apple TV remote to setup the Xbox controller.

Scroll down to Bluetooth. And under BlueTooth you will see other devices.

Next up grab your XBOX controller and put it in pairing mode. To do this Press the XBOX button to turn it on. Then press the connect button for 3 seconds or until the XBOX button starts to flash. The XBOX controller should show up under other devices select it with your AppleTV remote. Once you see the Controller Connected popup you should be good to go.

Connect the XBOX to your

Let’s connect the XBOX controller to your iPad or iPhone. Go into Settings > BlueTooth. And just toggle on the BlueTooth switch. Again put your controller in Pairing mode. And tap your controller to connect it.

Awesome lets go test out some games. On Apple TV just go into Apple Arcade and sign in with your Apple ID. Its free for the first month. The game I have played most is one called OceanHorn2. The games on Apple Arcade are pretty basic at the moment so don’t expect to the blown away. But they are ok for a bit of fun. OceanHorn2 is a Adventure Role Play game.

Lets check out some games on the iPad or iPhone. Not all iOS games will work with the XBOX controller. But when you load a game that does it should tell you at the bottom of the screen.

The game I am playing now is called real racing 3. In real racing 3 you can change your views in the car and also look behind you. This iPhone 11 pro does a good job with the sound and games can be quite fun on a bigger iPad screen. If racing is not your thing there is loads of other games like fortnight and actually having a controller will give you some advantage over other mobile players as the controller is much easier to use. Sonic Racing game on Apple TV is also a bit of fun.

Also guys don’t forget to check out my other videos such as How to setup DUALSHOCK controller on Apple TV, iPad and iPhone. And do me a favour hit the subscribe button and smash the bell icon.

Turn on Voice control on iPhone or iPad

10 iPhone settings that you should turn off straight away

Setup DUALSHOCK 4 controller on Apple TV, iPad or iPhone

Making the DUALSHOCK 4 work with Apple TV

Hi Guys and welcome to 123myIT, in this video we will show you how to Setup Dualshock 4 controller on Apple TV, iPad or iPhone.One of the new features with iOS 13 is that you can pair Dualshock 4 controllers with Apple TV, iPad and iPhone. This means you can use the Dualshock 4 controller to play game on Apple Arcade and iOS supported games.

All right let’s get started its pretty simple on your Apple TV go to Settings > Remotes and Devices.

setup dualshock 4 controller
Use the Apple TV remote to setup DualShock 4 controller.

Scroll down to Bluetooth. And under BlueTooth you will see other devices.

Next up grab your DualShock controller and put it in pairing mode. To do this hold down the PS and sharing buttons for 3 seconds or until the light starts flashing on the top. The DualShock controller should show up under other devices select it with your AppleTV remote. Once you see your Controller Connected popup you should be good to go.

Lets connect the DualShock to your iPad or iPhone. Go into Settings > BlueTooth. And just toggle on the BlueTooth switch. Again put your controller in Pairing mode. And tap your controller to connect it.

Apple TV Games

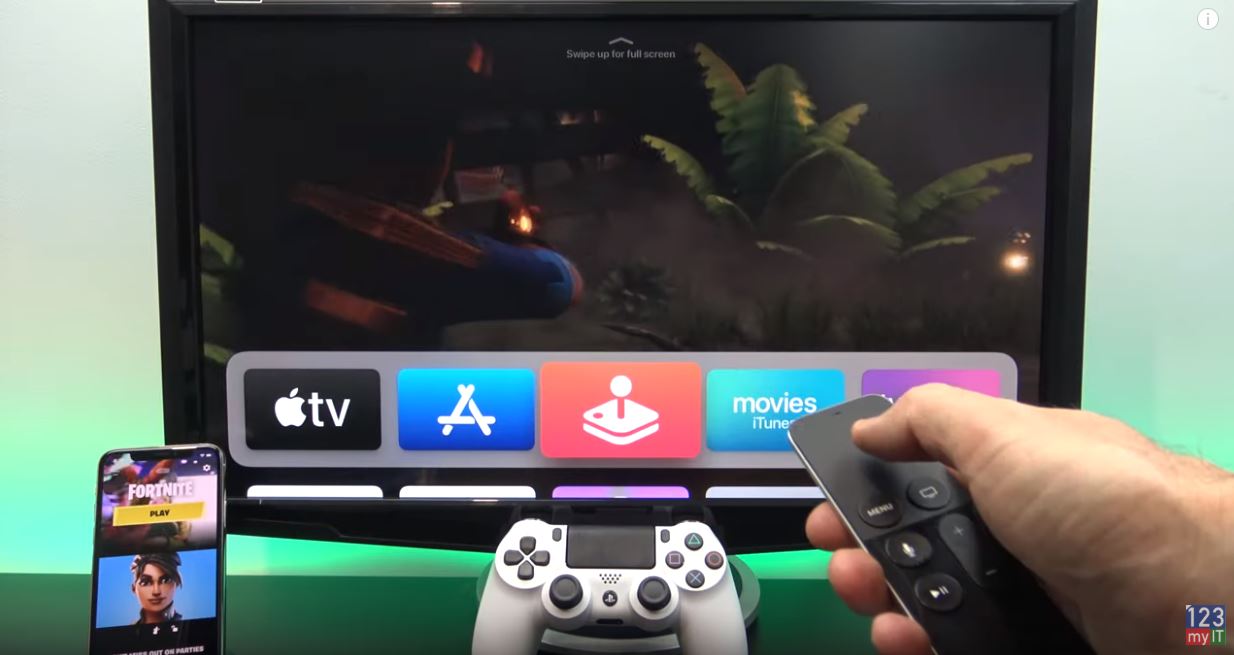
Awesome lets go test out some games. On Apple TV just go into Apple Arcade and sign in with your Apple ID. Its free for the first month. The game I have played most is one called OceanHorn2. The games on Apple Arcade are pretty basic at the moment so don’t expect to the blown away. But they are ok for a bit of fun. OceanHorn2 is a Adventure Role Play game.

Lets check out some games on the iPad or iPhone. Not all iOS games will work with the DualShock controller. But when you load a game that does it should tell you at the bottom of the screen.

The game I am playing now is called real racing 3. In real racing 3 you can change your views in the car and also look behind you. This iPhone 11 pro does a good job with the sound and games can be quite fun on a bigger iPad screen. If racing is not your thing there is loads of other games like fortnight and actually having a controller will give you some advantage over other mobile players as the controller is much easier to use. Sonic Racing game on Apple TV is also a bit of fun.

Also guys don’t forget to check out my other videos such as Turn on Voice control on iPhone or iPad. And do me a favour hit the subscribe button and smash the bell icon.
10 iPhone settings that you should turn off straight away

Forgotten Passcode on iPad, iPhone, or iPod Touch 2019

Turn on Voice Control on iPhone, iPad and iPod Touch

Voice Control the most over looked feature of the iPhone.

Hi Guys and welcome to 123, in this video I will show you how to Turn on Voice Control on iPhone, iPad and iPod Touch. Voice Control allows you to control your iOS devices using just your voice. This is helpful if you have your hand full or have limited mobility.

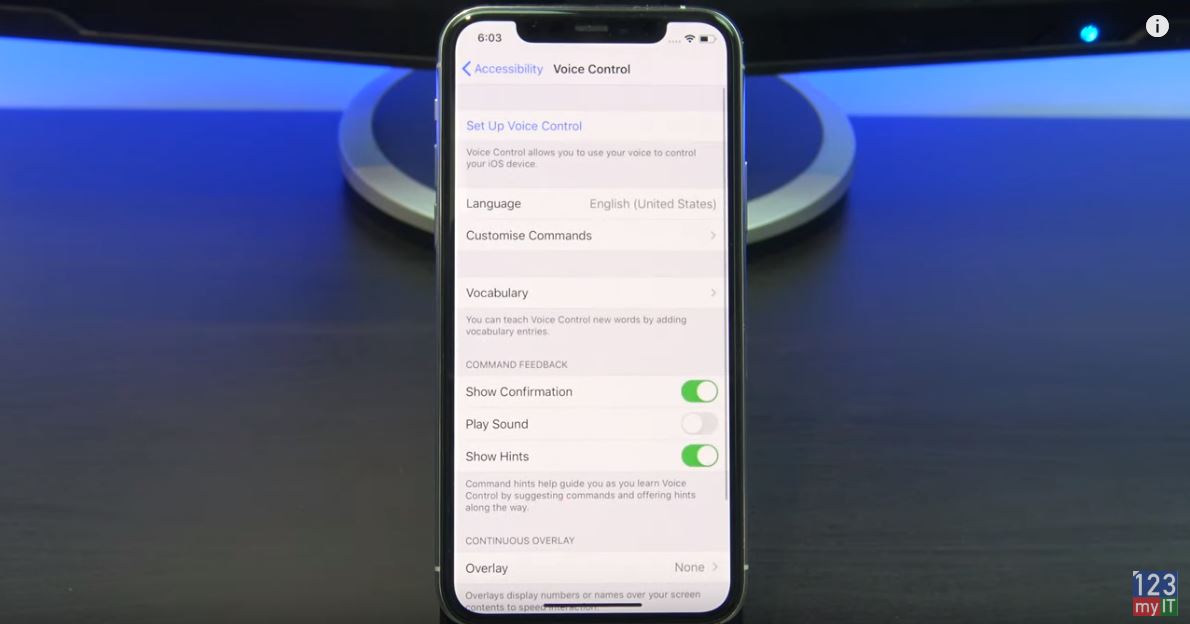
To turn on voice control go into Settings > Accessibility and Voice control.

Voice Control iPhone
Set Up Voice Control

Next, Tap on Set Up Voice Control. Voice control might need a small download when setting up, but after that, It doesn’t need an internet connection. Tap continue. In addition, it gives you a short list of commands. So we will go through these in a second. First, I want to show you how you can turn Voice Commands off and on using Siri.

Try some Commands

Ok let try some commands. When Voice Control is turned on you will see a blue microphone in the top left of the screen.

If you want to go to the home screen, say Go Home. Swipe Left to swipe left. If you get stuck for commands simply say. If you want to check out control centre, say Open Control Centre.

Awesome if you want to see other commands you can use just say, Show Commands.  Ok lets take some pictures.  Open camera. If you want to know, the names of the settings to use say Show names. In addition, to take a picture just say, Tap Take Picture.

Moreover, if you want to Zoom in just say Show Names to find the Name. Then Tap Zoom. If you want to lock your screen just say Lock Screen.

Some other commands are, Take screen shot.  Turn on Smart invert colours.

Also guys don’t forget to check out my other video such as 10 iPhone settings you need to turn off straight away. And do me a favour hit the subscribe button and smash the bell icon.
Forgotten Passcode on iPad, iPhone, or iPod Touch 2019

Gaming PC Setup – Turn Off Turbo Boost to Fix Lag

Transfer Data Old iPhone to New iPhone

10 iPhone settings that you should turn off straight away

10 iPhone settings that you don’t need. Time to turn them off.

Hi guys and welcome to 123, this video I will show you ten iPhone settings that you should turn off straight away. Ok guys these settings I am about to show you will do two things save battery life and save you mobile data. So let us get started.

iPhone Analytics

  1. The first one you should turn off is iPhone analytics. IPhone Analytics sends data to Apple and could be a privacy issue as well. They use these analytics to see how you use your phone so they can improve their services. It also drains your battery life. So to turn it off go into Settings > Privacy > Analytics. Just toggle the button at the top. If you have an Apple watch, it will also turn off the analytics for your Apple watch. Again, this will give you more battery life on your Apple watch as well.

iCloud Analytics

  1. In addition, while you are in there turn off iCloud analytics, which is the same thing as iPhone Analytics accept for iCloud.
  2. Turn off Improve Siri & Dictation. This setting allows Apple to store and review the Audio from your Siri interactions. For me no thanks I want to keep that private.

Significant Locations

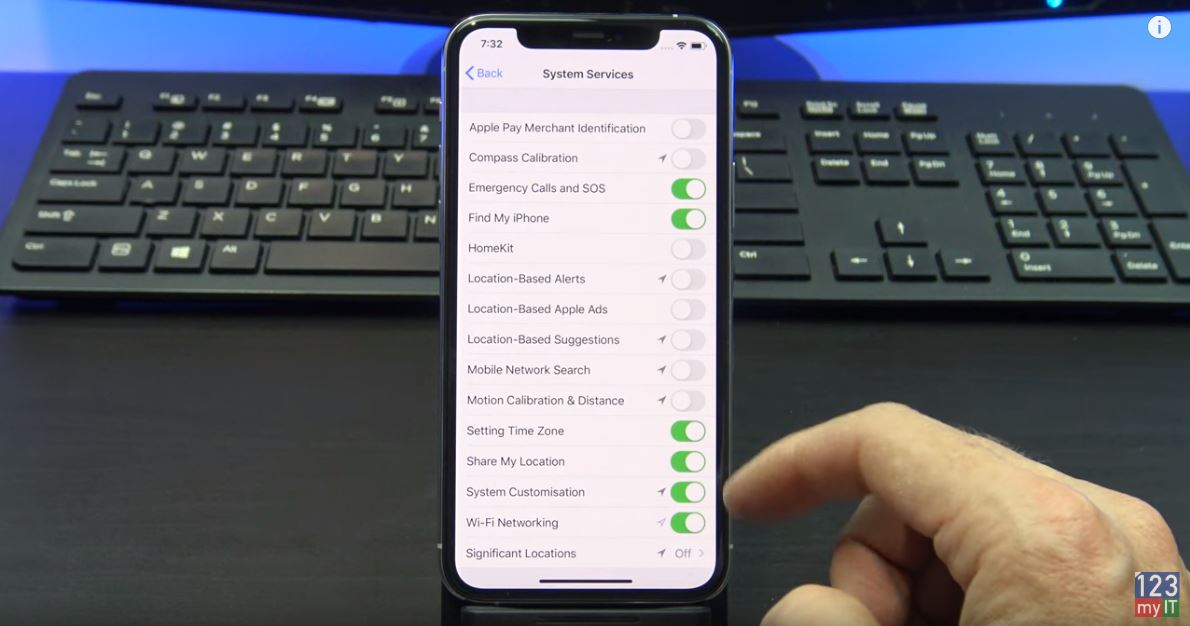
  • Next up turn off Significant Locations. Significant location tracks everywhere you go this also means it uses your GPS everywhere you go. This allows Apple to deliver targeted advertising to your phone.  To turn this off go to Settings > Privacy> Location services > you can toggle it off at the top. Otherwise if you want to see where you have been go to System Services > Significant Locations. You can turn it off in here plus see where you have been and clear history.
iPhone settings
System Services – Turn off services that you are not using.

System Services

  • Turn off everything in System services that are unnecessary. Turn off everything apart from Emergency calls and SOS, find my iPhone and share my location if you use that feature. If suddenly, something does not work come back in here and double check. Otherwise, turn them off. It will save you battery life and data.
  • While you are in there turn off everything in Product improvement. This allows Apple to use your location to improve maps. Just turn it off.

Limit Ad Tracking

  • Next, up you want turn on Limit Ad Tracking. This is one where the naming might be confusing. If you do not have this on then you are being tracked when you go to websites so that advertisers can advertise to you.  Turn this on under Privacy and Advertising. If you want to see information that is being used by Apple, tap the View Ad Information menu. Hit the Reset Advertising Identifier button and then toggle Limit Ad Tracking on.

Email accounts

  • Set your email accounts to fetch instead of Push. What this does is it only goes and gets your email when you open your email to look. Rather than wasting battery, life constantly checking for new email. You can also select how often you want to fetch your mail. Every 15 minutes might be suitable. Just remember the longer you leave this the better your battery life will be.
  • Turn off background app refresh. You can find this under iPhone Settings, General. This allows apps to download data in the background even where you are not using them. Turn these off for anything you are not using.
  • Raise to wake. Turn off save battery life. What this does is when your iPhone screen is blank it turns on when you raise it.

Also guys don’t forget to check out my other video such as Forgotten Passcode on iPad, iPhone and iPod. And do me a favour hit the subscribe button and smash the bell icon.
Gaming PC Setup – Turn Off Turbo Boost to Fix Lag

Transfer Data Old iPhone to New iPhone

Apple Watch Series 5 Unboxing First Look

Forgotten Passcode on iPad, iPhone, or iPod Touch 2019

Forgotten your passcode on your iOS device? This video will help.

Forgotten Passcode on iPad?

Hi guys and welcome to 123, in this video I will show you how to remove the passcode from iPad, iPhone and iPod touch. This is helpful if you have Forgotten Passcode on iPad, iPhone or iPod.

Ok guys so have completely forgotten your passcode and you need to remove it from your device. How painful it can be to have Forgotten Passcode on iPad, iPhone or iPod? Apple recommends two ways to remove your passcode. However, this will erase any data on your iPad, iPhone or iPod so I recommend trying to remember you passcode first. Because If you have backed up your device via iCloud or iTunes then you will be able to restore your data and settings after restoring your device.

Check iCloud first

Alright the first way to remove the passcode is if you have added your iPad, iPhone or iPod to iCloud backup and find my iPhone. Once you are on the iCloud.com page login with your Apple ID.

And then click on find iPhone. Click on All devices at the top and you should see your iPad, iPhone or iPod that you want to restore. If you don’t see your device there then you will have to fast forward the video to the second option of restoring your device.

Forgotten Passcode on iPad
Erase your device with iCloud if you have it added to iCloud.

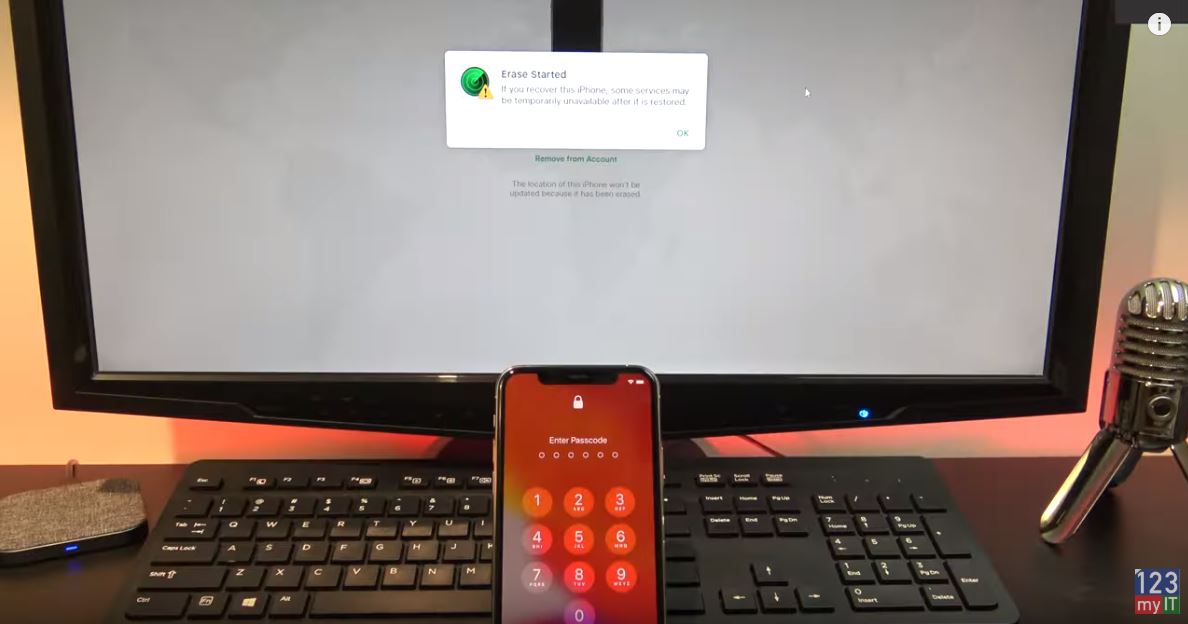
Here I have my iPhone 11 Pro and I will click Erase iPhone. This will restore your iPad, iPhone or IPod back to factory defaults. But remember that this will also erase any data on the device so be sure you want to do this. Next up enter your Apple ID and password and enter your secret questions. On the Erase iPhone menu click Next and then Done. And you will a message that states your erase has started.

Setup your device as new

Ok go a head now and start setting up your device again from scratch. Your passcode will be gone now. If your get activation lock you can enter your Apple ID or click the remove from account button in iCloud then go back on your device and the activation lock won’t come up once you have removed the account from iCloud. If you cant get past activation lock. You will need to take your device to Apple with proof of purchase. Follow the prompts to setup your iPad, iPhone or iPod. Your Passcode is now gone.

And there you have it you have removed you passcode.

If you haven’t Added your iPad, iPhone or iPod to iCloud then you will need to restore your device via iTunes. So you will need a computer with iTunes.

Recovery Mode

You will need to put your device into recovery mode and here’s how to do it for the different models. So for my iPhone 11 I just hold down the side button and plug it into my computer. Once done correctly you should see the restore screen.

But on your computer you iTunes should come up with a restore option. Click Restore and then Restore and update. Click next on software update.

In the top right hand corner of iTunes you should see the software start to download the new iOS for your iPad, iPhone or iPod. If you are using Mac OS Catalina the process is the same.  Click on Go and then computer.  Find your iPad, iPhone or iPod. Click ok and then hit restore. Again click restore and update. Click Next and Agree and your software will start to download.

Slow Internet?

If you are on a slow internet connection, your device might restart itself and you will have to put it back in Restore mode again. So once the download has finished it will extract and start to restore your iPad, iPhone or iPod.

You should now see a message that your device has been restored. However your device will restart itself and your passcode will be gone. Just go ahead and setup your device again. Congratulations you now have removed your passcode.

So guys don’t forget to check out my other videos such as Turn off Turbo Boost to Fix game lag. And do me a favour hit the subscribe button and smash the bell icon.
Transfer Data Old iPhone to New iPhone

Apple Watch Series 5 Unboxing First Look

Apple iPhone 11 Pro Silver Unboxing First Look

Transfer Data Old iPhone to New iPhone

Move your data from old iPhone to your new iPhone.

Hi Guys and welcome to 123myit. This video will show you how to transfer data from your old Phone to your new Phone.

Start the Transfer – Old iPhone to New iPhone

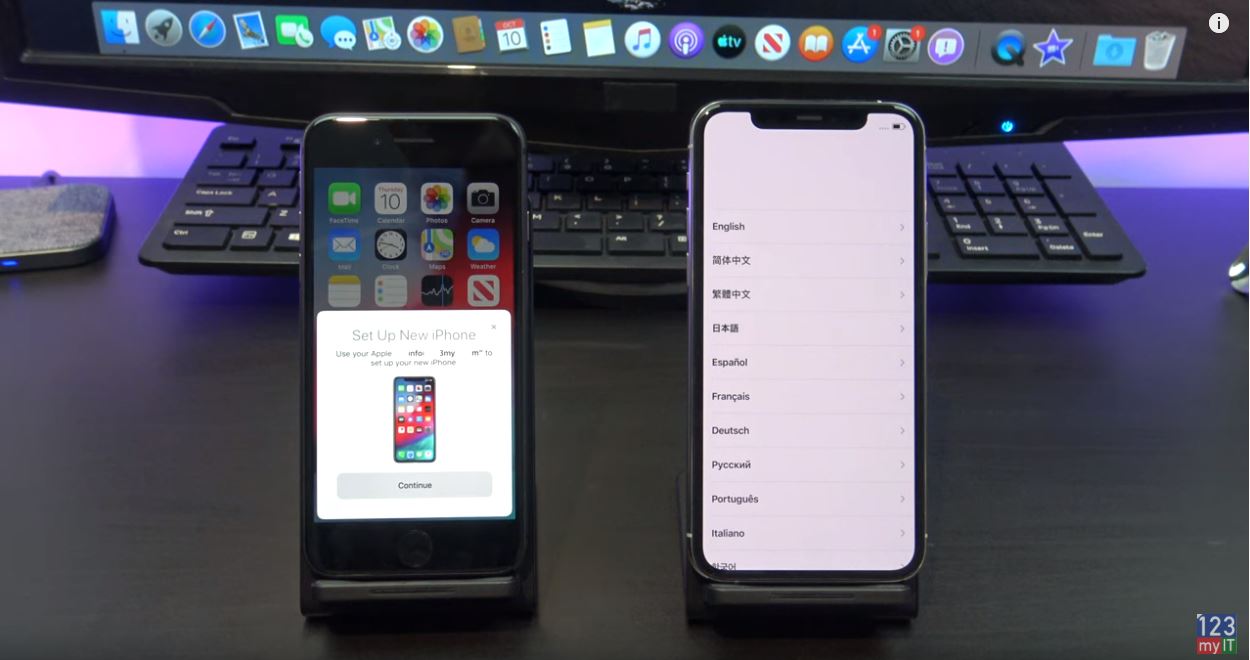
If you have a new Phone you can transfer data by turning it on and placing it beside your old Phone. You should see the Quick Start screen appear on your old Phone.
On your old Phone make sure you are logged in with your Apple ID and check that your iOS is 11 or later.
Next you should see an animation appear on your new Phone scan it with the rear camera on your old iPhone.
If you get prompted for a passcode enter your old iPhone passcode on your new Phone.
I didn’t have a passcode on my old Phone so its gone into the activate step.

Old iPhone to New iPhone
Quick Transfer window.

Also If you didn’t get the Quick Start screen try restarting your old Phone and make sure you have the WIFI turned on.

Follow the steps to setup Face ID or Touch ID on your new Phone. I am going to set mine up later.
Awesome you have made it this far! Hit continue to Start the transfer between your iPhones. This will take a while so now is a good time to plug your iPhones into power.

Logon to your Apple ID account

Next up enter you Apple ID password.
Agree to the terms and conditions. And then follow the next few setup prompts.
Awesome your iPhones are starting to transfer data. Depending on how much data you have this could take some time.

Your Phone will restart and you should see the Restore completed message. Hit continue. Again follow the prompts to setup your new Phone.

Ok you should be all done now. check your new Phone and make sure all your data is there. I am going to check that my pictures have copied across.

Also guys done forget to check out my other videos like Apple Watch series 5 Unboxing and do me a favor hit the subscribe button and smash the bell icon.
Apple Watch Series 5 Unboxing First Look

Apple iPhone 11 Pro Silver Unboxing First Look

Transfer data Android to iPhone 2019

Transfer data Android to iPhone 2019

Hi Guys and welcome to 123, in this video we will show you how to Transfer data from Android to iPhone in 2019.

Android to iPhone 2019 – What can you transfer?

This video will help you transfer Contacts, Message history, Camera photos and videos, Web Bookmarks, Mail Accounts, Calendars and Free apps.
The first step is to reset your iPhone, if you don’t want to reset your iPhone then you will have to Transfer the data manually. I plan to do some videos on this method so hit subscribe.

Ok you can go into Settings > General and scroll down to reset. Once you are there tap on Erase content and settings. Next tap Erase iPhone.
Once your iPhone has reset itself just follow the prompts and start setting it up.

Connect to your WIFI

Next up connect to your WIFI. Make sure that your Android device is connected to the same WIFI.
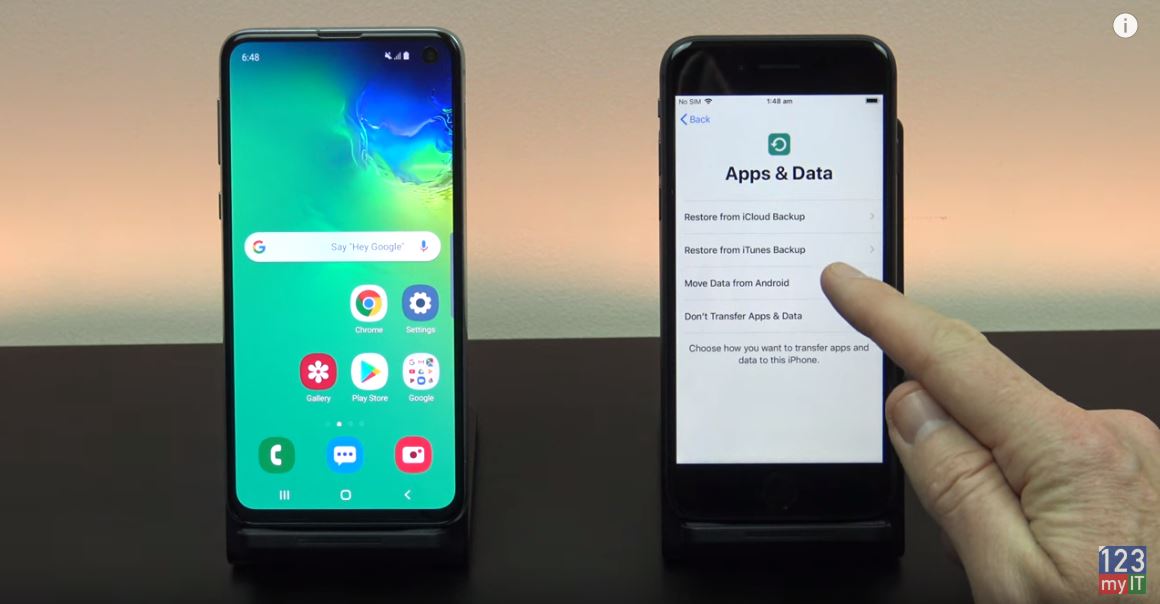
Continue setting up your iPhone until you get to the apps and DATA screen.

android to iPhone 2019
Apps & data screen.


Tap move data from Android.
Before you hit continue, Go to your Android phone and download the Move to iOS app from the Google Play store.

Tap continue on your iPhone and Continue on your Android device. Agree and hit next. On your Android device type in the code that you see on your iPhone.
Your devices should now connect and move to a Transfer data screen. If you get the error message Could not communicate with the device. I have already done a video on how to fix this and I will put a link in the top of the video now.

Select the data you want to Transfer

Alright good job you are on the Transfer data screen just deselect anything you don’t want to transfer and press next.
Cool all your data is transferred now, tap continue setting up iPhone.
Go ahead and setup your iPhone.

Awesome the last step here is to install your free apps. To do this you will need your Apple id. Just tap use exsiting Apple ID and your iPhone will download all the free apps for you.

If you swipe across you should see all your apps start to appear.
Also guys don’t forget to check out my other videos like Fix could not communicate with the device error and do me a favour hit subscribe and smash the bell icon.

Transfer data Oppo to iPhone 2019

Gaming PC Settings – Nvidia Control Panel

iPhone Battery Drain – Is your iPhone letting you down?

iPhone Battery Drain – Is your iPhone letting you down?

If you having issues with yor iPhone it could caused by problems with your Battery.
iPhone battery drain Issues you might experience are:

  • Apps are slow to launch
  • Slow frame rates while scrolling
  • Backlight dimming
  • Lower speaker volume
  • Gradual frame rate reductions in some apps
  • Camera flash disabled
  • Apps refreshing in background may require reloading upon launch

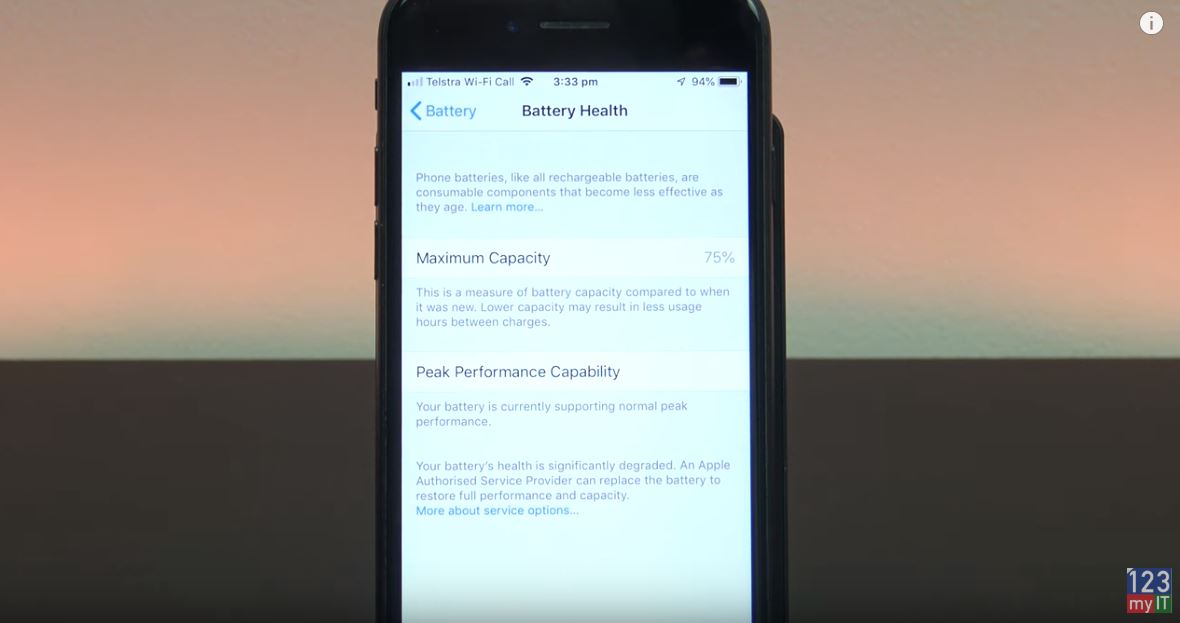
If you are having these issues mentioned the next step is to check your battery health and you can do that by going into Settings, Battery, Battery Health.

iPhone battery drain
iPhone Battery Drain – Battery Health

The first thing you need to look at is the Maximum Capacity %. As you can see here on my older iPhone 7 the Maximum Capacity 75%. Well what does that mean?If you compare that with my iPhone 8 which has Maximum Capacity of 100%. It means that every time I charge my iPhone 7 I am only getting a 75% charge of the battery.

iPhone Battery Drain – Check your Maximum Capacity.

So guys go ahead and check what the Maximum Capacity % is on your iPhone right now what number is it set too? I would be interested in knowing. So if my brand new iPhone use to give me 10 hours of battery life on a full charge and I am missing 25% I only get 7.5 hours now instead of 10 hours I use to get.

What do the other messages mean?

Under Peak Performance you will get a series of other messages and they mean different things. The first one is Performance is normal which means just that its normal. Nothing to worry about. The second one is Performance management applied. This means your iPhone shutdown because it couldn’t handle the power needed to perform a function. This management should stop the iPhone from crashing in the future.

The Battery Health unknown message – means that the iPhone can’t talk to the battery for some reason. Could be due to a hardware fault. If you get this take your iPhone into Apple.

Performance management turned off – if you get this message you have turned the Performance management off and your iPhone has crashed. The iPhone will turn this feature back on to stop future shutdowns.

Battery health degraded – This is the error I was getting on my iPhone 7. This means the battery is not as good as it was and it will need replacing to improve the performance and battery life.

Important Battery Message –
This error only Applies to the iPhone X series. It means that the iPhone can’t verify if the battery is genuine. This might be helpful to check if you are buying the iPhone second hand. Otherwise you can take the iPhone to a Apple Authorized service provider.

Also guys don’t forget to check out my other videos like Low Power Mode on iPhone. Do me a favor and hit the subscribe button and smash the bell icon.
Setup Bedtime on iPhone

Apple Shutting Down iTunes