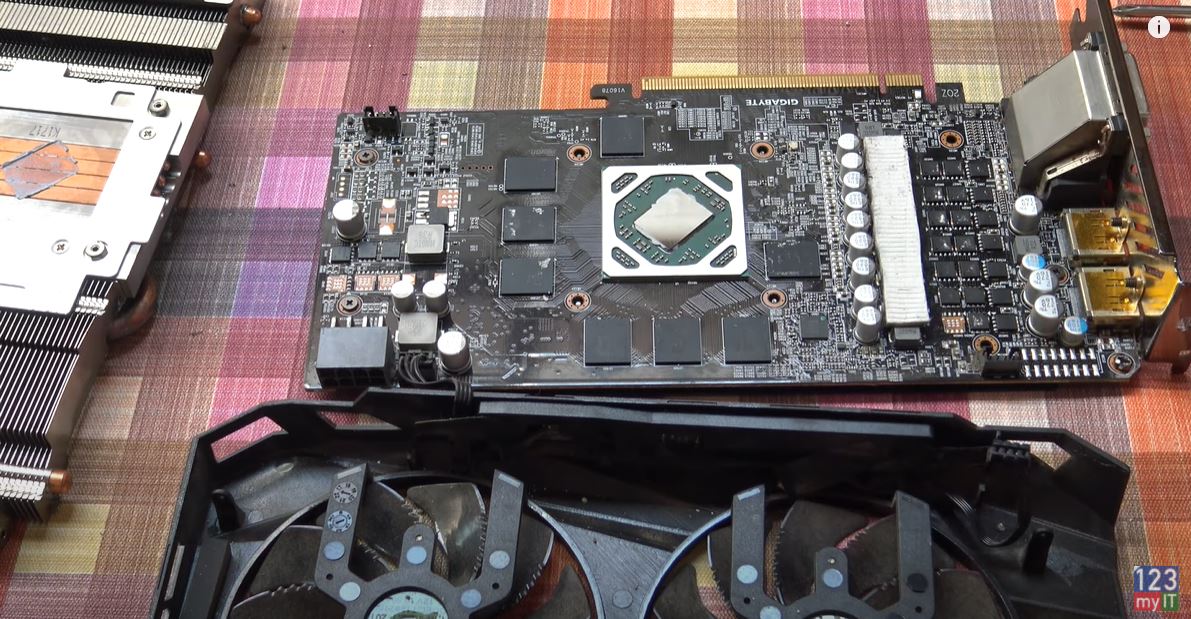
Hi Guys and welcome to 123myit. In this video, we will show you how to clean GPU in 2021. Ok Guys If you are like me and you have a Crypto GPU or a Gaming GPU and you have been using it a while and it needs a clean then follow me and I will show you how to fix it up.
In this video, we will clean the GPU as well as replace the heatsink thermal paste and the thermal pads.
Dirty GPU to Clean GPU
The model I have here is the Radeon RX 570 and I was using it on a mining rig and as you can see its really dirty and clogged up with dust and to the point where its just over heating all the time. And even some of the heat sink is starting to corrode.
Take the GPU apart
Let us get started. The first thing you will need to do is take apart the card. You can do that by finding the screws that attached the fans to your heatsink. Once you have found them, just go ahead to and remove them. If you have, a different model and you are unsure. My best advice is to take it slow and gently. Moreover, do not get frustrated with it, as you will wreck your card.
When you have the screws loose gently, try to remove the Fans. With my card I have 3 fan cables which I need to remove. Be very gentle with these cables. Make sure you pull them out by the plug and not by the cables. If you pull it out by the cables, there is a chance the cable can break.
Go slowly
Just do your best to kind of slow massage them out. This top one was in awkward position so I just leave it and try doing the bottom one. Try not to force things.
Finally, I get the bottom cable off and wow check out all that dust and the corrosion. To clean the dust off the heat sink, some people use a can of compressed air and blow It everywhere. I just use a vacuum with brush attachment. In addition, do the same cleaning on the fans.
Remove Heatsink
Next step is to remove the heat sink screws. Generally, they will be the four screws on the back of the card. Gently try to remove the heatsink. If it does not move, do not force it. Go back and check there are no more screws to remove.
Cool, there it goes I had two more screws to remove. Therefore, we are going to replace the Thermal pads and Thermal paste. As you can see, the Thermal Pads are pretty much gone on the memory. Gently remove the Thermal Paste. I very slowly just peal it off where I can.
The harder dry pieces gently remove with a screwdriver. Make sure you do not scratch the memory.
How to Clean GPU
You can use a damp cloth or an alcohol wipe to remove any leftover thermal pads and thermal paste.

Ok time to apply the new Thermal Pads and Paste. There is different thicknesses of thermal pads that go on the memory. On this RX570, .05 thickness goes on the memory and 1.0 goes on the VRMs. However, the VRM Thermal pads seemed ok on this card so I am not going to replace those. I will show you what they are in a second. Also, If you want an Amazon link the Thermal paste and Pads I will leave a link in the description. Cut the thermal pads to size and remove the two bit of plastic either side. Then place it carefully on the memory. If you need to know what thickness, Thermal pads go on your GPU then Google your GPU along with Thermal pad size.
Adding Thermal Paste
Do the same clean for the heatsink and then apply the Thermal Paste. I just put a little bit of Thermal Paste on the GPU. It will spread out when the heatsink and GPU are pushed together.
Both sides of the heatsink have guiding screws, which allows me to place the heatsink on in the right spot.
You can see there is more Thermal pads on the heatsink. It is in good condition so I did not change it.
Once the heatsink is back on flip the card over and replace the screws. Next up replace the fan power cables and screw the fans back on to the GPU.
Awesome you have now cleaned the GPU and replaced the Thermal Pads and Paste. Time to put it back to good use.
In addition, people do not forget to check out my other videos such Transfer Data Android to Android. And do me a favour if you know anyone who might need this video please share it will them, hit the subscribe button and smash the bell icon.
