Gaming PC Setup – Turn Off Turbo Boost to Fix Lag

Turning off Turbo Boost can fix lag in Games.

Hi Guys and welcome to 123, in this video I will show you how to turn off Turbo Boost in the bios.Ok guys about 2 years ago I made a video on how I fixed CPU Game Lag by turning off Turbo boost on a laptop with software. And you can find that video here.

A few of you guys are still having issues, mostly on laptops where your CPU heats up and it start to throttle down to stop itself from over heating.

What you can do is turn off Turbo Boost and this will reduce heat of your CPU, stop the CPU from throtling back and then this should stop your Game from lagging.
On my ASUS laptop the software helped me and allot, but some users couldnt use the software because their CPU wasnt supported. This video should help resolve that issue. Lets get started.

CPU Check – turn off turbo boost

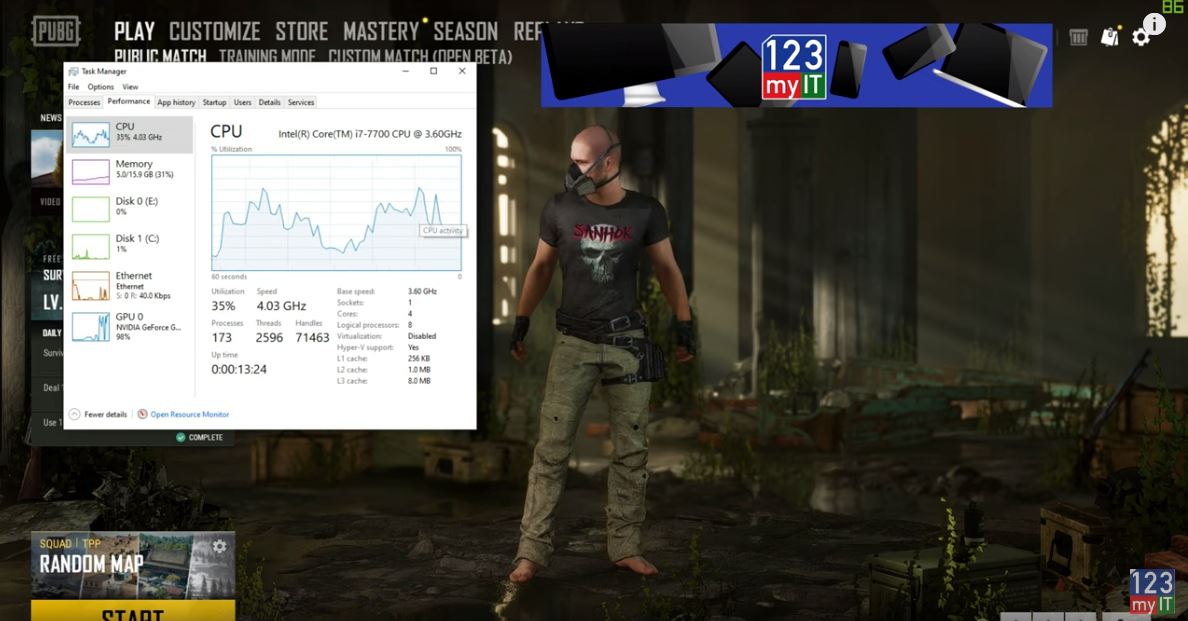
Ok so the first thing to do is check your CPU. We can do this by right clicking the Taskbar and going to Task manager. Once in there if you click on More Details and click the performance tab.
Click and highlight CPU and take note of your CPU speed and base speed. As you can see my base speed is 3.6GHz and my actual speed is 4.00GHz. This means I am getting Turbo Boosted from 3.6GHz to 4GHz. So turning this off should drop my speed back to 3.6GHz.
Check CPU - turn off turbo boost
Check your CPU performance first so you can check the bios change.

I know what you are thinking, hey but wont that reduce the computer speed. Kind of yes, but it will reduce heat and may fix your lag. Plus you can turn this back on at anytime. Before I show you how to turn it off, let start up your game that you are having problems with and check what your CPU is doing. In my case its PUBG.

Alright start your game up and press Alt Tab to show your Task Manager and you should see some more activity on your CPU now. For me you can see that it doesnt really go past halfway and actually most of the work is being done by the NVidia GPU which is sitting on 98%. This is a good sign that Turning off Turbo Boost shouldnt effect the game play.

Enter Bios

Ok Restart your PC and tap your bios key to get into bios. For my ASUS mother board the bios button is Delete. However on different brands it could be Escape, F1 or F2 or something different. On some motherboards its F10 if you cant work it out check the manufactures website.

Once you are in your bios it should look something like this. You will need to find your CPU menu. For me its in advanced mode.
Click the Advanced tab and then click the CPU Configuration menu.

Scroll down to and find CPU power management control. You can see that Turbo Mode is Enabled. Just set this to disabled and press F10 to save changes. These steps should be simular for other brands of motherboards.

Test your settings change

Awesome you have made it this far restart windows and go back into Task Manager. Excellent you can see that the CPU speed has dropped down from 4GHz to 3.4GHz. This means that the bios change worked. Start your game back up and test and see if you are still getting the throttling game lag. If this doesnt help you can just go back into the bios and turn Speed boost back on.

Also guys don’t forget to check out my other Gaming PC Setup videos like Nvidia Control Panel. And do me a favor hit the Subscribe button and smash the bell icon.

Transfer Data Old iPhone to New iPhone

Apple Watch Series 5 Unboxing First Look

Apple iPhone 11 Pro Silver Unboxing First Look

Fix Could not communicate with the device Move to iOS

If you are getting the error Could not communicate with the device when using the Move to iOS app. This video can help. If you have a new iPhone like the iPhone 11 and you are transfering your data via the move to iOS app. You might get the Could not communicate the with device. here’s how you can fix it.

Could not communicate – Move to IOS

If you not familiar with the move to iOS app don’t worry I will have two new videos coming out shortly so keep checking this website, or subscribe on our YouTube page for updates. So here I will show you that I am trying to transfer data from Android to iPhone and I am getting the Could not communicate with the device error.

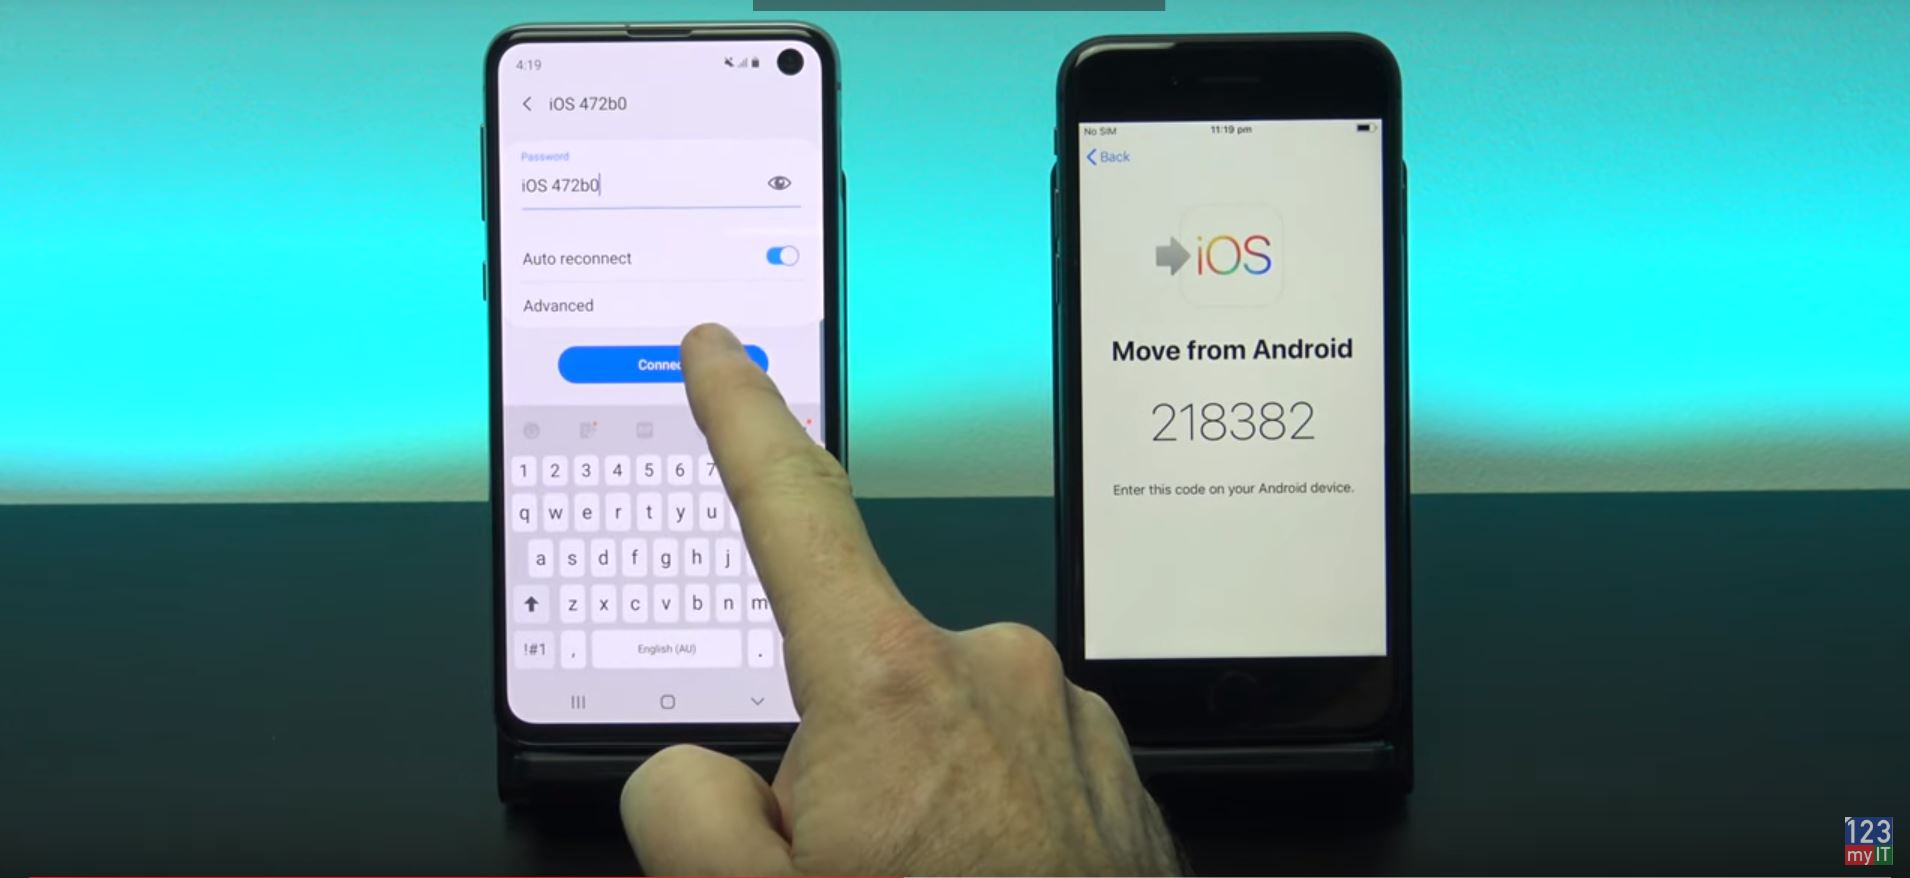
You will need to connect the Android phone to the iPhone manually. To do this go into the WIFI settings and find the iPhone WIFI. The iPhone WIFI will come up as iOS and then a random number, tap on that to connect to it.

Could not communicate
Connecting the Android phone to the iPhone WIFI

Enter the iPhone WIFI password

Next enter the WIFI name as the WIFI password. Make sure you use upper and lower case. When you are done double check you have entered it right and hit connect. On the next screen make sure you are connected to the iPhone WIFI and restart the Move to iOS apps on both phones.

Next up on your Android phone enter the code that is displayed on your iPhone.
There you go now the Could not communicate with the device error is gone and your phones have moved to the next step Data Transfer.

Simply untick and data you dont want to transfer and hit next.
Hit Done on your Android phone. And now just continue along with the Move to iOS prompts to setup your new iPhone. Thats it you have now got past the Could not communicate with the device error.

Also Guys dont to check out my other videos like iPhone battery drain and do me a favor hit the Subscribe button and smash the bell icon.

Gaming PC Settings – Nvidia Control Panel

iPhone Battery Drain – Is your iPhone letting you down?

Setup Bedtime on iPhone

ASUS Strix GL702V Game Lag – Fixed

ASUS Strix GL702V Game Lag – Fixed

This video will show you how to fix in game lag by turning off Turbo Boost.
I had a massive problem that the Asus themselves could not fix and this related to in game lag. This lag would slow the game down every five seconds or so and the frame rate would drop from around 40-50 to below 20. This would happen in multiple games such as Elder scrolls online and Player Unknowns Battlegrounds. I was so stressed and frustrated with this lag so I want to try and help others hopefully fix this issue if they are having it.

This big issue is when you buy a product and you have a problem with it and you try your upmost to get help with that problem and no one listens. I had put a post up on the Asus ROG forum and it was removed when I said Asus service centre couldn’t resolve the problem. Which was the truth. But it made Asus look bad so they removed it because it proved that there was an issue with their laptops. Shortly after they released BIOS 305 Update thermal policy to reduce CPU temperature. πŸ™‚ I will do a video shortly on this update. But it has really left a sour taste in my mouth with regards to their after sales support.
After all, they only need to acknowledge that there is an issues and that they are looking for a fix.

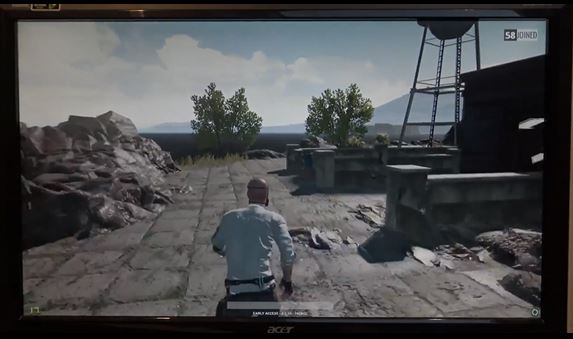
The picture below shows the game at the drop of 19 frames per second.

Game Lag

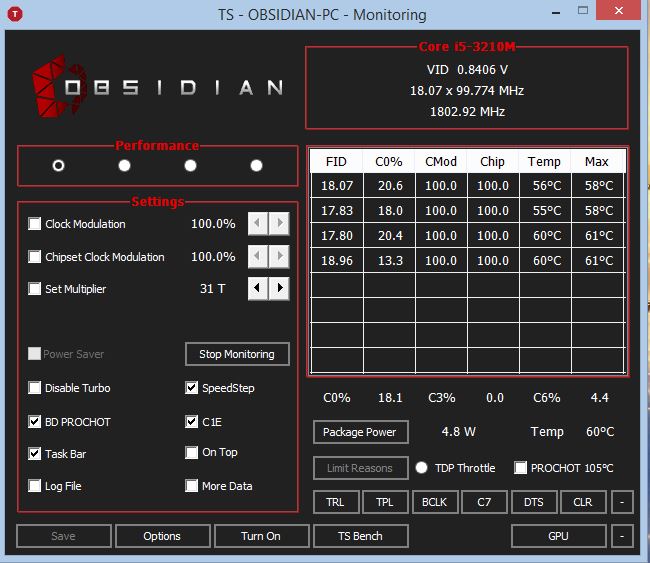
The tool I used to turn off Turbo Boost is called Throttle Stop and you can find it here. Simply download and install Throttle Stop, then run he program and you should get a series of check boxes, simple select the checkbox that you want to change and click save. This should then apply the setting you wish to apply. Don’t forget this will reset after a reboot so you might have to reapply the setting when you restart the computer.

Throttle Stop - Game Lag

Good luck guys, I hope it helps out.

What to do with your old broken iPad?

This video will show you what you can do to fix repair your old broken iPad.

Hi All,
I get allot of questions about old broken iPads so I thought I would put up a quick video about what you can do if anything with your older iPads. These steps will work with iPads, iPhones and iPods. This is helpful if you have got a new iPad and you want to retire your old iPad give it away or sell it and even recycle it for cash.

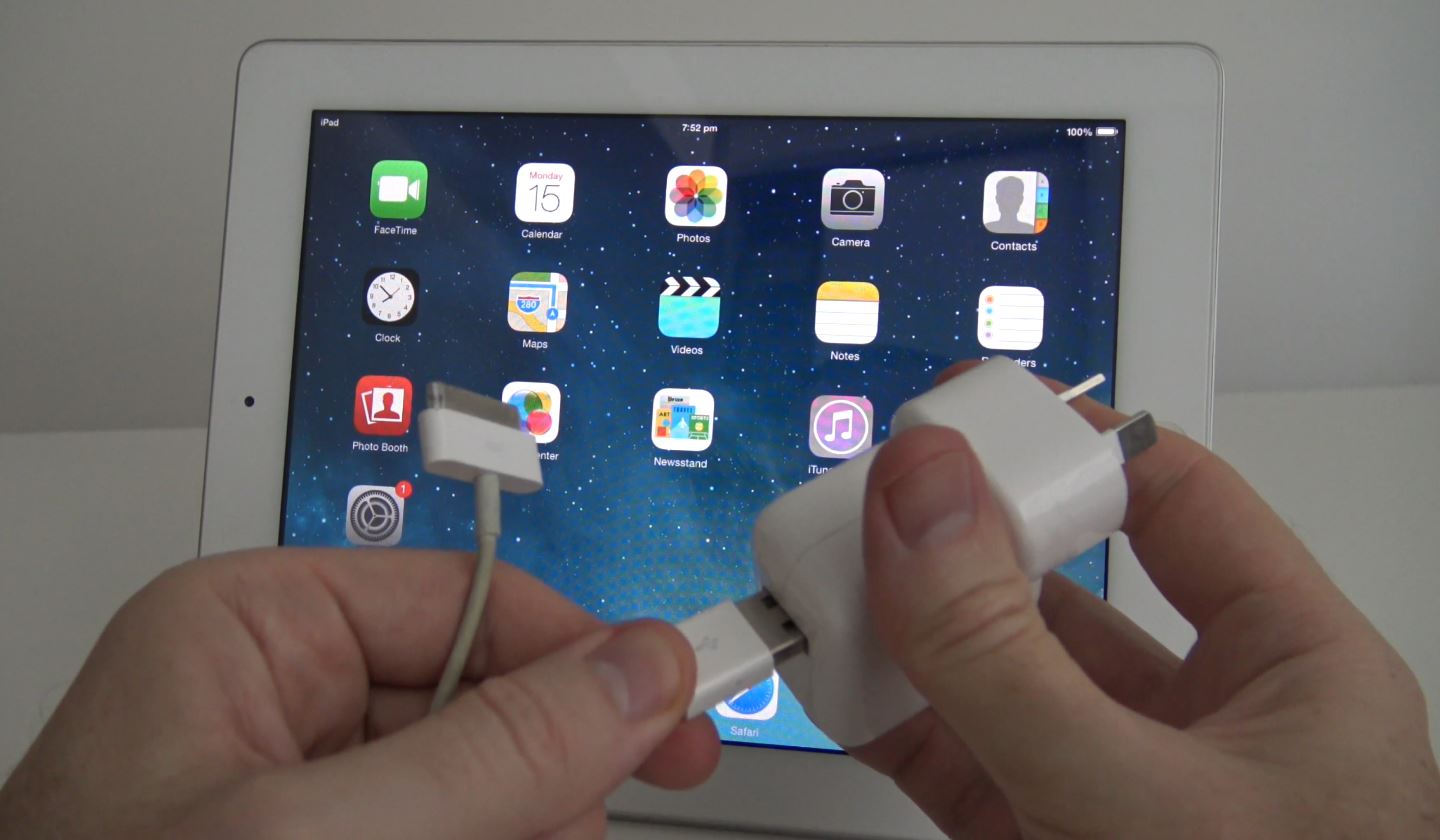
The first tip I mentioned was to make sure you have fully charged your iPad this is mainly for people that have faulty power cords or their laptop isn’t charging the device properly via the computer USB. Apple recently has recalled allot of these devices because they are faulty and I will go over how to work out if you cable is a faulty one or not. So its just something to try if you iPad or iOS device is not powering on properly.

old Broken iPad Power Cable

The next step is to clear out and personal data if you want to give away or sell the iPad. To do this its pretty easy go to Settings > General > Reset and then Erase all content and settings. This will put the device back into a factory default state simular to when you purchased the iPad.

The next step is to check your iOS version. Apple update the software on the iPad called firmware all the time and when they update this some apps may also need an update before they will work.
Now you can update the iOS by doing a OTA over the air update or you can do a full clean update by doing a DFU update. I wont go into this to much as I already have a video about how this is done and you can see it on the link below.
Phone DFU Mode – iPhone is disabled

Also you can find a complete list of iPad firmware here, iPad Firmware.

Lastly can you get your old broken iPad fixed under your warranty? and can you get a trade in voucher for your old working device? Well the answer is yes and you can check that on the links below.
These links are to the Apple.com US site. For people in other country’s just search for Warranty or recycle on your country’s Apple site.

Apple Links
Link to the Apple Warranty Check website here.
Link to the Apple Recycling & Reuse website here.

Good luck!
Matt

How to Resolve iOS update and restore errors in iTunes

This article and video is a step by step guide on How to Resolve iOS update and restore errors in iTunes.
So I recorded this video to try and go over all the errors that can come up in iTunes.

Some of the Symptoms you might have when restoring your iPhone, iPad, or iPod touch via iTunes are in the form of error codes and alert messages. Most of the time these errors are caused by older versions of software or problems with connectivity, connecting to the Apple servers.

To resolve these problems you can try the following.
Step 1. Update your iTunes to the latest version or even try uninstalling iTunes if your using a PC do a restart and download, reinstall iTunes. To update iTunes on a Mac go into Apple icon and click updates.
iTunes Updates

Step 2. Make sure you OS is up to date. If you are using Windows go into Control Panel and click on Windows Updates. If you are on a Mac click on Apple and then Updates.

OS Updates

Step 3.Check the Anti Virus and security software on your computer. It could be blocking the connection to the Apple servers. In Windows you can generally right click and disable software until you do a restart. And you can turn off the Windows firewall in Control Panel. On a Mac you can System preferences and security and privacy. 123myIT also has a video guide which shows you how to edit your host file on your computer.

The 3194 error video for Windows here.
The 3194 error video for a Mac can be found here.
Windows iREB video here.

This is really important if you are having issues connecting to the following Apple servers.

* Ports: 80 and 443
* Apple servers:
phobos.apple.com
deimos3.apple.com
albert.apple.com
gs.apple.com
itunes.apple.com
ax.itunes.apple.com

* Verisign servers:
evintl-ocsp.verisign.com
evsecure-ocsp.verisign.com

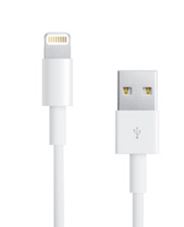
Step 4. Unplug any extra devices that don’t need to be connected to your computer. Only have your Mouse, Keyboard and iOS device connected. Try a different USB port on your computer and try a different cable and if that doesn’t work try a different computer altogether.

USB Cables

Step 5. After updating or installing software its a good idea to restart your computer. When your computer is restarting take the opportunity to restart your iOS device.

Restart Devices

Step 6. By now hopefully you know how to resolve iOS update and restore errors in iTunes. Time to try the restore again and see if you get the same error.

For more information see this Apple article here.

I hope it helps and Good luck!

How to Fix iTunes Error 3194 on a Mac – This device isn’t eligible for the requested build

This video will show you how to Fix iTunes Error 3194 on a Mac – This device isn’t eligible for the requested build.

Hi All
Earlier I created a video on how to Fix iTunes Error 3194 while using Windows. This video will show you how to fix the same error on a Mac.
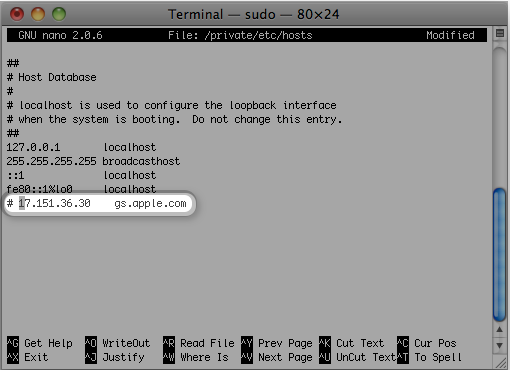
You will need to open up Terminal in Finder and type the following command.
sudo nano /private/etc/hosts

Press Return and Enter your password.
Once you have typed your admin password you will see all the entry’s in the hosts file.

Mac Terminal Hosts file

Now Apple says, look for an entry containing β€œgs.apple.com”.
The next step I delete any entry back to the local file which essentially sets the hosts file back to defaults.
However Apple says, Add the # symbol and a space (“# “) to the beginning of the gs.apple.com entry.

You can save the file by pressing Control-O. Hit Enter when prompted for the filename and Control-X which will allow you to exit the editor.
Restart your Mac and you should be good to go.

Good luck guys.