Delete Gmail contacts from Android

This video will show you how to Delete Gmail contacts from Android phone.

Hi All,
Recently I was able to get my hands on Samsung’s latest model of Galaxy phone the Samsung Galaxy S6 Edge and after wanting to take some pictures with it to post up on 123myIT Instagram I went to the Google Play store to download the Instagram App. Sounds pretty straight forward right ?
Well some where along the line I entered the 123myIT Google play login details and Gmail decided that I also needed that Gmail account setup on my phone. Maybe I clicked accept to something I shouldn’t have? However I found this very intrusive because not only did it install an unwanted Gmail account, it also installed also installed all my 123myIT Gmail contacts into my phone contacts. Very Annoying, because I have over 80 contacts who, I don’t need to contact via my mobile phone.

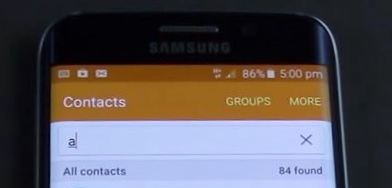
84 Gmail Contacts

The big question is, how do I delete Gmail contacts from Android? Well the easy option is to go into Settings > Accounts section on the phone and delete the Gmail account. This will remove both the Gmail email and contacts from your phone. But what if you want to keep the Gmail account but not be burdened with all the Gmail contacts?

Well you can turn off the contacts Sync, by going into the Settings > Accounts go into the Google account tap on your Google account and you will have the follow toggle switches below.
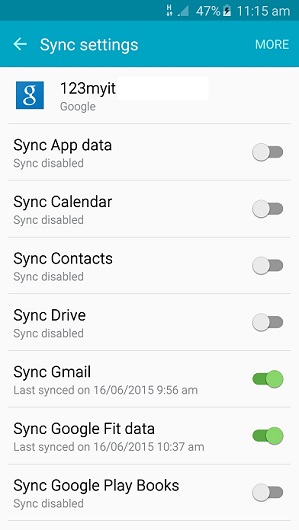
Gmail Settings Android
Once you turn off the contacts sync, you can then go back into your contact and delete the contacts one by one.

If you have 1000 contacts, then this is usually not an option for you. If this is the case you will need to remove the Gmail account altogether and start from the beginning. In the video above I will show you how to add the Gmail account without Syncing the Gmail contacts by making use of the fight mode setting.

I hope this delete Gmail contacts guide was helpful for some. I found this quite frustrating as I am sure there are others out there with the same issue.

Thanks for watching
Cheers
Matt

How to Add Bookmarks in IOS 8

This video will show you how to Add Bookmarks in IOS 8.

Hi All,
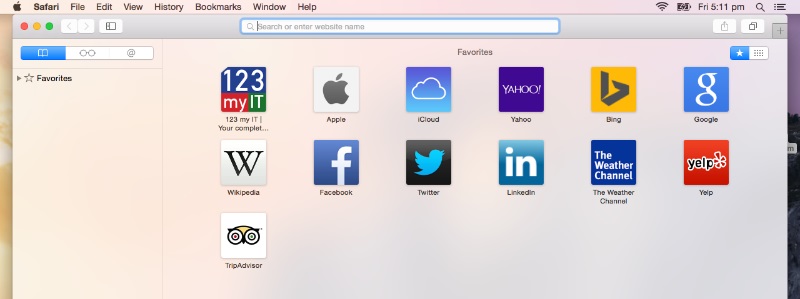
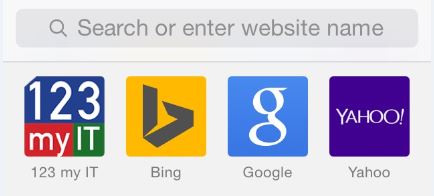
I always cringe a bit when I see people that use their iOS device everyday. But still have the same old default Apple, Bing, Google and Yahoo Bookmarks icons in their Safari browser. This also goes for any Mac running OS X Yosemite as the home page on these Mac’s now defaults to a bookmarks screen bringing them inline with their iOS devices.

Mac OS Bookmarks Page

I really don’t like this page as I feel its locking people in. However its here to stay so we may as well work with it.

So the steps to add a Bookmark in iOS is pretty straight forward, all you need to do is go the website you want to add. For the example in the video I used the www.123myit.com website. Once you have browsed to your website. Press the up arrow icon in the middle of the page at the bottom.

iOS Bookmark 1

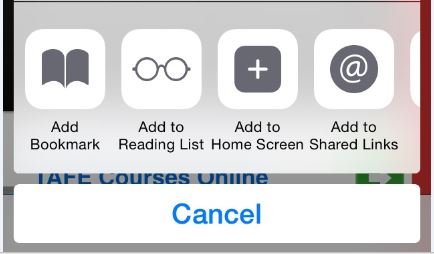
Once this is done you will see a menu which contains the Add Bookmark, Add to Reading List, Add to Home Screen, Add to Shared Links buttons, press the Add Bookmark button and this will take you to the next screen.

Add Bookmarks in IOS 8

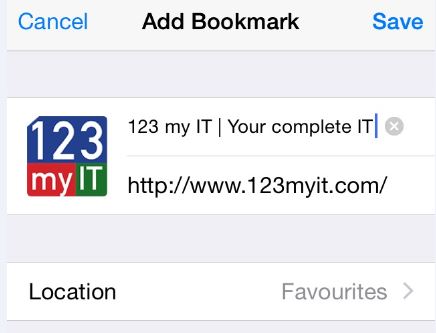
The next screen will have the Bookmark that you want to save, at this stage you can change the heading of the Book mark if you wish. In the video I have removed the “Your complete IT help portal” from the 123myit.com Bookmark. Once you have adjusted the heading simply press save.

Save iOS Bookmark

Once saved the Bookmark will show up every time you start a new Safari browser session.

Saved iOS Bookmark

If you want to know more about iOS 8, you can find the official Apple site here.

How to Delete Google Chrome History

This video will show you how to Delete Google Chrome History.

Step 1. Open up Google Chrome.
Google Chrome Icon

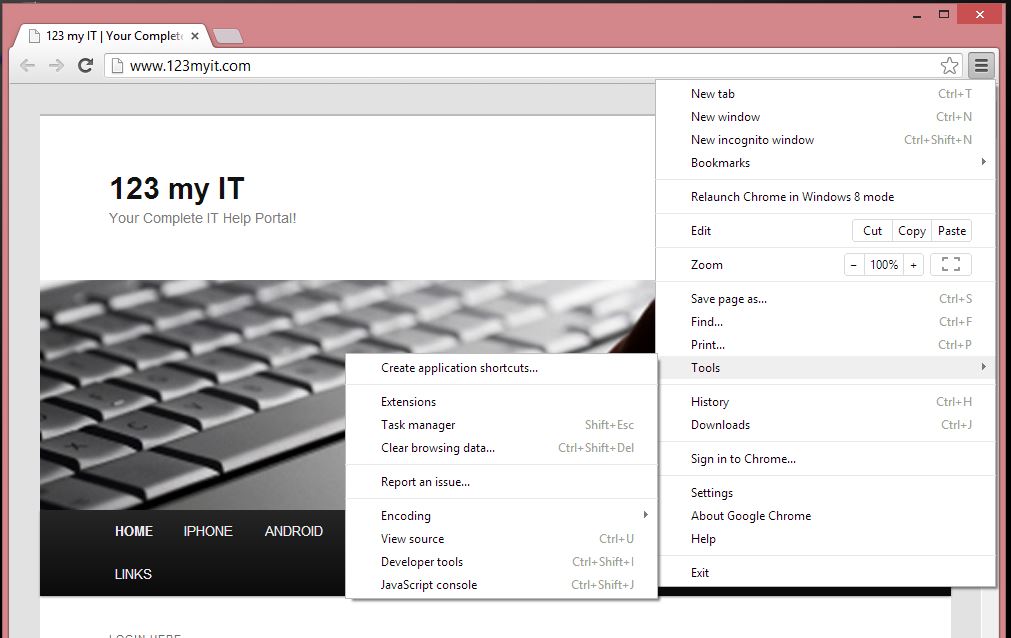
Step 2. Click on the Customise button in the top right hand corner of the browser. Click Tools, then go to Clear Browser Data.

Customise Google Chrome

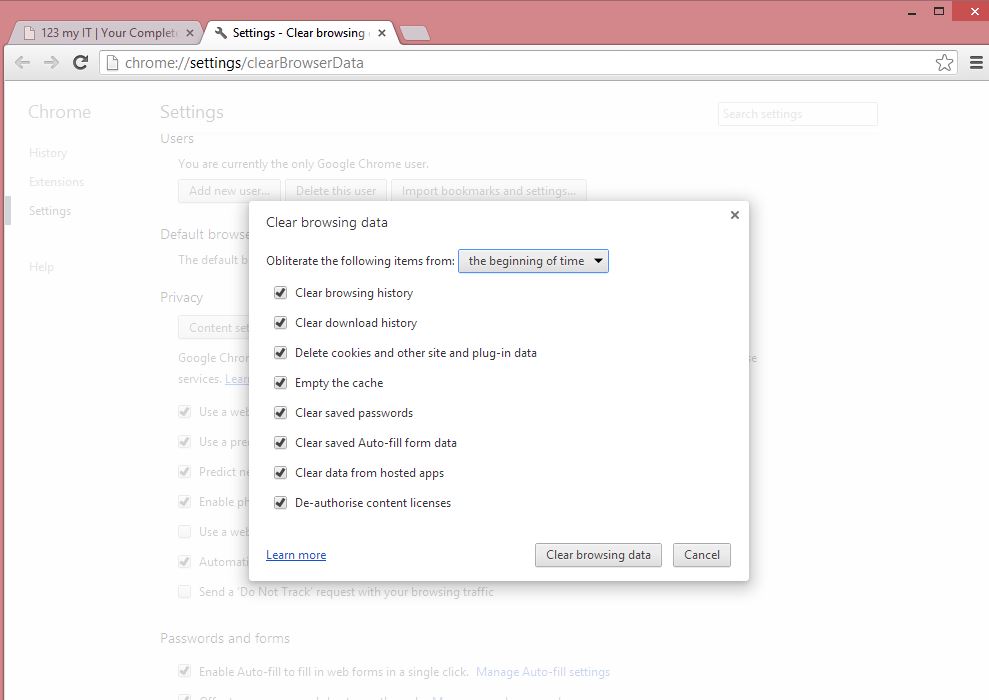
Step 3. You should see a Clear Browsing Data Screen. At this point you will be able to select how far back in time you want to delete the history.
Your options are:
* The past hour
* The past day
* The past week
* The past 4 weeks
* The Beginning of time

Clear Chrome Browser Data

Step 4. You can then select the following check boxes and click Clear browsing data.
* Clear browsing history
* Clear download history
* Delete cookies and other site and plug-in data
* Empty the cache
* Clear saved passwords
* Clear saved Auto-fill form data
* Clear data from hosted apps
* De-authorise content licences

NOTE: Be careful when checking the Clear saved passwords option as it will removed any saved passwords that you have in your Google Chrome Browser.

How to Delete Internet Explorer History

This video will show you how to Delete Internet Explorer History.

Hi All,
Since everyone uses web browsers so much these days. I decided to make a few videos on how to clear the web history and reset the browser back to factory defaults.
If you find you are having funny issues like browser is closing and crashing and you are getting funny popup and odd behaviour then its probably time to set the browser back to factory defaults.
When you use the browser so much you want it to be running as fast as possible so I suggest following these steps every few months or so.

In this video I have used Windows 8 and Internet Explorer 10. You may find that it looks a little bit different but it should be very simular for Internet Explorer 8 and 9.

Step 1. Click on Internet Explorer and open a Window.

Open IE

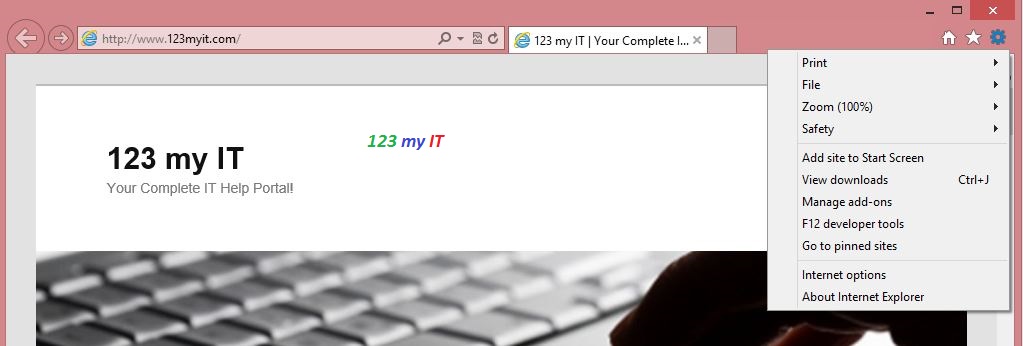
Step 2. Click on the Cog icon in the top right hand corner of the browser and then click on Internet Options.

Internet Options

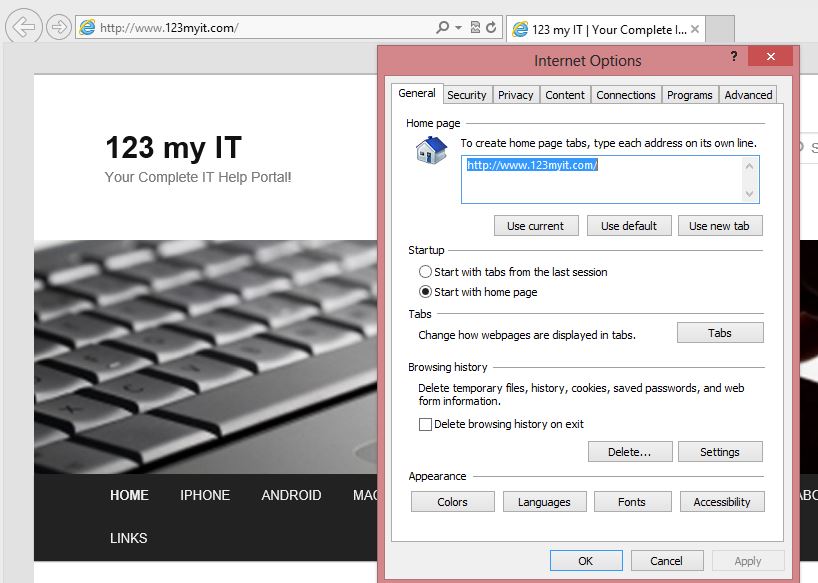
Step 3. Make sure you are in the General Tab, and then under the Browsing history heading click Delete.

Browsing History Menu

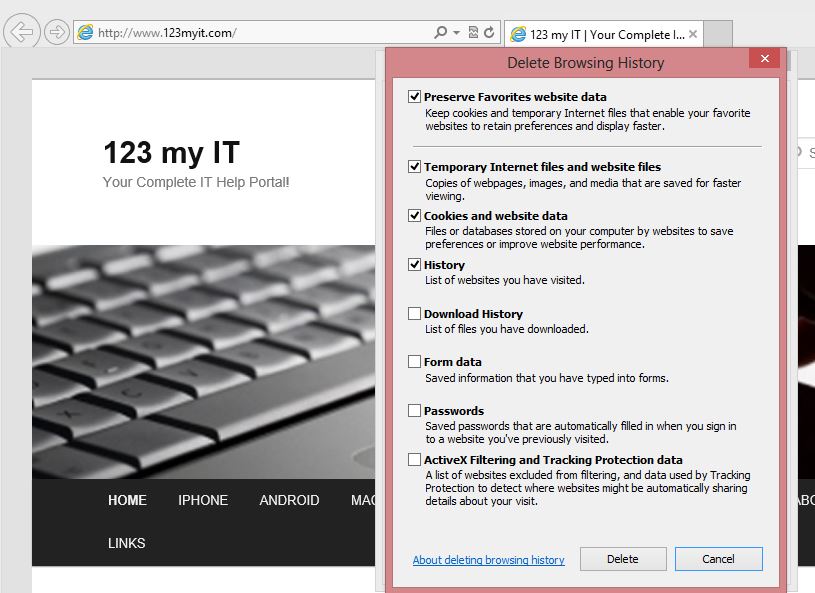
Step 4. Once you have done step 3, you will see a Browsing History Window pop up. In this Window you can choose what items you want to delete from Internet Explorer.
If you are having problems with your browser then I suggest you delete everything. However if you have passwords saved in your Internet Explorer then please make sure you know what those passwords are before you press delete.
The following options will appear.
* Preserve Favorites website data
* Temporary Internet files and website files
* Cookies and website data
* History
* Download History
* Form data
* Passwords
* ActiveX Filtering and Tracking Protection data

Delete Browser History

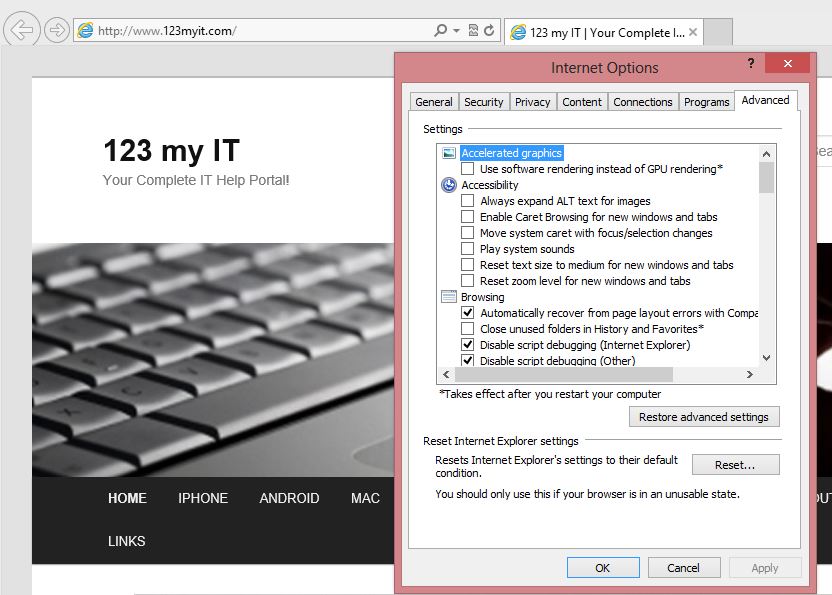
Step 5. If you just wanted to delete the history then you don’t need to do the next step. However if Internet Explorer is doing strange things then you should probably try and do this next step and set it back to factory defaults. Go back to the Internet Options menu and click the Advanced Tab, then click Restore Advanced Settings and click Reset.

Internet Explorer Advanced Settings

Once this is done, restart your Browser windows and you will need to setup your search providers and homepage again. However your browser should now be in the same state it was when you first started using your PC.