Gaming PC Settings – Nvidia Control Panel

Use the Nvidia control panel to increase performance of your games.

Nvidia Control Panel – What can it fix?

If you are having issues with your Gaming Pc such as Low Frame rates
Game lag or Game Stuttering, then this video should help. By following this video and optimizing the Nvidia control panel you can do the following.

  • Increase your Frames rates.
  • Fix Game Stuttering
  • Increase power
  • Optimise Nvidia GPU
  • Best colour settings and brightness for games
  • Smooth out your gameplay

As mentioned this video is for Nvidia GPU, If you have an AMD GPU I plan to do video for AMD as well so make sure you hit the subscribe button.

Nvidia Control Panel – Config

Alright first step is to open your Nvidia control panel. You can do this by right clicking the Desktop and selecting Nvidia control panel.
If you cant find it there try looking in the bottom right hand corner of your screen near the time. If you still cant find it, check what GPU you have installed by right clicking the start button and selecting Device Manager.
Under Display adapters you can check what Nvidia GPU you have and download the driver for it.

Download your GPU drivers – Nvidia.com

Head over to nvidia.com and download your driver or you can download the GeForce Experience software and I will leave links to those pages in the description below.

In the Nvidia control panel go to Adjust image settings with preview. Click on use 3D image settings and click Apply.
Next up click on Manage 3D settings and make sure you are on the Global Settings Tab. These settings will apply globally you can change these at any time or click restore if you want to set settings back to defaults.

  • Set Ambient Occlusion to Off
  • Anisotropic filtering to Off
  • Antialiasing to Off
  • Leave Gamma correction On
  • Antialiasing – Mode Off

Antialiasing on or off?

Don’t worry you can still turn Antialiasing on in Game. Also if the options aren’t the same as this video just change the options that are the same.

  • CUDA -GPUS Should be set to all.
  • DSR Factors should be off.
  • With Maximum pre rendered frames set this to 1, if you have an older pc you can try setting this to 2 or 3. But if you have a newer PC set this to 1.Multi-Frame Sampled AA set to Off. Open GL set to Auto.
  • Power Management Mode set this to Prefer Maximum Performance.
  • Preferred Refresh rate set it to Highest Available.
  • Shader Cache set to On.
  • Turn on – Texture Filtering – Anisotropic
  • Texture Filtering – Negative LOD Bias set to Allow
  • Texture Filtering – Quality set to High Performance
  • Threaded Optimisation you can set to Auto, however if you play games like PUBG, FORTNIGHT and Battlefield which are quite demanding. You can set this to On.
  • Triple buffering set to Off
  • Vertical sync to Off
  • Last setting Virtual Reality pre-rendered frames set this to the same value as Maximum pre rendered frames.

Once you are done make sure you click Apply. Once you have set this go ahead and click Apply.
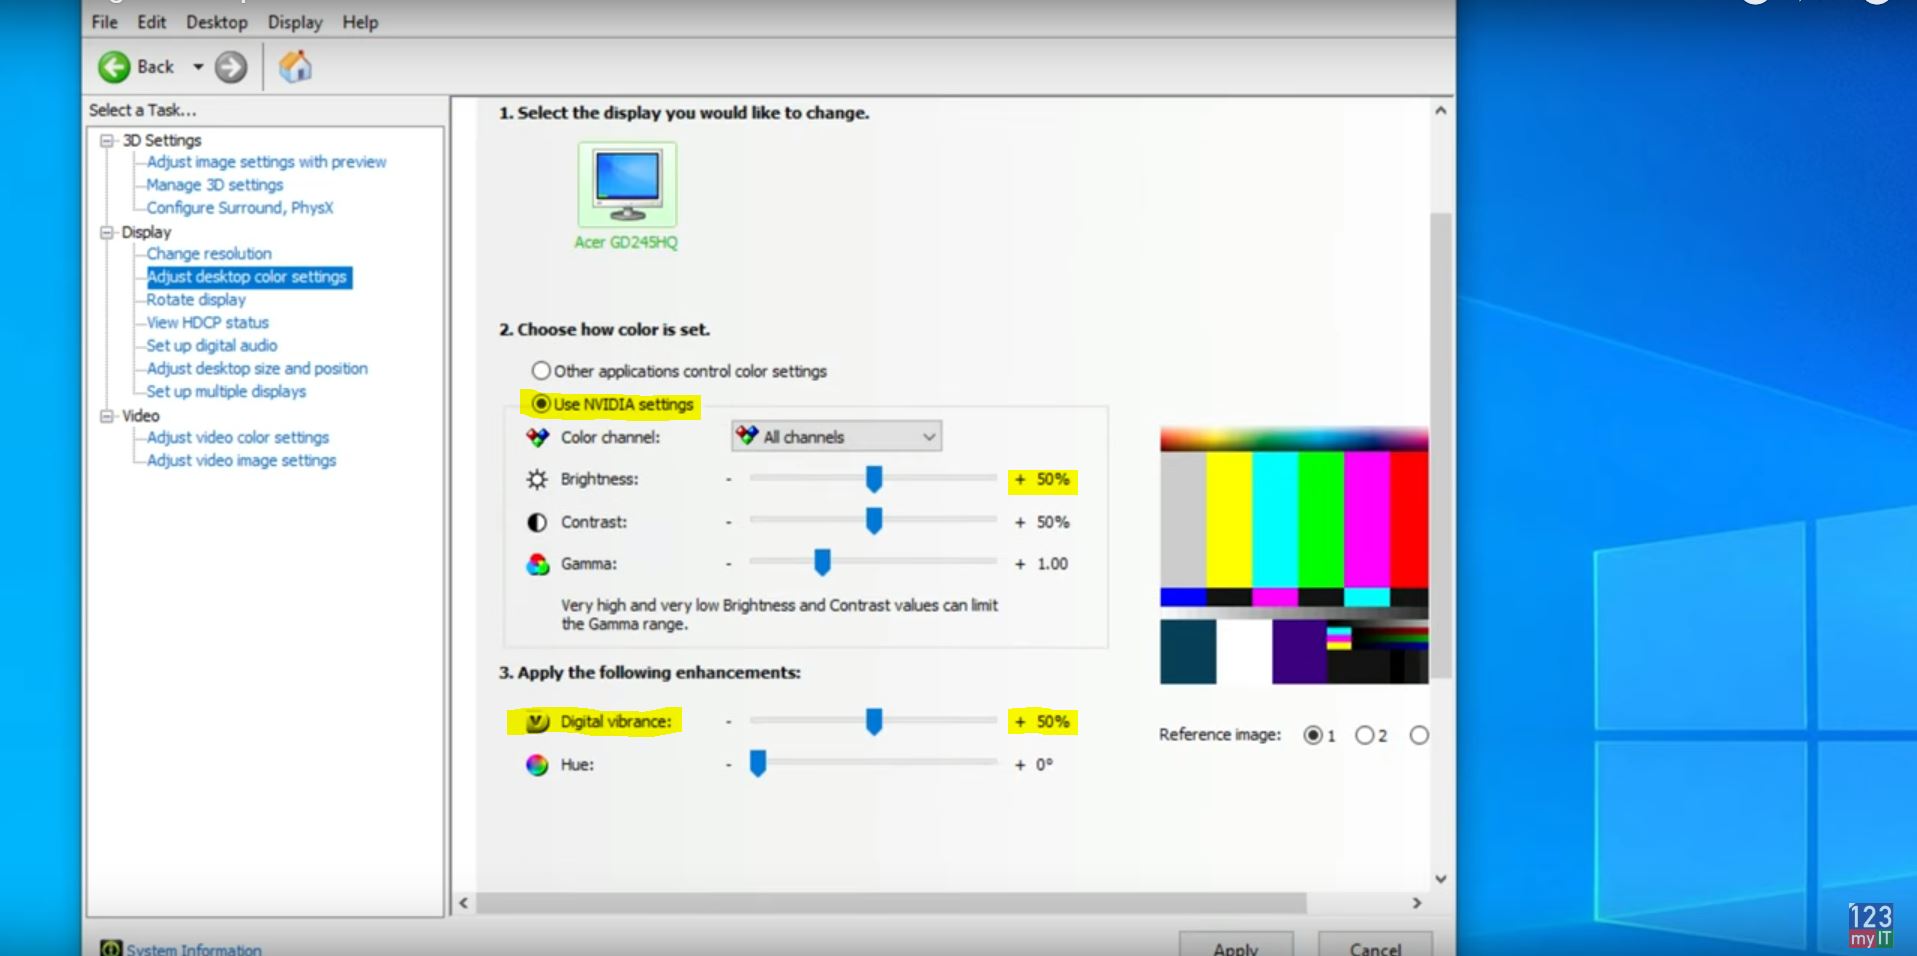
Next up go back to the left hand side and click on Adjust desktop colour settings.
Select the Use Nvidia Settings on the right.
Click Apply then click Yes.

PRO TIP!

Heres a little secret. If you play first person shooters you have just made the colours much better than the default ones by selecting Use Nvidia settings. Also if you scroll down to the Digital vibrance slider its default settings is 50%. If you slide this upto 80% suddenly the dark areas of your game will become much brighter. This will allow you to see your emimenes in game before they see you. This really helped me allot in PUBG.
nvidia control panel
PRO TIP: Use Nvidia settings to control brightness and colour – this helps when spotting enemies.

Best image and colour settings

Click Apply and then go to the Adjust video colour settings.
Next up select the with the Nvidia settings. Click onthe Advanced tab.
In the Dynamic range drop down menu select Full. Next click Apply this should allow you to see better colours when watching videos.

Next go to the Adjust video image settings.
In here you can also use the Nvidia settings and change these however you like. These last two settings only change video and image settings outside of Games and they wont effect Gaming performance.

Another point to mention is, if you update your Nvidia driver, make sure you come back to this video and check that the driver update hasnt reset your Nvidia control panel settings back to defaults. And lastly I get asked allot of questions about customising Windows 10 and AMD settings I will do a few more videos on this topic so do me a favor. Hit the subscribe button and smash the bell icon.

iPhone Battery Drain – Is your iPhone letting you down?

Setup Bedtime on iPhone

Apple Shutting Down iTunes

Backup Samsung to PC or Mac

Step by step guild on Backing up your Samsung device.

In this video and article we will show you how to do a backup and restore of your Samsung device to PC.

Have you ever thought about what might happen to your pictures and videos on your Samsung device if you lose or break it? You don’t need to take the risk you can do a backup and restore with the following steps. Also if you are getting pop up ads on your device and want to clean it these steps will help. If you have a Mac You can also backup your Samsung device to a Mac.

Backup Samsung via Smart Switch app

To do the backup we are going to use an application called smart switch. You can find the direct link to the Smart Switch website here.
In the download section scroll down to where it says smart switch and click that link.
That will take you to the Samsung US website. And you can download Smart Switch for Mobile, Mac and Windows.

Backup Samsung
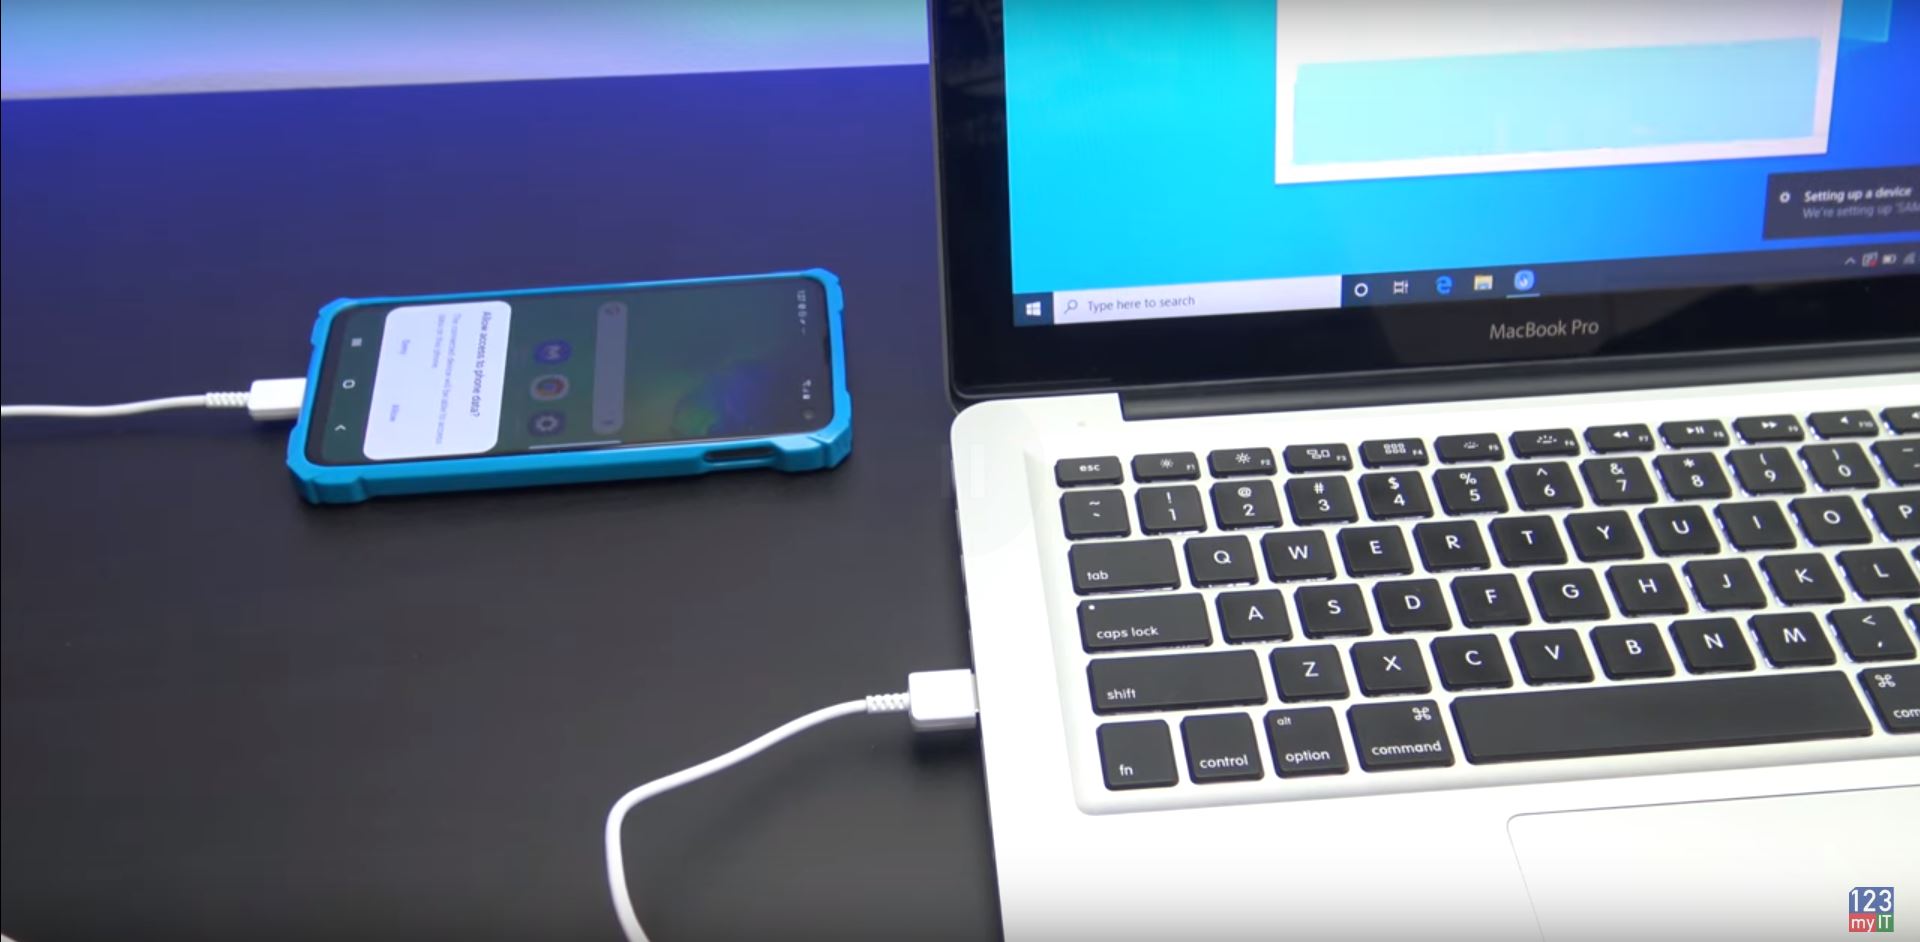
Plug your Samsung into your computer to start the Backup

Click the Windows link and download Smart Switch to your desktop.
Once its downloaded install the Smart Switch app. You will need to agree to the terms and conditions. Plug your Samsung USB into your computer. Tap Allow access on your Samsung Device.

Encrypt your data that you are Backing up

If you want to encrypt the data that you store on your Computer with a password go to more and preferences. Then select the checkbox Encrypt backup data. Next up just click on Backup and it will ask you for a password for your backup. You will need to enter the password on your Samsung device. So go a head and Enter a security code on your Samsung device and then confirm it.
Once its finished doing the back up it will give you a list of items that’s have been backed up successfully and a list of items that it didn’t backup.

Click ok and if you want to know what location your files have been backup in simply go back to More and Preferences. It will be under the Backup folder location.

Wiping the Samsung Device

In the video I am going to reset the Samsung device back to factory defaults. So it will wipe any data on the device and I will restore the data from the backup we just created.
I will do this under settings > General Management > Reset > Factory Reset data. However once the Samsung device has been wiped so just go ahead and set it up like a new phone again.

Plug your Samsung back into your computer with the USB and press restore. You will need to tap allow on you Samsung device again. Press Restore now.
And then you will need to enter the password you setup earlier when you created the backup.

Once your data has finished copying you can disconnect your USB cable. Go ahead and double check all our files have been restored and there they are.

Ok Guys, Don’t forget to check out my other videos.

Enable Window Zoom on iPhone or iPad

Make your iPhone iPad speak each word you type

Clean Install MacOS Catalina on any Mac

HP ProBook 430 G6 Unboxing & Firstlook

Unboxing of the HP ProBook 430 G6

In this video we will show you a HP ProBook 430 G6 Unboxing.

The ProBook 430 G6 is currently the smallest model of this series and has a 13.3-inch display.
If you want a bigger display HP also sells 14-inch, 15.6-inch and 17.1-inch in the ProBook 400 range.

HP ProBook 430 G6 Specifications.

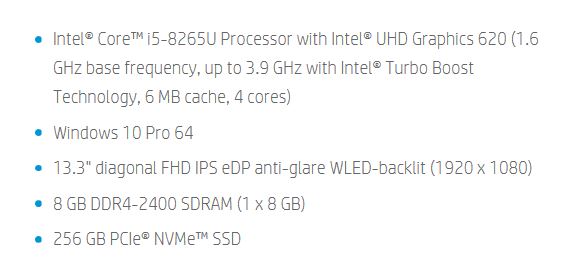
This probook comes with an Intel Core i5-8265U processor, 8 GB of RAM, a 256 GB SSD, and a Full HD display.

ProBook 430 G6 Unboxing
HP ProBook 430 G6 Specifications

The design of the previous ProBook the 430 G5 did not last long and I think this is a good thing. See the review of the G5 here.
The G5 had a dark plastic Case, where as the G6 now has a really nice silver case.
On our model both the palm rest and display cover are still made of smooth, silver plastic.
The unit feels sturdy and does not bend when I apply pressure to it. The craftsmanship is also really good. HP have done a really good job with this laptop.

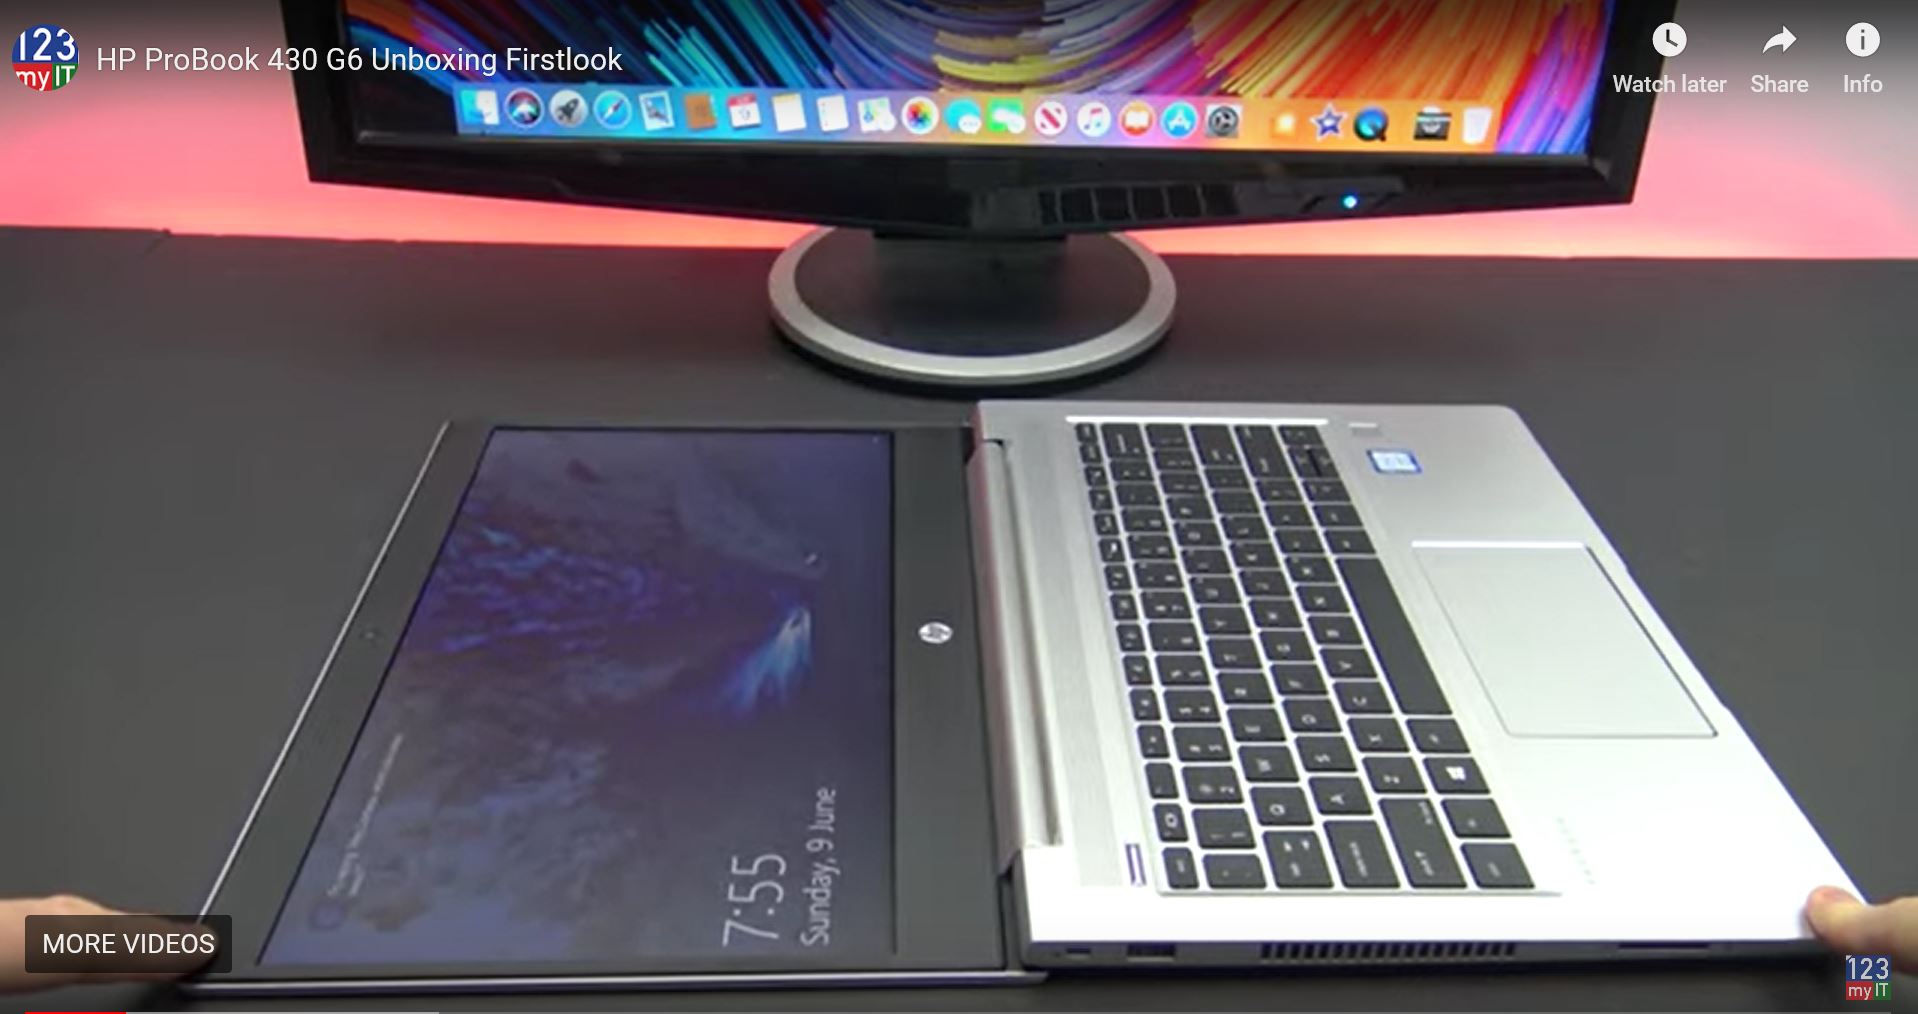
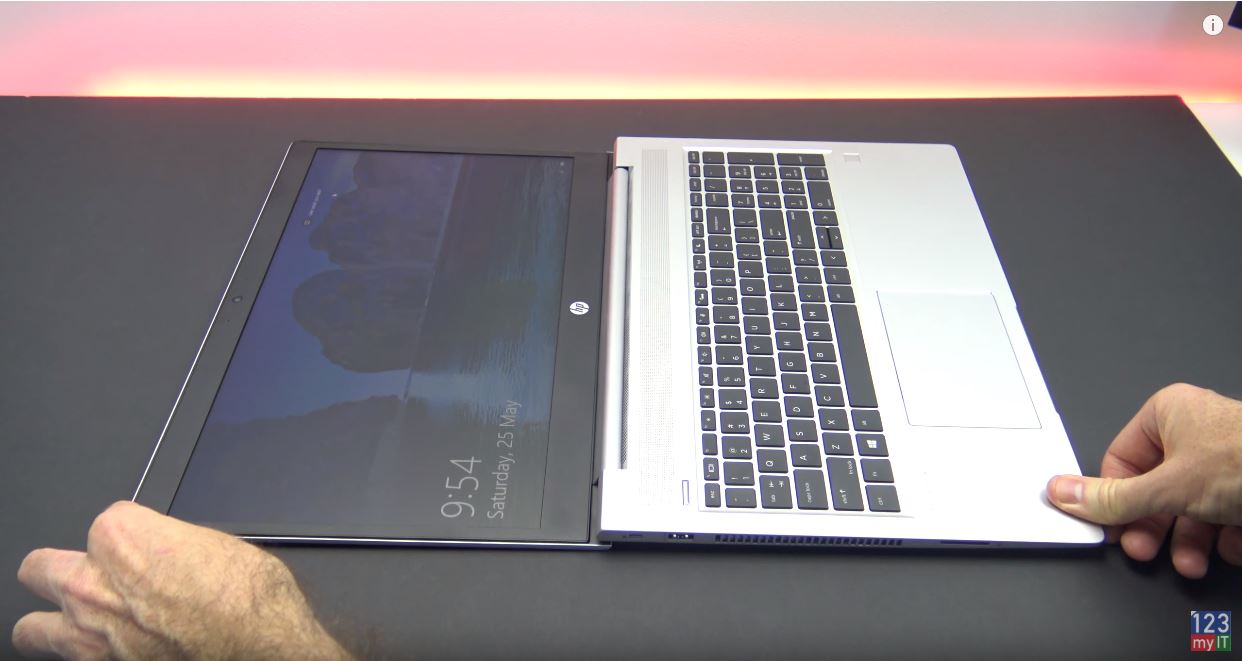
The G6 has a wide drop-down hinge that grips the display and allows the display to open to a 180° angle. We could also open the display cover with one hand, underlining how well balanced the hinges are.

Wide drop-down hinge that allows the display to open to a 180° angle.

The ProBook G6 is about 100 g (~3.5 oz) lighter than the ProBook G5, 1 mm (~0.04 in) thinner and more compact overall. Hence, G6 has much thinner display bezels. Which I really like.

Ports.

The good thing about buisness laptops is that they have a much wider variety of ports.
On the right side the G6 has a full-size HDMI and RJ45 Ethernet ports along with a USB type-A port and headphone jack. There is also a USB Type-C port. Unfortunately it’s not a Thunderbolt 3 port, but at least you can charge the ProBook with a Type-C cable if you need too, as it has USB Power Delivery (PD) support.
The Type-C port supports DisplayPort out too and you also have a AC power port which lights up to let you know the G6 is being charged.

On the left side you have a Kinsington lock, USB type-A port and an SD card reader. The SD card sits flush inside the laptop so you could use this to upgrade the storage of the laptop without opening the case.

You can expect the SD card reader to transfer at speeds of around 81 MB/s.

Also included is a fingerprint reader that supports Windows Hello. We tested the infrared camera and the fingerprint reader, which both worked perfectly. HP saves a smart card reader and a mechanical camera aperture for its more expensive EliteBook series though, which prevents the ProBook from being a complete security package.

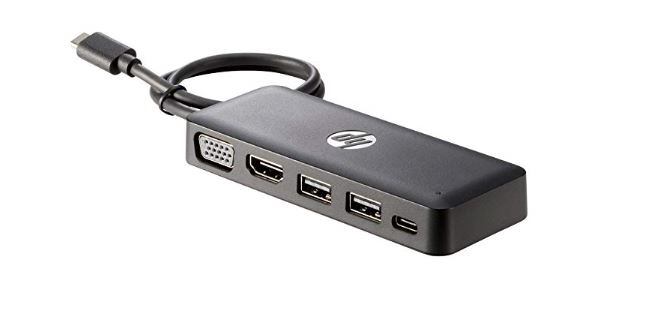
The ProBook 430 G6 comes with just a charger and a recovery DVD. The ProBook also lacks a dedicated docking port, so you must buy a USB Type-C docking station should you need one. You can use any third-party docking station though, which is positive, although HP sells compatible docking stations too.

Pick one up at Amazon here.

USB C Docking Station

Upgrade.

The ProBook 430 G6 is easy to upgrade and you can do this by removing the bottom cover. Plastic clips hold the bottom case in place as well, so I would recommend being careful when prying it free.
You will see two SODIMM slots, of which one is unoccupied in our review unit.

The system supports 64 GB RAM so you could upgrade that, there is also an empty 2.5-inch drive bay if you want to add an HDD or SSD.

There is also an M.2 2280 slot, but you must first remove the boot drive, as you must with the Wi-Fi card should you wish to upgrade that too. The fan is also easy to clean should that become dusty over time. The keyboard looks tricky to remove though and is probably only interchangeable if you remove the motherboard.

HP Warranty.

You will only get 12 months warranty on the ProBook G6, However you can opt to buy extra cover.

Keyboard and Trackpad.

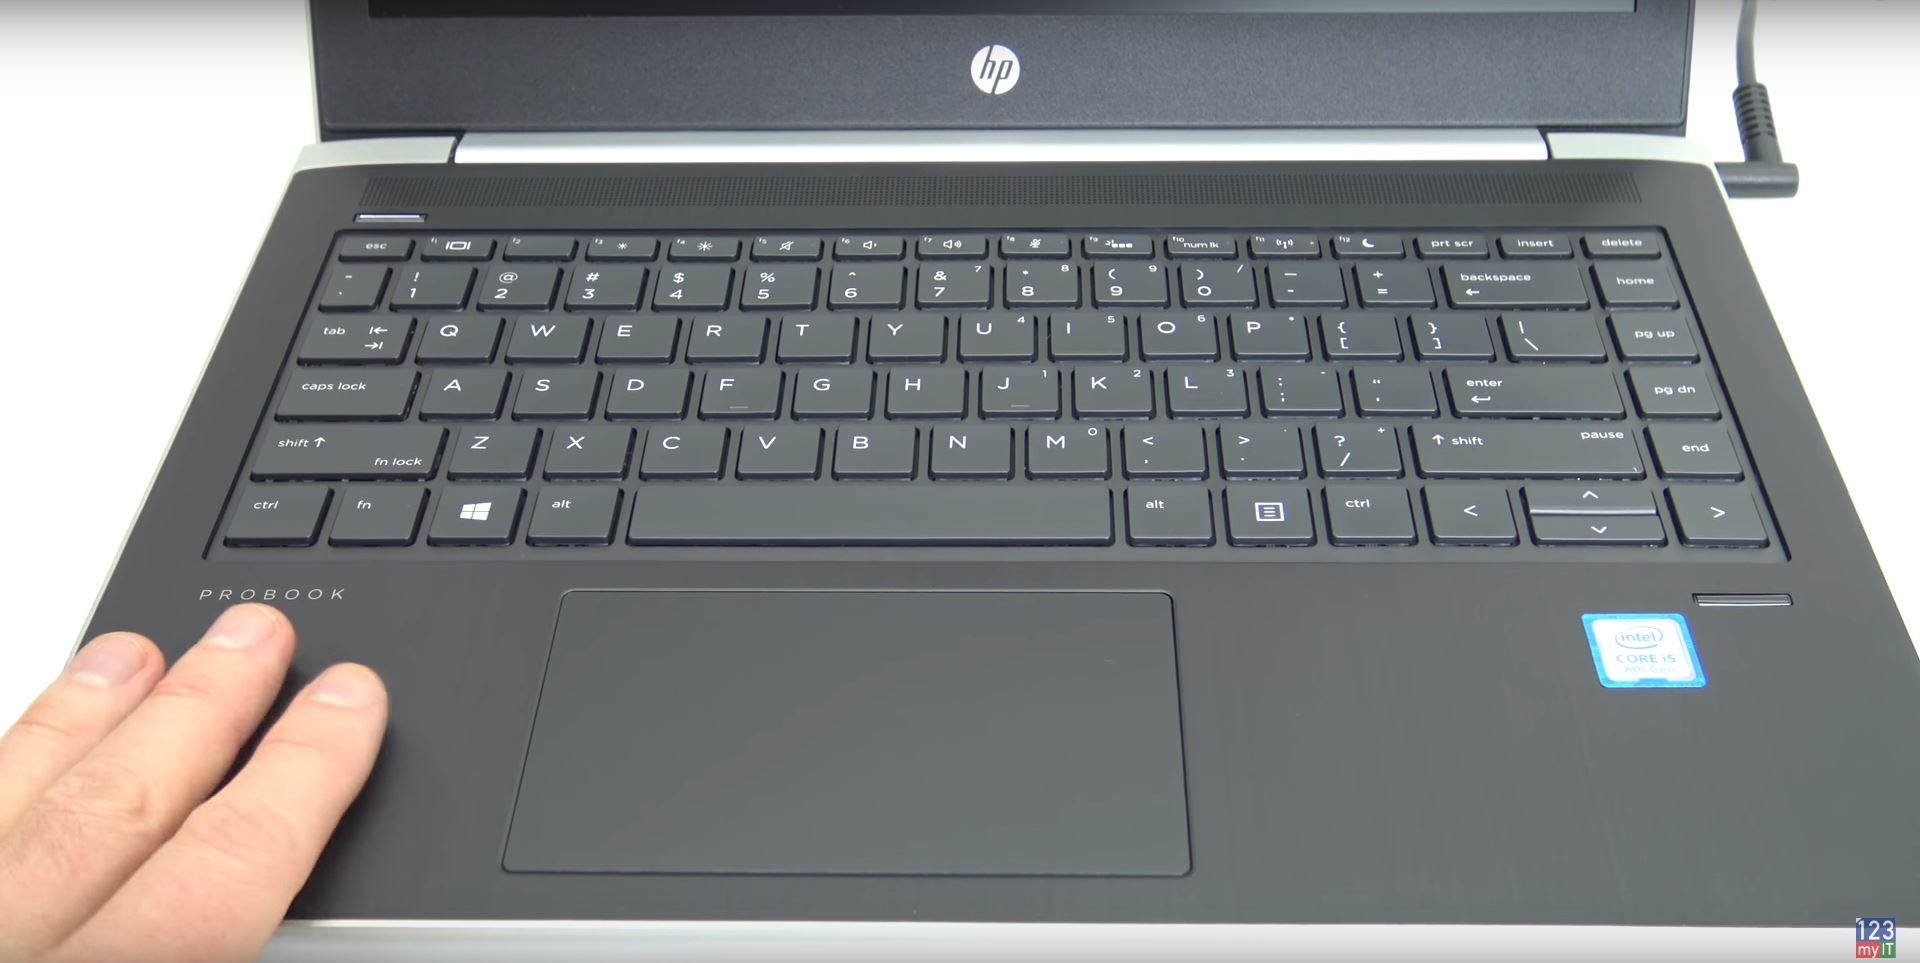
The G6s’ keyboard is now smaller and HP have removed a row of dedicated navigation keys, which sat to the right of the keyboard.
The navigation keys have been merged with the right-most Function key and the arrow keys.
The flat, black, keys have a two-stage backlight and feature off on and brighter.

The ProBook 430 G6’s TrackPad measures 11 x 6.5 cm, which is pretty large for a 13.3-inch laptop.
The TrackPad is made of relatively smooth plastic, on which it is easy to slide one’s fingers, but glass TrackPads feel better to the touch.
The TrackPad is fine overall and even its integrated mouse buttons work well. I find left click sometimes hard to find.
multi-touch gestures like scrolling or zooming and allow decent TrackPads to feel almost as responsive as touchscreens.

HP ProBook 430 G6 Display.

HP gives customers the choice between a 1366 x 768 display and a 1920 x 1080 one. However the viewing angel for the 1366 x 768 is not great. Also because of the dim display you might find it hard to use outdoors.

CPU

The Core i5-8265U is a quad-core processor that has a 15 W thermal design power (TDP) and a 1.6 GHz base clock speed. The CPU also supports Intel Turbo Boost for clock speeds up to 3.9 GHz on a single core. Please see our CPU benchmarks page for more information about the Core i5-8265U and how it performs against other CPUs.

GPU and Ram.

All ProBook 430 G6 models use the Intel UHD Graphics 620 for graphics. There is no dedicated option. The UHD Graphics 620 shares its memory with the CPU and benefits from running in dual channel mode, which is only enabled when the system is running with two RAM modules installed. Our review unit is only equipped with one RAM module, so it runs in single-channel mode, which restricts GPU performance. Hence, you could squeeze more performance from the UHD Graphics 620 if you added another stick of RAM, but it would still not be powerful enough for demanding tasks like CAD or video editing.
Like the CPU, the GPU is factory-throttled when running on battery. Activating Turbo Boost in the BIOS reverses this limit though.

You could add another ram module and this would put the graphics in dual channel mode. However it would still not be powerful enough for demanding tasks like CAD or video editing.

HP ProBook 430 G6 is Not a Gaming laptop.

The ProBook 430 G6 is not a gaming laptop in disguise. And this shows in the 3d Mark Score. The intel 620 graphics is powerful enough to play older games like BioShock Infinite at 720p, but current triple-A titles are out of the question.

you cant connect an external GPU either, which would have allowed for serious gaming. I would recommend looking at the 455 G6 which I reviewed recently heres the link.

Accross the top of the display we haev a 720p HD camera, a status indicator light and two mic pinholes. Our model didnt have an infrared sensor, however you will need this for face recination.

the g6 has an excellent 45watthour battery and when browseing the web can last for around 9 hours.

The hp probook 430 g6 is an execllec laptop choice for students and small buinesses. Its battery life, upgradeability, lightweight and sturdy desgin are really impressive but its lets down by the dim display.

Guys if you want to check out other HP probook reviews I have done click the links now.

HP ProBook 430 G5 Unboxing FirstLook

HP ProBook 455 G6 AMD – Will it run Fortnight?

iPhone to Android data transfer 2019 with iCloud

HP ProBook 455 G6 AMD – Will it run Fortnight?

HP ProBook 455 G6 Unboxing

This video & article will show you an unboxing and fortnight benchmark of the HP ProBook 455 G6 Notebook.

HP ProBook 455 G6

The ProBook 455 G6 comes with an AMD Ryzen CPU and Radeon Vega GPU. When buying the notebook you can configure it with different versions of CPU and GPU. So if you are keen to do some gaming I would suggest trying to get the Radeon RX Vega 10 GPU included with your model. This means that you will be able to play games at a higher framerate which makes for smoother game play. The stock version which features in the video, comes with the Ryzen 5 2500U and Radeon Vega 8. This combo was a little slow when gaming in Fortnite and the benchmark. It means you might also struggle when doing video editing and CAD work.

HP ProBook 455 G6
HP ProBook 455 G6 laying flat – Good for sharing content.

Fold it down.

One of the really nice features about the ProBook 455 G6 is that the notebook folds down to 180 degrees. This is great if you are sitting around a table as it helps others see the screen without to much bother. Overall the notebook is designed very nicely and the case is made from silver plastic but it doesn’t feel cheap. The Keyboard is nice to type on and doesn’t bend. This click pad comes with multi touch gesture support however sometimes I struggle to find the left click. It feels like I have to put move my hand to far to the left to find it.

Work faster.

One thing I really like is the removal of having to hold down the FN “Function key” when turn the display brightness up and down. It just takes that extra step out of the equation which make sense because you use these buttons so much why not make them primary.

If you want to compare the HP ProBook 455 G6 with the other models we have reviewed check out the links below.

HP ProBook 430 G5 Unboxing FirstLook

HP ProBook 430 G4 Notebook – MacBook Killer?

ProBook 430 G6 – Coming soon – on YouTube now! 🙂

HP ProBook 430 G5 Unboxing FirstLook

HP ProBook 430 G5 Unboxing FirstLook

The HP ProBook 430 G5 is HP’s low cost answer to enterprise or education laptops.

The main difference between the HP ProBook 430 G5 and the HP ProBook 430 G4 is the CPU upgrade and some cosmetic changes to the outside of the laptop.
For me I preferred the silver plastic on the HP ProBook 430 G4 and if you want to see the 123myIT review on that model check it out here.

Probook 430 g5 top

The CPU is a 8th Generation Intel® Core™ i5-8250U Processor, up to 3.4 GHz with Intel®Turbo Boost Technology, 6 MB cache, 4 cores. This model also has a 256 GB M.2 SSD, this means that the computers overall performance will be much faster then the HP ProBook 430 G4. There is enough power in this laptop to do some video editing.
This laptop can play some games but not really recommended as it has an Intel® HD Graphics 620 built in graphics. If you are looking to play the latest games maybe try and get a Nvidia or AMD Graphics card in your laptop.

13.3″ diagonal HD anti-glare LED-backlit (1366 x 768)
8 GB DDR4-2133 SDRAM (1 x 8 GB)
256 GB M.2 SSD

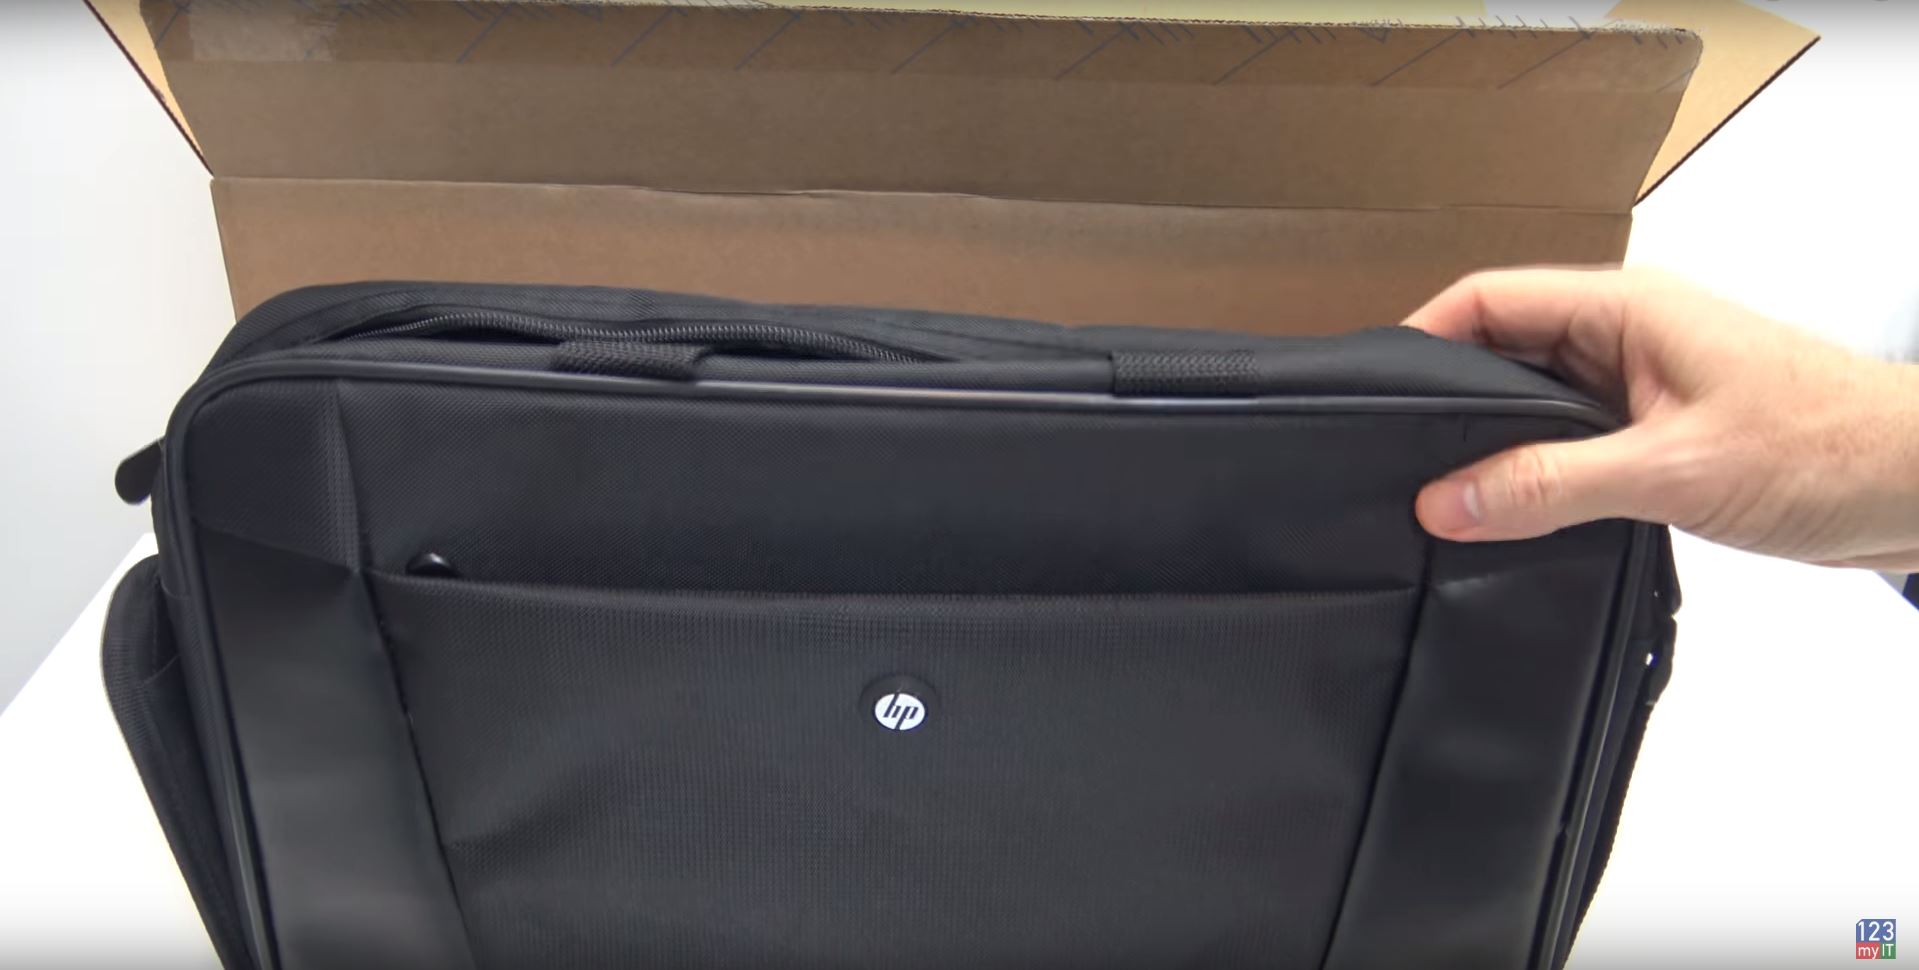
Prices for this model start $639USD and the model we got came with a free HP carry bag. So its a pretty good deal if you actually use the carry bag.

Probook 430 G5
○○○○○○ Want to buy this HP at Amazon ○○○○○○
►Amazon US – https://amzn.to/2PO4J63

One of the negatives to this laptop is the trackpad. I find that I am constantly missing the area for a right click. This means that when I want to right click I have to press the trackpad several times to find the right spot. While this is not a massive deal it is kind of frustrating and should be something that HP take note of moving forward with new laptops.
I hope you liked this video and that it helped out.

Best AMD RX 570 GPU for Mining Cryptocurrency

Best AMD RX 570 GPU for Mining Cryptocurrency

In this video I talk about the AMD RX 570 graphics cards and which brand I think is the best AMD RX 570. All cards will do a pretty good job at mining Ethereum at about 27 to 30 Mh/s however some cards are just better built easier to use and don’t get as hot.
The three different brands of RX 570 cards are Asus, Gigabyte and Sapphire.
Don’t forget to check out the best AMD rx 570 cards in action on my KraKen build.

Sapphire RX 570

Lets get straight into it, I have listed the pros and cons of the Sapphire cards below.
Pros
* Price around $329 usd
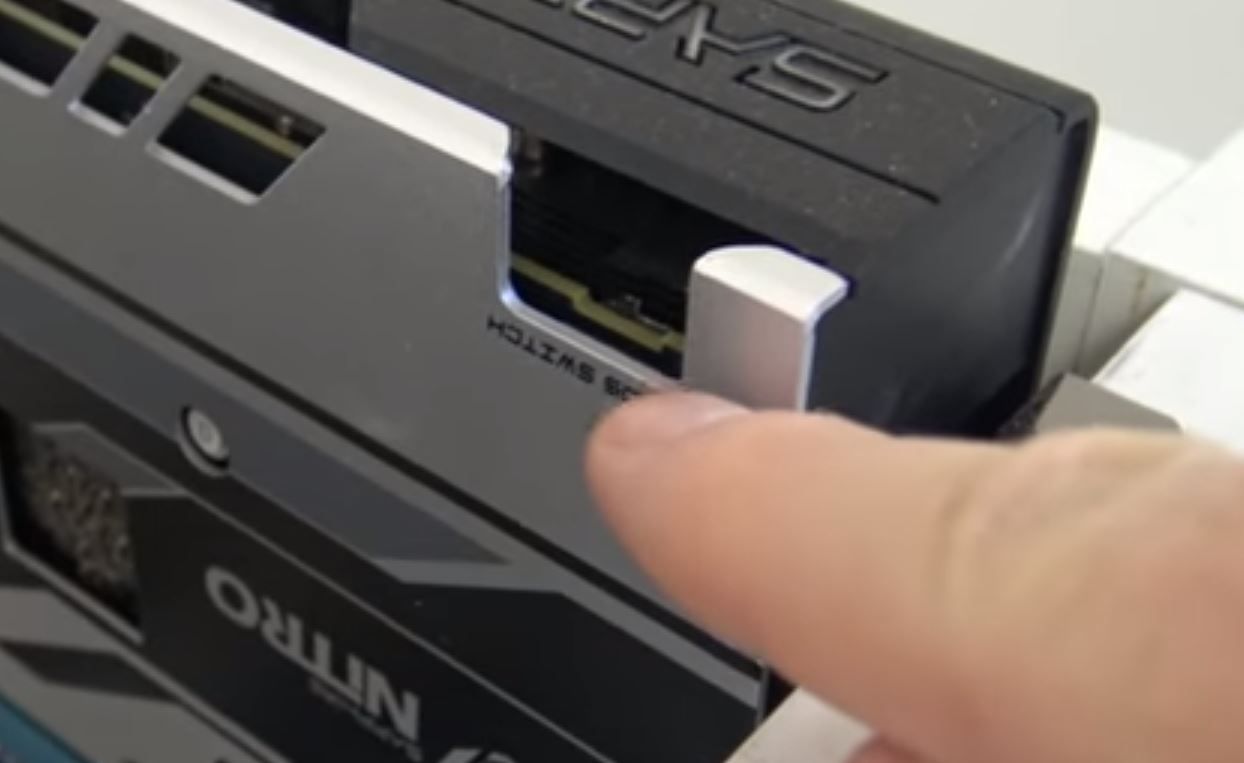
* Has a bios switch which allows you to switch between a gaming bios and a mining bios, really handy if you want to build a gaming / mining rig.
sapphire bios switch
* 2 x power ports 1 x 6 pin and 1 x 8 pin power ports. Handy for different power supplies.
* Save power by turning off the flashy lights. Can turn these lights off permanently without the need to install extra software.
* Cards come with a back plate good if you have cards sitting close together.
Cons
* The cards are big so you will need allot of room to store them. 26 cms long.
* Sapphire cards heat up a bit more than their rivals.
* a little less stable and a little less able to be overclocked.
* Tend to use a little bit more power

Asus RX 570

Pros
* Price around $379 usd
* Smaller than the Sapphire cards at 24 cms.
* Run a little bit more stable at higher clocks.
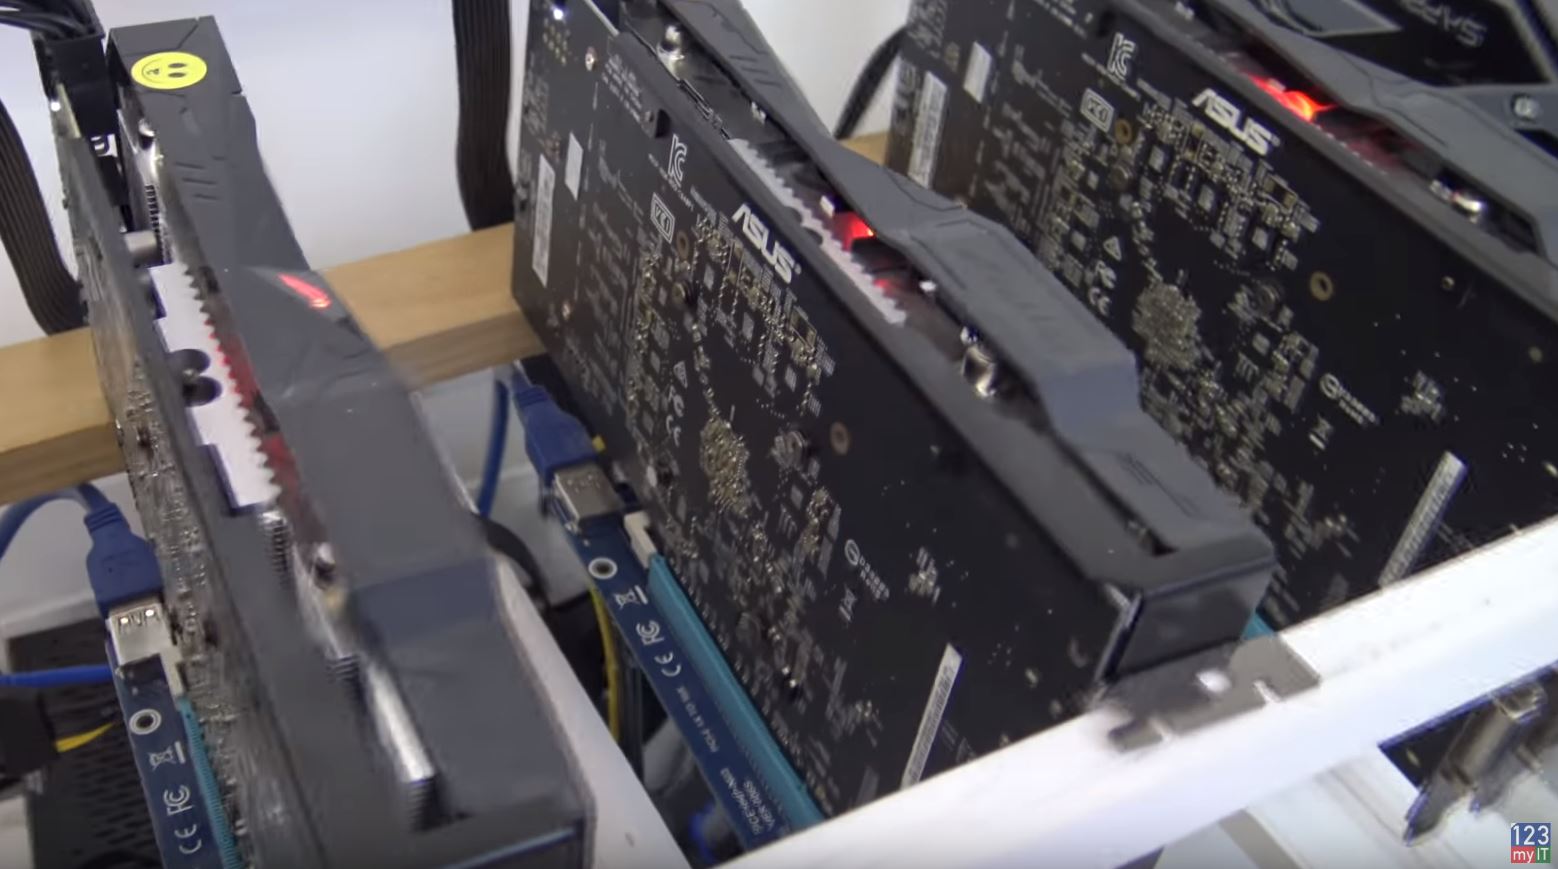
* No back plate so they wont heat up as much.
best AMD rx 570
* 1 x 8 pin power slot only. Comes with led though so you can see when the card is plugged in properly.
Cons
* The cards don’t come with a back plate. Can be annoying when installing or when you have cards sitting close together.
* 1 x 8 pin power slot only.
* Can’t turn the light off permanently without installing software.

Gigabyte RX 570

Pros
* Price around $279 usd
* Cheap price return on investment will be faster.
* Smaller than the Asus at 23 cms long.
* Has a back plate.
* Memory does over clock quite high.

Cons
* Gets hot! Can’t run to many of these cards together.

In the end the all the cards will do the job. However the best AMD rx 570 card would be the Asus. If you want to buy any of these cards and support 123myIT.com please use the licks below.
○○○○○○ Want to buy the parts at Amazon ○○○○○○
Recommened Best:
ASUS AMD RX 570 4GB https://amzn.to/2Lh9FiA
Others:
Gigabyte Aorus RX 570 4GB https://amzn.to/2GzpwVZ
Sapphire Nitro + RX 570 4GB https://amzn.to/2rUvI6u

Recommened Best:
ASUS AMD RX 580 https://amzn.to/2Lh9FiA
Others:
Gigabyte Aorus RX 580 https://amzn.to/2rXu0Bt
Sapphire Nitro + RX 580 https://amzn.to/2kbIw4k

Windows 10 Mining Rig Settings

Windows 10 Mining Rig Settings

In this video I show you how to setup a Windows 10 mining rig with all the correct settings to make sure you mining rig will run without a hitch. Windows 10 is a massive beast on its own and has allot of difference settings that do very different things. So it can be hard to find out exactly what settings are effecting which part of Windows. For example, you will need to turn off Windows Updates temporarily while otherwise I can restart your mining rog.

As always the first thing you need to do I get yourself a copy of Windows 10 and you can do that through the 123myit.com website under Downloads link at the top of the page or click here. On that page if you scroll down to where it says
Windows 10 Media Creator Tool 32 bit link here. Create Media Tool 32 Bit
Windows 10 Media Creator Tool 64 bit link here. Create Media Tool 64 Bit
And click on the link that suits you. Most people would go for Windows 64 bit these days.
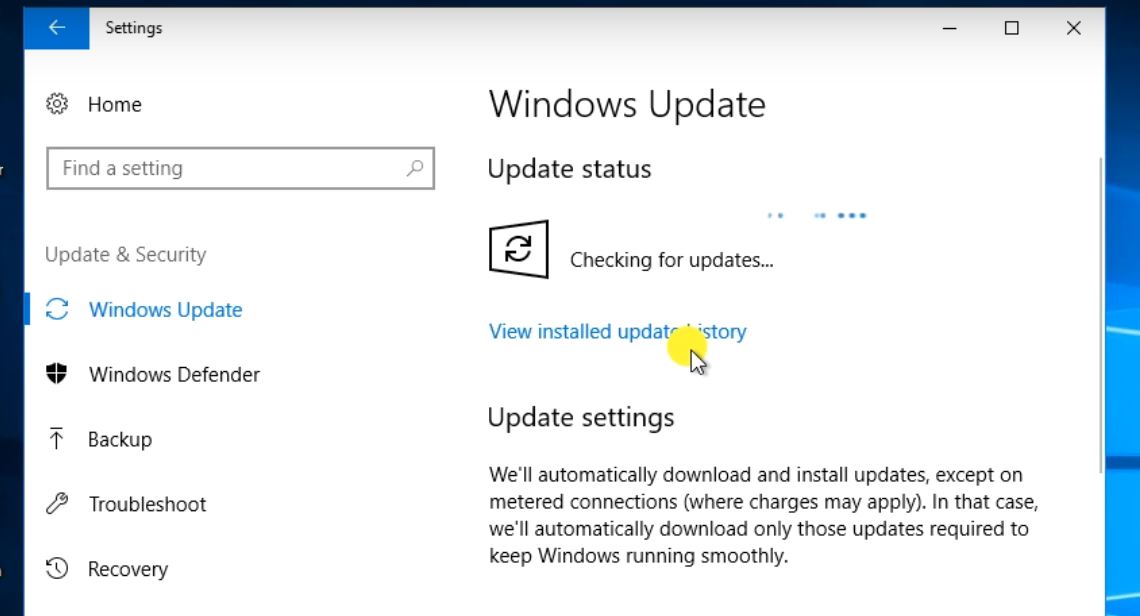
The next step you will need to do is make sure you run Windows updates. You can do this by going to Start > Settings > Update and Security.
Run those updates until Windows is fully up to date.

Windows 10 Mining

Once Windows 10 is updated go ahead and turn off the update service under services. You do this because when Microsoft push out new updates once a month the update can force your mining rig to restart. So disabling the updates makes sure you don’t wake up to your rigs that haven’t mined any cryptocurrency overnight. The important thing is to turn this back on every month and run the updates again then turn the service off again. This makes sure that your mining rig is still getting the updates but it not effecting your mining.

For more information on mining rigs please see the following link. https://support.microsoft.com/en-au/help/4027667/windows-update-windows-10

Enjoy the video guys.

Nvidia Mining Rig – The Gambler Build

Nvidia Mining Rig – The Gambler Build

This video will show you how I went about creating an Nvidia Mining Rig for my friend Phil. Phil likes to Gamble so I called this build The Gambler!
I have setup a full list of parts below if you wish to copy this build. And I have tried to add in some secondary parts list incase some parts are no longer available.
The Gambler build is very simular to my RX570 The Kraken build accept I swapped out the AMD RX 570 cards with Nvidia 1070s.
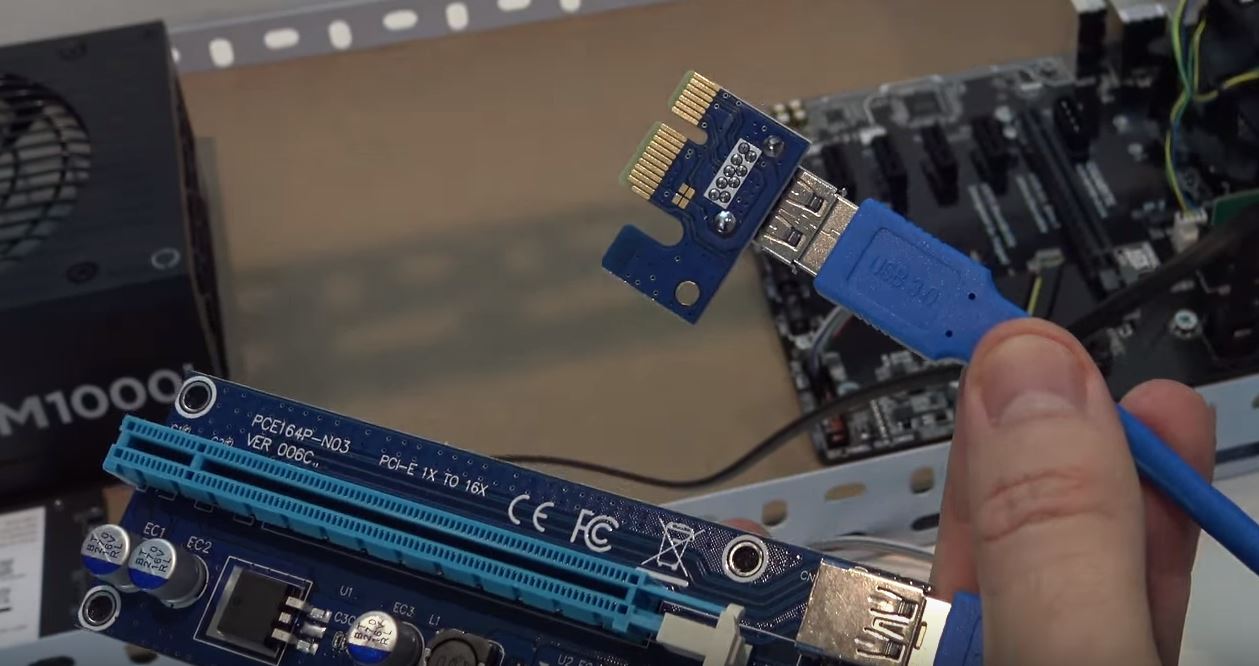
Through this video I also give some tips when building a new rig to do with troubleshooting setup and faulty risers.

Nvidia Mining Rig Riser

a faulty Riser can cause all sorts of issues with mining rigs. The more hardware you add the more chance of failure.

○○○○○○ Want to buy the parts at Amazon ○○○○○○
Gambler Mining Rig Build Parts see below.
► Gigabyte motherboard http://amzn.to/2ivOIUr
(Alternative) Biostar Motherboard
TB250 http://amzn.to/2CvCHVV
► Celeron CPU http://amzn.to/2iwek3v
(Alternative) i7 7700 Intel CPU http://amzn.to/2rgTRGM
i7 Can mine ETN as well.
► Corsair 1000 watts http://amzn.to/2HtzCts
(Alternative) EVGA Power supply http://amzn.to/2iwnIUz
► Crucial 8GB Memory http://amzn.to/2ivo6Tm
(Alternative) G.Skill Ripjaws Series
http://amzn.to/2Djz5aR
► Couldnt find the GALAX model on AMAZON so just grab any
card will do fine. http://amzn.to/2ECsUDz
(Alternative)
1080 TI http://amzn.to/2FPh4mp
1080 http://amzn.to/2DntBAa
1070 TI http://amzn.to/2FTNRa6
1070 http://amzn.to/2rlDt7K
1060 6gb http://amzn.to/2DvTTzl
1050 TI http://amzn.to/2Dlcdbe
RX VEGA http://amzn.to/2DMNkWT – 64
http://amzn.to/2DhNXGK – 56
RX580 http://amzn.to/2DQTeq5
RX560 http://amzn.to/2DMrNgS

► PCIE Riser cards http://amzn.to/2iv1nXK
(Alternative) Mailiya 2-Pack PCIe Risers Dual Chip
http://amzn.to/2BDyIKv
or
Rebbic Latest VER009S 2-Pack PCI-E 16x
http://amzn.to/2HqyXsH
► SSD SanDisk http://amzn.to/2Cx9IBq
(Alternative) Any 120gb will do. http://amzn.to/2Hq4hrD
► Frame if you need one. http://amzn.to/2CuqIrN
► Fans to Keep rig cool http://amzn.to/2Gmk759
► Power Button Cable for motherboard.
http://amzn.to/2FUGMpU
(Alternative) http://amzn.to/2sEkAgT
► Power meter http://amzn.to/2FQgW6l
(Alternative) TP LINK Smart Plug http://amzn.to/2Grlsb0
P3 P4400 Kill A Watt Electricity Usage Monitor
http://amzn.to/2BCiCR9
► PCIE M.2 Adapter Card http://amzn.to/2mOofTl
(Alternative) http://amzn.to/2C6lYNi
► Tripp Lite Heavy-Duty Power Extension Cord 15A
http://amzn.to/2CtRf8N