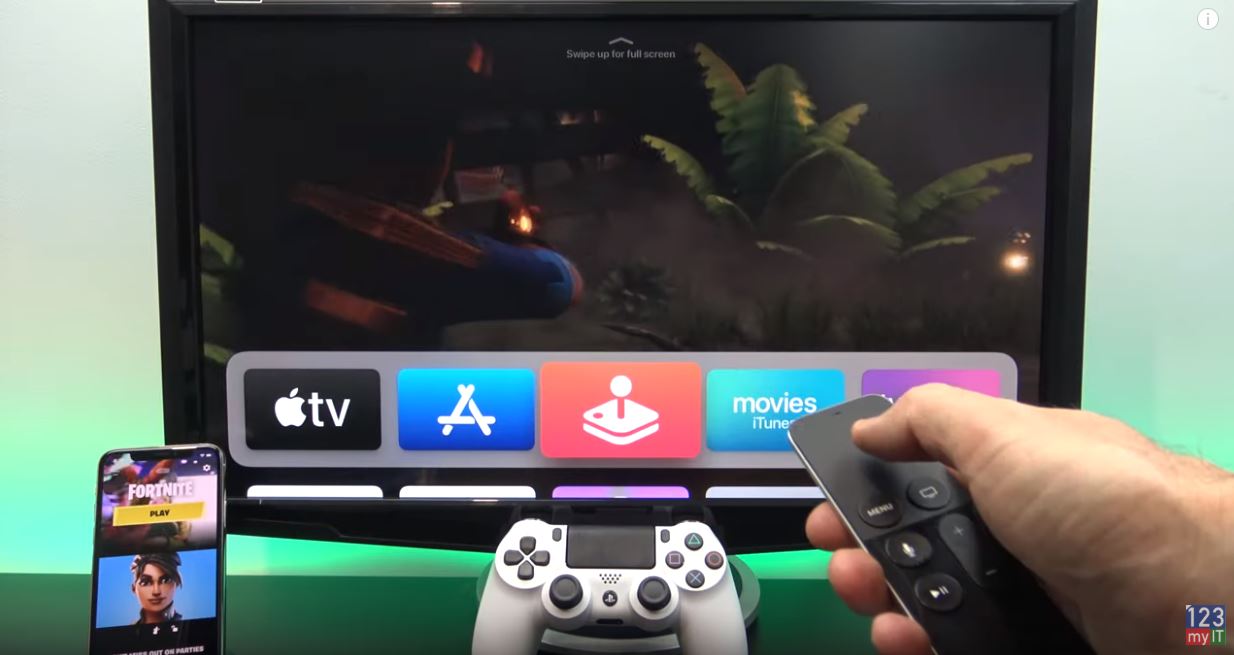
Apple MacBook Pro M1

Hi Guys and welcome to 123myIT. In this video, we will show you everything you need to know about the Apple MacBook Pro M1.

I have to say right of the bat, I am not a Mac fan. However, this MacBook Pro has me surprised and impressed.

Design of the MacBook Pro M1

On the outside, the design of the Apple MacBook Pro M1 has not changed from the previous model. However, the biggest change is on the inside of the Mac. It’s the M1 chip that is custom designed by Apple. Previously a Mac needed multiple chips to deliver its features. Now all those chips are in one Soc. Basically making it faster and more efficient.

The new chip allows the MacBook Pro to perform better and run longer on battery, than its Intel-based predecessors.

How much for the MacBook Pro M1?

Pricing for the MacBook Pro M1 starts around $1299 USD for the 256 GB SSD model and goes up to $2299 USD for the 2TB model. In addition, it comes in two difference colours Space Grey and Silver. After using the 256 GB model, I found the upgrade to 512 GB is probably worthwhile as I started having disk space issues after installing Fortnite game, which requires about 90 GB. I started to wish I had the extra space. So consider this when buying the MacBook Pro.
macbook pro m1
Fortnite taking up 90GB of hard disk space!

In the box, you will get Warranty and setup documentation. Along with Apple stickers. Also included is a 61 watt USB 4 power adapter. The MacBook draws 61 watts of power when charging. Moreover, you can expect to get around 20 hours of battery life. Which is just outstanding.

Display

Next, you will have the MacBook Pro itself. The MacBook Pro M1 comes with a 13.3-inch LED Backlit Retina Display with IPS technology. And it has a resolution of 2560 x 1600 with 500 nits of brightness. True Tone technology also adds a warmer more realistic colour to the display. In Terms of how heavy the MacBook Pro is its 3 pounds, which is slightly heavier than the MacBook Air on 2.8 pounds. In addition, regards to Dimensions its .61 inches high and 11.97 inches wide.

Connectivity Ports

On the left side, you have two Thunderbolt, USB 4 ports. I would have like to see three as one could be taken up with a power adapter. There is No Ethernet, so this model is WIFI only. The USB 4 doubles as a display port so if you have a USB 4 to HDMI adapter you can plug in an external display.

On the right side, you have a 3.5 Headphone Jack. Moreover, there is no SD card reader which I get it, you can buy an Apple Adapter if you need that. However, it does feel limited in terms of connectivity.

Audio

The MacBook Pro M1 has Stereo speakers with high dynamic range. They sit both side of the keyboard and are designed to point upwards towards your ears. The speakers have the best sound on any laptop I have heard so far. They are truly amazing. Take a listen. Let me know what you think in the comments below.

Touch Bar

Above the keyboard, you have the Touch Bar. This allows you to control whatever apps is on the screen. So for example, I can fast forward or rewind the YouTube song. Alternatively, if I wanted to turn the volume up and down.

The Backlit Magic keyboard is a delight to type on and does not bend when pressing the keys. And there is very little flex on the keyboard too. Which is nice.

The Force Touch trackpad is nice and wide and I never find myself missing a click or having to click twice.

Always On?

Another nice feature is the MacBook Pro has this always on feature when you open the lid. Just like your iPhone it’s on and ready to go. Along the top, you will find an integrated 720p FaceTime HD camera with an indicator light. I would like to see a button to manually close the webcam. It is a nice to have feature for the security conscious.

The overall build is excellent quality but the display hinge does not fold all the way back 180 degrees, however other laptops go all the way to 180 degrees, so it does feels a bit awkward.

Fortnite

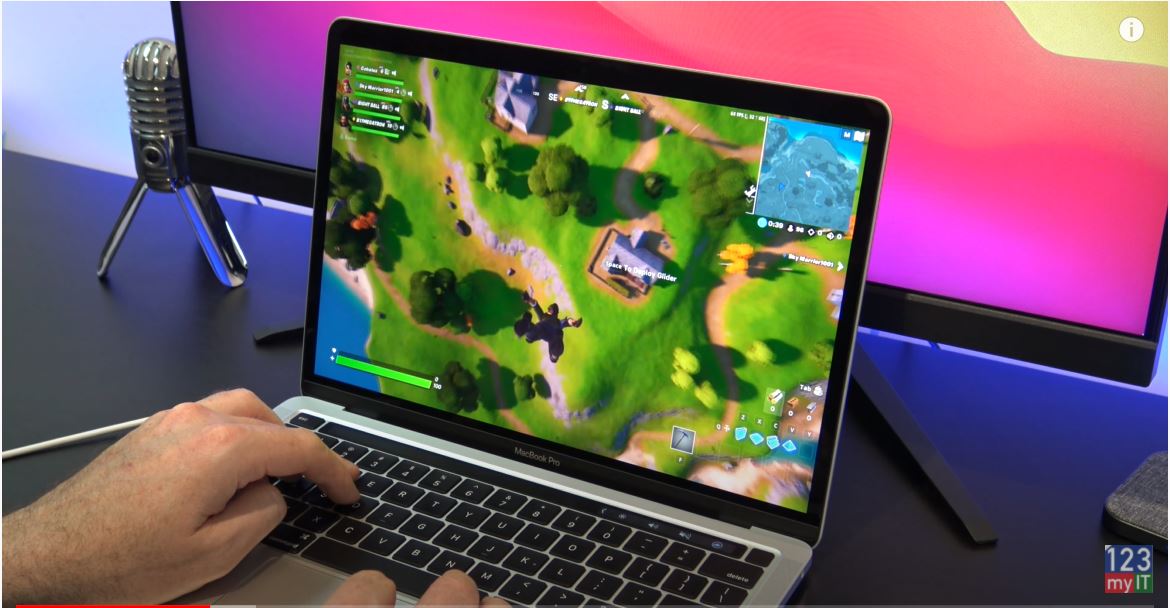
Now for the Amazing part, I was able to get FortNite to run really well giving up about 50 to 70 Frames per second on high settings. And when I dropped it back to low settings. I was getting 130 to 140 frames. So much better performance from the gaming side of things. Having said that FortNite did crash on my once. I am not sure if that was down the MacBook hardware being so new or a bug with the FortNite software itself. At any rate, a great result in terms of gaming performance.

Benchmarks

Cool, let us run the benchmarks quick and I will show you the fan noise. Starting the Cinebench software really works the MacBook Pro hard. You can hear the fan spinning its quite loud. To be fair though the room temperature was quite warm at 30o degrees. One thing to mention is the MacBook Pro does have a fan while the MacBook Air does not. So you won’t get any fan noise from the MacBook Air.

Heres the Cinebench multicore score which is 7795 points and if you look at the CPUs ranking its pretty good for a laptop.

Here is the Geekbench CPU score and the GPU score.

Let us run the GFXBench Metal tool. As you can see here the MacBook Pro M1 scored and average of 55.4 frames. So not outstanding but a good result.

Who should buy?

The MacBook Pro M1 is aimed for people who are doing allot of video editing or graphic design work. This laptop is amazing for that type of workload. Plus it’s very portable. For those that want to know if they should buy the MacBook Air or the MacBook Pro I would say that if you a student and just using learning some video editing or graphic design go the MacBook Air. IF you are a professional or semi-professional then go the MacBook Pro. However if you want to see the MacBook Air review and comparison then subscribe to my channel as I will have both of those videos coming up after this one.

Guys don’t forget to check out my other videos such as How to Backup Your Android Phone to Google Drive. And do me a favour if you know anyone who might need this video please share it will them, hit the subscribe button and smash the bell icon.

Set a Live Photo as your Wallpaper on your iPhone

Move from Android to iPhone

HP EliteBook 840 G7

Hi guys and welcome to 123myIT. In this video, we will show you everything you need to know about the HP EliteBook 840 G7.

The design of the HP EliteBook 840 G7 has changed somewhat from the previous model the HP EliteBook 840 G6. The biggest change is its thinner and lighter and this is mainly due to the reduced bezels around the screen.

This is 14-inch mid-range business laptop and it sits between the lower-end ProBook series and the high-end EliteBook 1000 series. And the only difference between the EliteBook 840 G7 and EliteBook 830 G7 is the screen size.

Pricing for the G7 starts around $1400 USD for the Intel i5 CPU and goes up to $1600 USD for the i7 CPU.

Inside the box – HP EliteBook 840 G7

In the box, you will get a gray HP laptop bag. Warranty and setup documentation. Along with a 65 watt USB C power adapter. The laptop uses around 7 to 31 watts of power. And you can expect to get around 11 hours of battery life. Charging the battery will take just under one and a half hours.

Next you will have the G7 itself. The 840 G7 comes with a 14 inch FHD LED Anti-Glare HD Display. With a resolution of 1920×1080 and 250 nit of brightness. Because the bezels are thinner the laptop footprint is smaller. So you are saving space on bezel overhang. Which is awesome.

HP EliteBook 840 G7
Testing Fortnite Frames Per Second.

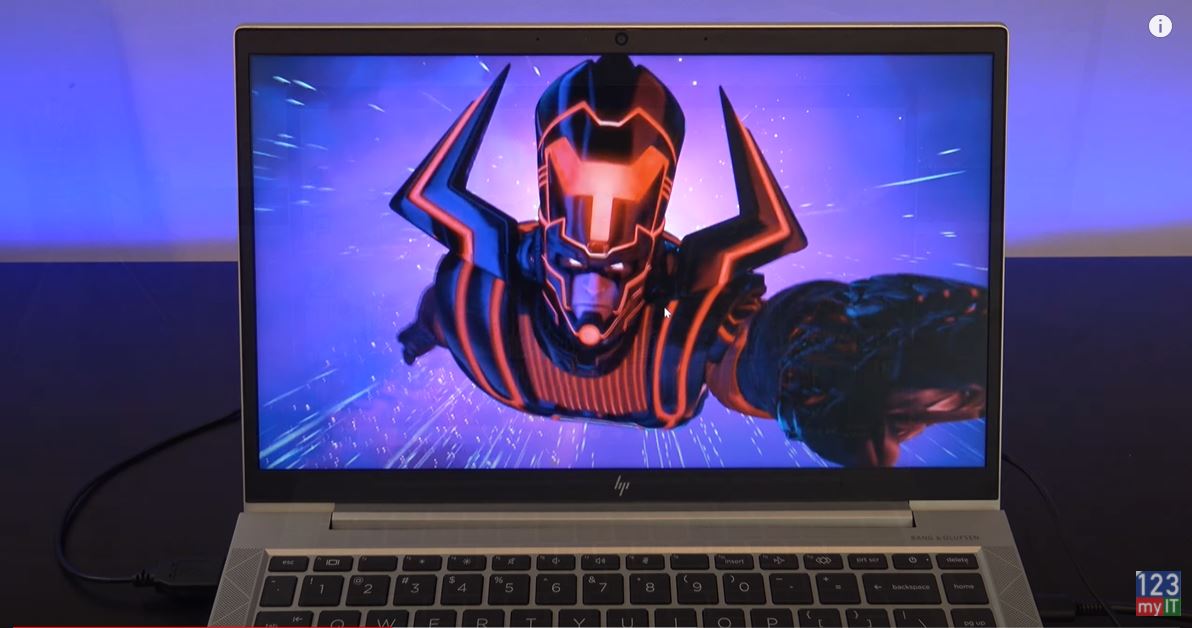
Out of the box, though I was able to get FortNite to run ok on giving up about 35 to 50 Frames per second. This would be mostly due to the Intel quad core i5 10th gen CPU and 8gb of ram as the Intel  GPU is not the best for gaming.

Finger Print Scanner – HP EliteBook 840 G7

The G7 does also have a finger print scanner. Thich allows you to unlock Windows with a touch of the button. Along the top, you will find an integrated HD 720pwebcam with dual microphone and indicator light. One of the cool things about the G7 design is you can close the camera off with a sliding button.

On the right side, you have the charging port, one HDMI 1.4 port, two USB C ports and a SIM card slot. No RJ45 Ethernet, so this model is WIFI only. You also have an indicator light to show when the laptop is being charged. The USB C doubles as a display port so if you have a USB C to HDMI adapter you can plug in an external display.

On the left, you have a Kensington lock, two USB 3 ports, Audio Jack and SC card reader. Annoyingly there is no SD card reader because of the size of the laptop.

Speakers – Bang & Olufsen

The 840 G7 comes with Bang & Olufsen-tuned speakers, they are designed to point upwards towards your ears. The speakers sounds pretty good but missing a little bass.

The Trackpad is nice and wide but I do find myself right clicking allot because to left click you need to press on the left side of the Trackpad. And for me it feels like the trackpad sits too far to the left.

This model comes with an extra right and left mouse button along with a rubber nipple which I know some people prefer over the Trackpad.

The keyboard is a delight to type on and does not bend when pressing the keys. Also the letters printed on the keys are bigger than normal which would be great for some users.

Build Quality

The overall build feels like good quality and display hinge folds all the way back 175 degrees, however other laptops go all the way to 180 degrees, so 175 feels a bit awkward.

 You can also upgrade the G7 by removing the screws from the bottom cover. The system supports 64 GB of RAM so you can upgrade that along with a 1TB NV Me SSD if you want. The WIFI has also been upgraded to WIFI 6.

Here’s the Geekbench CPU score and the GPU score.

If you are looking for a gaming laptop then you are better off looking for a laptop with the GeForce MX or Radeon RX GPU configured. While this laptop is small and easy to carry, I feel the lack of and SD card reader and other ports a bit of a letdown for me.

Guys don’t forget to check out my other videos such as How to use the Camera app One-Handed on iPhone. And do me a favour if you know anyone who might need this video please share it will them, hit the subscribe button and smash the bell icon.
Install Windows 10 on a Mac External Drive 2020

Apple iPad 8th Gen 2020

Install Windows 10 on a Mac External Drive 2020

Hi Guys, In this video, we will show you how to Windows 10 on a mac external drive SSD on your Mac. If you don’t have much hard disk space on your Mac or you just want to run Windows 10 games and Apps on your Mac then I am going to show the whole process, step by step and this is the end result.

What you will need – Windows 10 on a Mac External Drive

Ok so things you will need are an external SSD. I am using a Samsung 512GB SSD attached with a SATA to USB 3 Adapter you can get it off Amazon for $10. I will link it in the description below. You can also use a Seagate Hard drive and even an old laptop hard drive if you have one laying around.

If you have a newer Mac you can also get the USB C to Sata adapter, Amazon link below as well. Or you could just buy a new Samsung USB C SSD like this one.  

You might need a USB mouse and keyboard initially till you get the drivers working correctly and ill show you how to do that. Open Safari and go to the 123myit.com website and click on downloads.

Get your files from the Downloads Section

Scroll down to where it says Install Windows 10 on a Mac and click the first link download Windows 10. On that page in the drop down box select Windows 10 and confirm and choose your language in the second drop down box. Next click on 64 bit and that will download the Windows 10 iso file. The file is fairly big so it might take some time to download. Check it in your downloads. I’ve already downloaded these files so I will just cancel them.

Close that tab and download the WintoUSB file. Again close that tab and download the VMware fusion. Ok so you should see all three downloads in the downloads folder. The next step is to download Windows Support folder. So Quit Safari and go into finder and search for bootcamp. Start up bootcamp and on the Action menu at the top click download Windows support software.  Just change the where menu to Downloads. That way all your downloads are in the same spot. Ok now it’s time to plug in your windows 10 on a mac external drive or external hard drive.

Just make sure you have no data in the SSD that you need as the next step will delete any data on that external drive. Close the drive and click on Go, Utilities and the Disk Utility. Highlight your external drive and click Erase. Rename it as BootCamp and change the format to MS Dos Fat. This will make it recognisable in Windows. Click don’t use and Done. And then close Disk Utility.

VMWare

Next we want to run the VMware installer file we downloaded earlier. So click Go and Download and open up the VMware installer file. If you get this message saying the VMware file can’t be opened go to System Prefs, Open up Security & Privacy, click on the General tab unlock your pad lock enter your password and click on Open Anyway. Click open and close the Security & Privacy window. Double click to Install VMware. Click open. Type in your password. Click open. Agree to the terms. Put a dot in the, I want to Try VMware fusion. You can use the software for 30 days which is more than we need. However if you like the software you can always buy it. Click ok and Ok again. Open System preferences and unlock your pad lock and give VMware the access it needs.

It wants to install from disk or image. So click go and downloads and drag the Windows 10 iso file you downloaded earlier to the VMware menu. And then click continue to proceed. You are setting up a new Virtual Machine here so you need to click the drop down menu and select Windows 10 Home. Click continue and continue without a key. Click More Isolated. Now you can click Finish now or if you want to customise the Virtual Machine click customise settings. Then click Save.

Customise your Virtual Machine

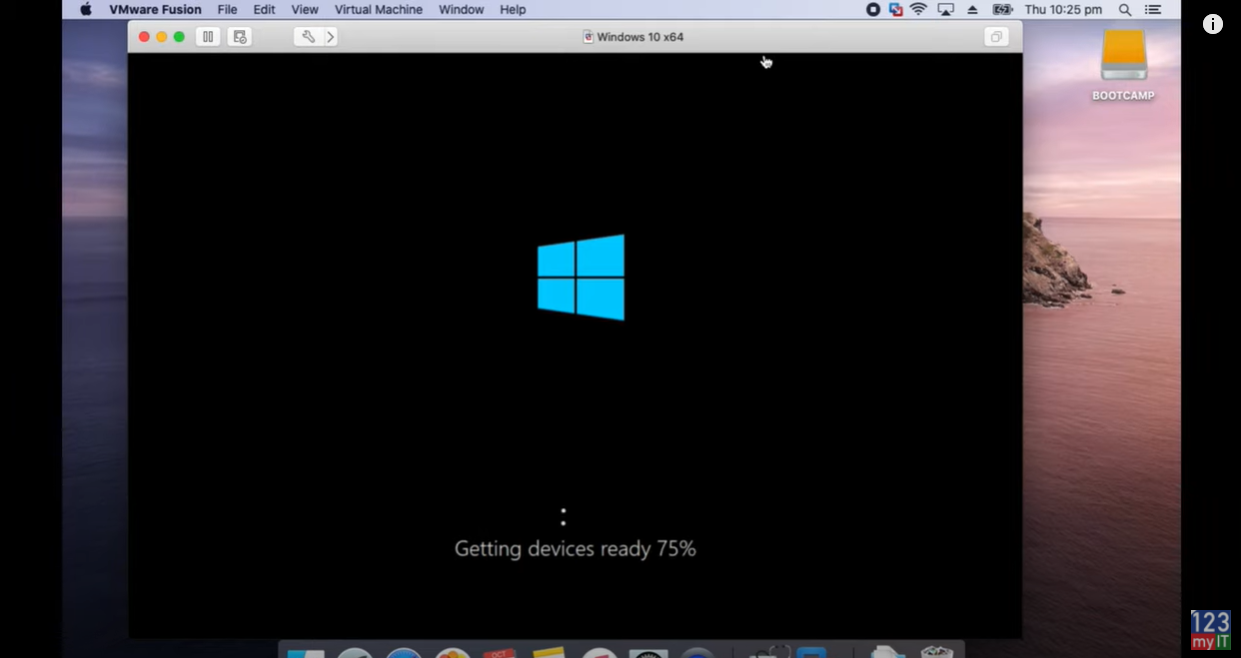
Ok to customise the install click on Processors and Memory. I am going to give it a little bit more memory. From 2GB to 4GB. That should be enough. Alright you can close that window now and click play to start Windows. If you get the broken pipe errors go Quit VMback into System preferences Security & Privacy, General tab and click allow again. Click ok. Close your padlock. Restart VMware. Press play again and it should start your Windows install now. Awesome that’s going to take a while I will speed up the install here. This is not installing Windows 10 on your external drive just yet. We are setting up a Virtual Machine which will allow you to install Windows on the external drive.

windows 10 on a mac external drive
Using VMware to create a Virtual Machine.

Ok so Windows has finished installing. Click on the Go menu then click downloads and copy the WintoUSB and Windows Support folder onto your Windows desktop. I could drag the WinToUSB file. But I had to right click copy and paste the WindowsSupport folder to get it to copy across.

Connecting the SSD

Now let’s connect our External SSD to our Windows Virtual Machine. You want to go up to Virtual Machine USB & Bluetooth, find your BootCamp drive and add it. Therefore, it’s gone now on your Mac side and there it is on the Windows side now. Now go back to Virtual Machine click CD/DVD and then choose disk or image. And then choose your Windows 10 iso file. Click open. Then go back to Virtual Machine select CD DVD and Connect CD DVD. It should also pop up.

Ok so all the ground work is done its time to create the Windows 10 external drive. And the Windows support folder has just finished coping. Next thing you want to do is double click on the WintoUsb executable and follow the install prompts. So click yes. English Ok. Accept the agreement. And then next next install.

If you get Microsoft Edge popping up just close it. It doesn’t it a few times. Now you want to launch WinToUsb the shortcut with the little arrow. Click your CD DVD drive and in the drop down menu select your Windows disc. And then choose Windows 10 home click next. And then select your destination. So this will be your external drive.

Older and Newer Macs – Audio and drivers not working.

Ok heres an important bit. If you have an older Mac like mine select MBR for Bios if you have a newer Mac select GPT for UEFI. If you select the wrong option here when you start your Mac your Audio might not work. Don’t worry simply come back to this step and select the correct method for your Mac. I will select the wrong option for my Mac to show you what it does.

Ok this part shows you how your external drive will be partitioned. No changes here just hit next to start. This part will take a long time especially if you have an older sata drive. This will take at least 15 mins or more this process will install Windows 10 on your external drive and you will be able to boot into that drive shortly. Once that is complete just hit Exit and yes to quit.  Alright open up Windows Explorer and click on the newly created WinToUSB drive and you want to drag the Windows Support folder into that drive.

Once that’s copied you can shut down your Virtual Machine. Because you are done here.  So Restart your Mac and you want to hold down the Alt Option Key when you Mac starts up. This is so you can select the external drive to boot. If you are on a newer Mac you can use the Command R to access the start up security utility. Once that starts up go into Utilities and Startup Security Utility. If you are on a Newer Mac you might have to enter a password here. Otherwise on an older Macs just close that menu. On Newer Macs select the No Security check box and also the Allow booting from external media. This will allow you to boot to your external Windows drive.

Startup Disk – Windows 10 on a mac external drive

Alright click close on MacOS Utility’s window and select Choose Startup Disk. You can see our SSD drive starting to flash it the background.  Go ahead and select your WinToUsb external drive. And this will set the external drive to boot into by default.

If for some reason it doesn’t boot restart your Mac and hold down the Alt option key. And go ahead and select your external usb drive from the menu. It should then start booting into Windows for the first time. Select your Region and follow the setup prompts. If your Trackpad doesn’t work try using the USB Mouse and Keyboard I mentioned at the start of the video. If your keyboard is not working you can open up the on screen keyboard by click the icon in the bottom left of the screen. I don’t need a password and we are going to turn all this stuff off. You don’t need that.

Ok cool we are now running windows from an external drive. The next step is to get the Windows driver installed. You can do this by opening up Windows explorer and going to your WintoUsb C drive. Go into the Windows support folder. Go into the Bootcamp folder and run the setup file. The just follow the prompts and restart Windows. If you open up device manager you can see the drivers being installed. Go ahead and click finish and restart.

Checking the Device Manager

When you are back up open your device manager again and check any drivers that have not installed properly. You can see the audio driver has not installed correctly. Let add our WIFI password first. Ok if we right click and Update driver and if that doesn’t work we can run the Windows updates. So just click check for updates. This will take some time. Click restart now. Ok once you have done the updates and restarted. Check to see if your keyboard buttons all work on the Mac. So I test the display brightness, Audio Volume and Keyboard brightness. You can see here the Audio is still not working so there are two more things you can do to get this working.

Open up device manager again. Go back to your Audio device right click it and update driver, click on browse my computer for drivers and then click the browse button. And navigate to your Windows Support folder on the C drive. Click on the WInPEdriver folder and then click ok and next and do this for any other drivers.

If you still have drivers that aren’t working go into the Start menu and right at the top you should have Apple Software update. Click that. So its gunna search the web and find any updates that are necessary.  It will ask you to restart go ahead and do that.

Issues with sound Troubleshooting – windows 10 on a mac external drive

If you are still having issues with your sound then you have an older Mac and should have selected the MBR for Bios option when setting up the external drive. So head back to the 10 min mark of the video.

Here’s a tip as well. If you selected GPT for UEFI then you will have a EFI boot drive. If you have selected MBR for Bios then you will have a Windows boot drive.

Cool ok we have restarted now and if you check your buttons should all be working and if you check device manager you shouldn’t have any outstanding drivers to install.

Awesome so you are ready to go you can install Windows games and apps on your external SSD and let the fun begin. You can also setup an Xbox controller to play games with. You have finished installing windows 10 on a mac external drive.

Also guys don’t forget to check out my other videos such as Apple iPad 8th Gen 2020. And do me a favour if you know anyone who might need this video please share it will them, hit the subscribe button and smash the bell icon.
Transfer Data Huawei to iPhone

Apple’s September 2020 event in 10 minutes

HP ProBook 430 G7 in 3 Minutes

Hi guys and welcome to 123myIT. In this video, we will show you everything you need to know about the HP ProBook 430 G7 in three minutes.

HP ProBook 430 G7 Overview

The design of the ProBook 430 G7 is the same as the previous model the HP ProBook 430 G6. I did a review on the G6 and you can compare the two by using the link above. Personally, I think that HP have the design of the G6 and G7 right so this is probably why they have not changed it.

Pricing for the G7 starts at $792 USD for the Intel i3 CPU and goes up to $1118 USD for the i7 CPU.

Battery Life

In the box, you will get a black HP laptop bag. Warranty and setup documentation. Along with a 45 watt power adapter. The laptop uses around 31 watts of power, which is good. However, the battery life is not so great and will last around seven hours and take almost two hours to fully charge.

Next you will have the Hp ProBook G7 itself. The G7 comes with a 13.3 inch LED SVA Anti-Glare HD Display. With a resolution of 1366×768 and 220 nit of brightness. It is a TN Panel and while movies look ok you can configure the laptop with a higher res IPS panel when you buy it. However, the response time is not great so it not designed as a gaming laptop.

Will it run FortNite

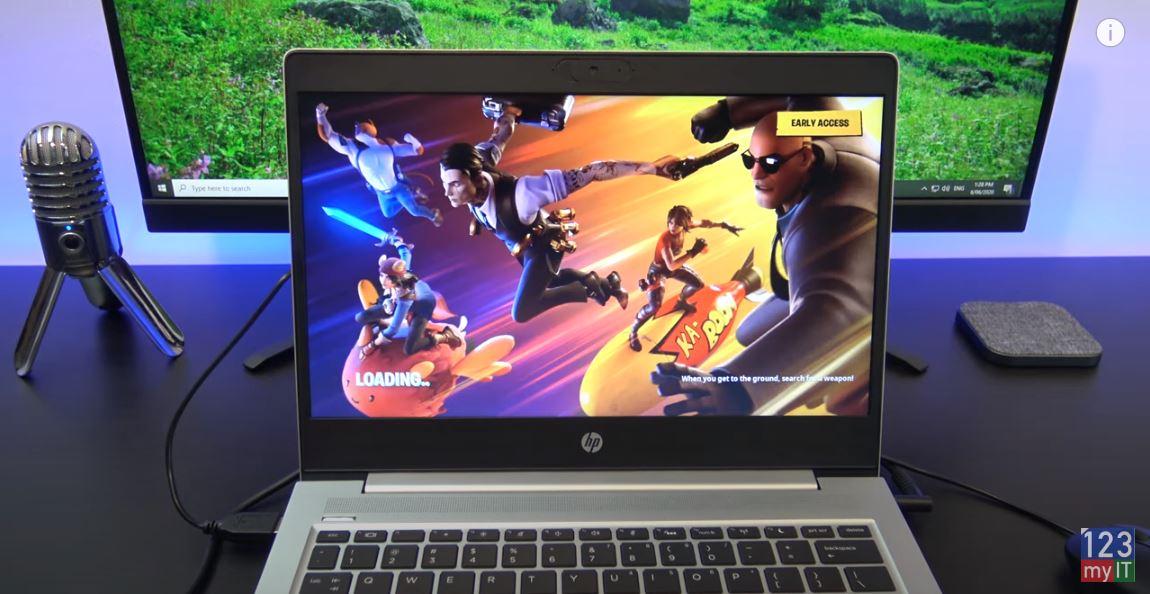
Out of the box, though I was able to get FortNite to run ok on giving up about 35 to 50 Frames per second. This would be mostly due to the Intel quad core i5 Comet Lake CPU and 8gb of ram as the Intel 620 GPU has no memory and is kind of old now.

hp probook 430 g7
HP ProBook 430 G7 Runs FortNite

Finger Print Scanner and G7 Hardware

The G7 does also have a finger print scanner, which allows you to unlock Windows with a touch of the button. Along the top, you will find a integrated HD 720pwebcam with dual microphone and indicator light. One of the cool things about the G7 design is you can close the camera off with a sliding button. On the right side, you have the charging port, USB C port. RJ45 Ethernet, HDMI port, USB 3 port and Audio combo.

You also have an indicator light to show when the laptop is being charged. The USB C doubles as a display port so if you have a USB C to HDMI adapter you can plug in an external display. On the left, you have a Kensington lock, USB 3 and SD card reader. The SD card sits flush in the laptop so you can use this port to upgrade the storage without opening the case.

Sound

The ProBook 430 G7 speakers are pretty good. They are not too loud and missing some base, but otherwise sound pretty good. The Trackpad is nice and wide but I do find myself right clicking allot. Because to left click you need to press on the left side of the Trackpad.

Keyboard

The keyboard is a delight to type on and does not bend when typing. The keys are also backlit and have off, on bright and brighter setting. The overall build feels like good quality and display hinge folds all the way back 180 degrees. You can also upgrade the G7 by removing the screws from the bottom cover. The system supports 32gb of RAM. So you can upgrade that along with a spot to add another SSD if you want. The WIFI has also been upgraded to WIFI 6.

Benchmark

Here’s the Geekbench CPU score and the GPU score. If you are looking for a gaming laptop then you are better off looking for a laptop with the NVidia MX GPU. However if you are after a light cheapish laptop to browse the web and check email then the G7 is a good option.

Guys don’t forget to check out my other videos such as Transfer data Android to Android 2020. And do me a favour if you know anyone who might need this video please share it will them, hit the subscribe button and smash the bell icon.
Change Bixby Side Button on Samsung

Make your Phone Number Private on Android in 2020

Aorus KD25F Gaming Monitor – Cheating Stream Snipers Paradise

Hi Guys and welcome to 123, in this video I will show you how to an unboxing and first look at the Aorus KD25F Gaming Monitor.

Check out the KD25F on Amazon here 👉 https://amzn.to/2Pd7K2F

The Aorus KD25F is a 24.5 inch 240hz Gaming monitor with a 0.5ms response time. Its also  Gsync and Free sync compatible. The KD25F retails for around $400 usd and $750 aussie at the time of this video. Other features include LED Fusion lighting, Aim Stablizer and what I consider the best feature of them all OSD SideKick. Lets take a look what you get inside the box.

You get three different power plugs. So it looks to be a Chinese power plug, an Australian New Zealand power plug and a US power plug. Next we have display port 1.2 and a HDMI 2.0 cable. Its nice that you get one of each. In some monitors you will only receive one cable. And last up we have a USB 3.0 cable which powers the USB hub and OSD SideKick software.

A monitor in this price range should come with a really good stand. And the Aorus KD25F monitor doesn’t disappoint with a really solid base to the stand. More about this later in the video. Its looks a bit like a boomerang.

Next up is the arm that connects to the monitor to the base. Taking the monitor out of the box you can see it has a Energy rating of 4 stars and while on the Gigabyte website it says it uses 60 watts on average it uses about 21 watts. Which is actually pretty good for a gaming monitor.

Also in the box you get the installation guide and warranty card.

The Stand

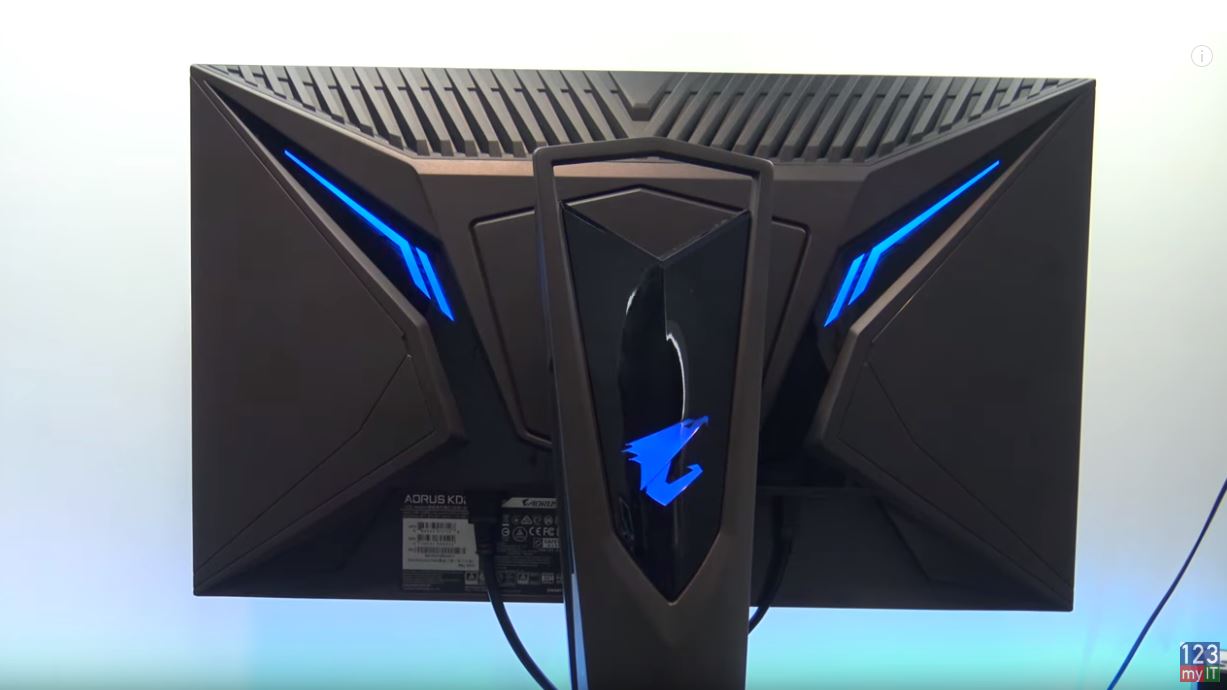
The stand is solid as and the arm and base just slot it together. After this just tighten the screw on the base. On the back of the monitor you have a power plug with an on off switch and a Kensington lock.  You also have a toggle switch to navigate the monitor OSD which is really helpful when navigating the menus. Above that Audio and Microphone jacks. Two HDMI posts, one Display Port port! USB 3 in port and two USB 3 out ports.

On the back of the monitor itself you will find 4 screws which means the monitor has VESA wall mounting support. Helpful if you want to change stands. The stand snaps into place nicely and there is a quality feel to it. There was talk on the internet about the stand being flimsy and wolling allot and it does move when I shake like this. However after testing the monitor for about a week I didn’t find it to be an issue at all.

Once setup the monitor take up about 21 cms of desk space. This means if you have a small desk it like I do. It will sit off the wall about 21 cms. Its not a deal breaker but just something to be aware of.

Rotate the Stand

The stand not only looks great but it allow you to ajust the height. Also the pivot the monitor 90 degrees. Tilts up and down. And it can swivel 20 degrees side to side.

Aorus KD25F Monitor
Wings of excellence design

The stand has the Aorus Wings of Excellence design which looks cool. But in my opinion it lacks functionality. You can change the colour of the LEDS on the back of the Aorus KD25F monitor and the stand however they are very bright and most of the time you wont see them so they are a complete waste of time. If they were brighter you could shine them on a wall behind the monitor like I have done with my LEDs and it would make for an excellent gaming experience. The stand also has a nice built in handle, which is handy if you need to carry it.

Iam going to spend a bit of time going through the OSD SideKick because I think its really cool.

AORUS OSD Side Kick
OSD Side Kick Software – Allows greater control of Monitor settings.

OSD Side Kick – Best Feature !

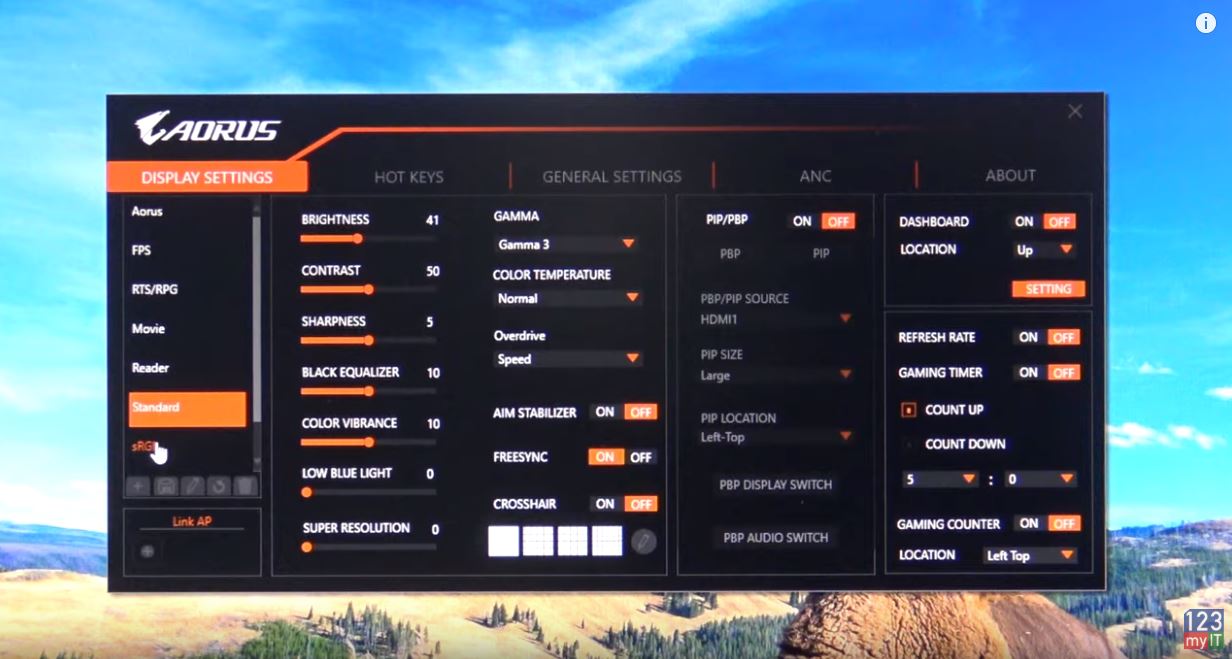
The OSD sidekick software allows you to control the settings of you monitor with your mouse. You need to plug the USB into your computer for it to work but it has some great features.

The first thing you will notice the Aorus KD25F monitor is really bright, to the point of where its hard to look at. So in the OSD there is a set of seven profiles. Each of these profiles give you different settings such as Brightness, Contrast, Sharpness, Black Equalizer, Colour Vibrance, Low Blue Light and super resolution. This means you can set a really bright profile for gaming and then another low light profile for browsing the internet or working. Then you can bind these profiles to a Hot Key so you can change them on the fly. Here you can see change a few settings within the Aorus profile.

Next up we have the Gamma setting which you can change as well as the colour temperature. However, the one I want to talk about most if the Overdrive setting. The Overdrive setting controls the response time of your monitor, which is very important for RTS and First Person shooter games. You have three settings Quality, Balanced and Speed. Quality is over drive turn off and it’s the slowest setting. It has an average Gray to Gray of 5.5 ms and no overshoot. The Balanced setting has a faster response time of 3.1 ms Gray to Gray and still no overshoot so this is a great setting to use for that balance between speed and quality. Speed mode is the fastest with an average of 1.5 ms gray to gray. However you will start to see some overshoot errors and ghosting with this mode.

Ok so the next setting is Aim Stabilizer, this reduced the motion blur in fast moving games. However you cant use this feature with the FreeSync function enabled. And to be honest I couldn’t see any difference with this on.

FreeSync and G Sync

Turning on the FreeSync option will turn FreeSync or G Sync on depending on if you have AMD or NVidia graphics card. When this option is turned on it eliminates screen lag and tearing whilc playing games.

The Cross Hair option is borderline cheating. Turning this on will allow you to paint anything in the middle of the screen. So if I click on the edit button and paint a crosshair or anything else this gives an advantage over other players for sure. I was surprised how easy it was to make good Crosshairs.

PIP and PBP. This setting allows you to create a picture inside your picture or make two pictures beside each other. Lets take a look. As you can see here I now have my laptop and monitor computer screen side by side. Now the settings is picture in picture and I can change the size and the location of the picture. You can also swap your pictures around and bring the small picture to the front and large picture to the back.

Cheating Possible with the Aorus KD25F Monitor

I racked my brain thinking how this technology could be used and then it hit me. If you are a stream sniper you could use this to follow someone’s stream at play your own game. Then I realised you could watch a team mates stream and you might be able to see what enemy players are. It would be delayed slightly but still helpful!!! Again great from cheating. J

Dashboard is pretty cool. Lets say you want to keep an eye on the temperature of your CPU or GPU you can do it through the dashboard. It makes a little display which you can make it see through so it doesn’t get in the way. It’s a nice feature. Just turn off what you don’t need. For me the CPU and GPU temps were pretty helpful.

Cancel Noise

You can turn the LED indicator on and off on the monitor. Not a big deal, but I also wanted to show you that there is a mic pin hole just above it which works with the noise cancelling feature.

There is also a noise cancelling feature which people on the internet said it would be good for when you take your computer to a lan party. But I was thinking it would probably be best for those of us who intend on getting on discord with loud clacky keys. Hopefully this feature would filter out allot of that background noise.

Here is some footage of the Crosshairs in action! I will be selling the 123 crosshair on my website. Just kidding J And here is the default crosshair. Its pretty good.

Also guys don’t forget to check out my other video such as The Witcher Media PC Build. And do me a favour hit the subscribe button and smash the bell icon.
Setup XBOX controller on Apple TV, iPad or iPhone + Games

Setup DUALSHOCK 4 controller on Apple TV, iPad or iPhone

Media PC Build – The Witcher

The Witcher 3 PC Build.

If you did not know already, The Witcher is Netflix series, which is due to be released on the 20th of December. Before that, it was a series of books written by Andrzej Sapkowski. In 2015, The Witcher 3 game was released and it won numerous Game of the year awards. This was one game that I felt like I missed out on playing, so when I found out that the Witcher 3 supports XBOX controller on the PC. I decided to build a media pc complete with an XBOX controller.

In this build, I repurpose an OLD HP Z800 which featured in a Cryptocurrency CPU build I did. And I will be reusing an RX 570 card which I used in the Kraken mining rig build. I will put a link to that video as well.

All right let get started.

If we take, a look at the specs needed to run the Witcher in the z800 we have 12 GB of ram and duel Xeon X5660s which is more than enough and adding the rx570 should give us a great result for a media pc build.

Media PC Build
AMD RX 570 GPU install.

First up let’s remove the Nvidia Quadro 4000 card. Remove the 6 pin power plug first. You might have noticed I did not use the GPU clip, which unlocks the card from the motherboard. That is because I’ve modified the clip and when I say modified I really mean I broke it. I did this because I found the clip annoying when adding and removing cards.

Install the GPU RX 570

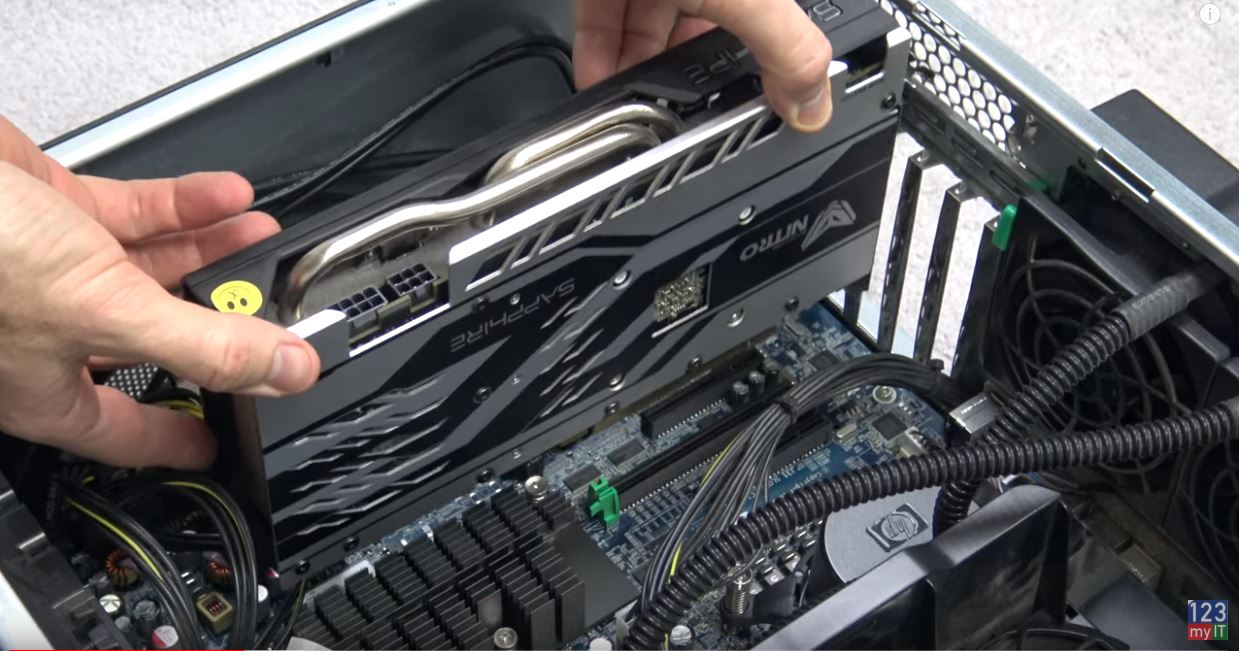
Let’s remove the Sapphire RX 570 from the Kraken mining rig by removing the 8 pin power cable. As well as removing the PCIE connector from the bottom. The Sapphire RX 570 cards are great for mining and gaming and heres why. They have a dual bios switch, which means you can have one bios for Mining and one bios for Gaming. So I just switch the bios switch over and start gaming with it. I do not have to flash the bios or anything messy like that.

As you can see she’s a bit dirty, so let’s give her a quick clean up before we move her into the case.

Alright let’s add the GPU to the case. Pretty straight forward. Just add the card in the same spot we removed the Quadro 4000 card from.

The Z800 only comes with 6 pin power connectors. So we need to add a 6 pin to 8 pin power connector. You can get these cheap online.

Make it power efficient as possible.

I am going to remove the SATA hard drives and replace them with a faster SSD. You could keep these in if you wanted extra storage for games or movies, but I do not need it and they will just waste power being plugged in.

The SSD I am going with is a Kingston brand and I could slot it into the same spot as the SATA hard drive, however it will not have any support there so I am going to gerry rig it inside the case.

Add in a new SATA cable and give it some power. And then I just find a spot to wedge it in the drive bay area and it’s good to go. Plug the SSD into the motherboard on bay 0. Remove the power from the DVD drive since I am not going to be using that.

Close the case and hopefully we are done on the inside of the build. Next up plug in power keyboard and mouse into the media pc build.

Install Windows 10

To install Windows 10 I’ve got an installer copy on this Seagate USB hard drive. Newer USBs do not seem to detect properly on this older computer. Do not forget our HDMI cable for our monitor. To boot into bios or boot menu. On your keyboard you might have tap F2 Delete or in this case of the Z800 you press F9. Once you are in the boot menu select the USB device. Then go ahead and install Windows. When windows finishes installing remove your USB hard drive.

Check that your RX 570 card is correctly installed. This is important if they were used for Cryptocurrency as they will show up with a yellow exclamation mark next to them and your game will be slow or not even load. Make sure your driver date is on the money as you can see here mine is recent so we are good to go. This next addition is what will really make the build shine. We are going to add in the XBOX controller. The Beauty of the XBOX controller is when family or friends come over to your house and they are a bit bored, you throw them an XBOX controller and they are instantly entertained.

XBOX Controller working?

All right plug in your XBOX USB and let it detect in Windows. Go ahead and pair your controller it, the USB should flash when successful.

The Witcher build going live!

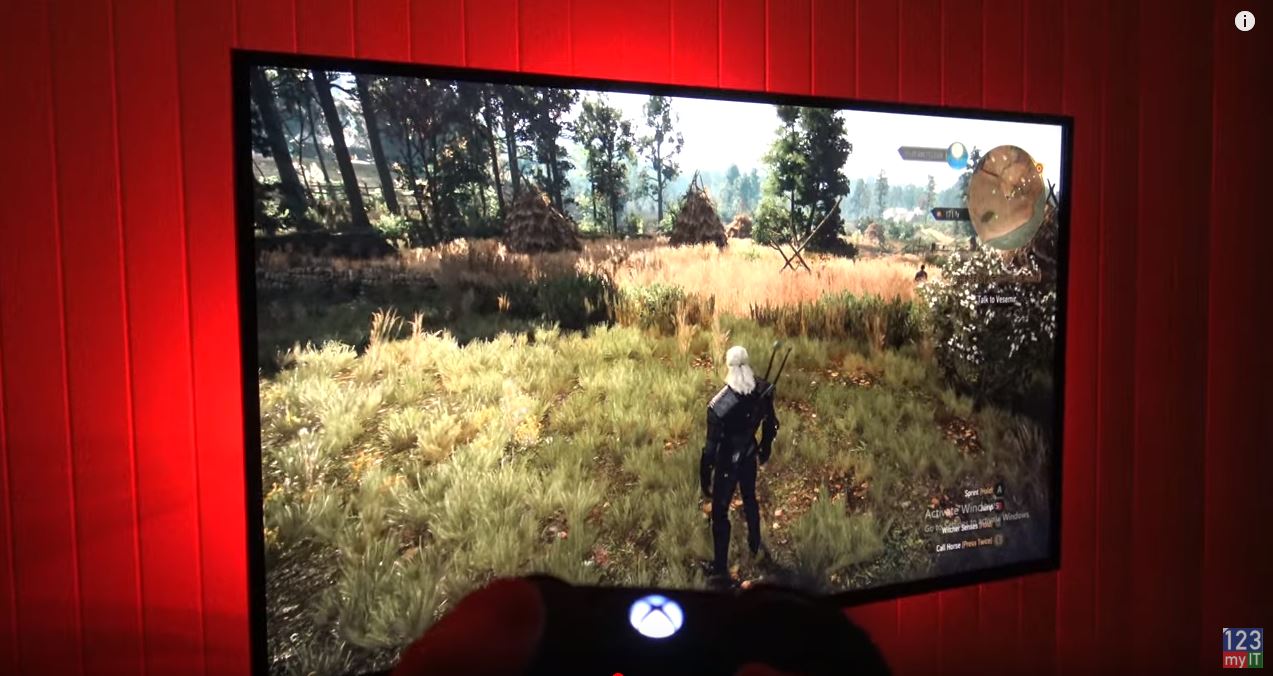
Ok so I have connected the Z800 to my LG TV and I’ve got my XBOX controller ready to go for the media pc build. But I feel like there is something missing. I still feel like there is something missing. How about LEDS? That is better!

Cool, let’s fix up the TV settings. On the LG TV I have this button called Q menu and it allows me to choose a few different TV options such as Gaming and Cinema. What I noticed is the picture on Cinema was far superior to Gaming. Because I am not playing the game competitively, I am just going for the best picture and man it really made a difference. Take a look.

I decided to leave it on Cinema. A quick check to see how many frames the RX 570 is giving me and as you can see here, it is a solid 60 frames. Its a great result. I tested this on my 120 hertz monitor. I set the game to unlimited so I am sure it is higher than this but maybe it is a limitation of the TV.

Let check out some gameplay!

Also guys don’t forget to check out my other videos such as How to setup XBOX controller on Apple TV, iPad and iPhone. And do me a favour hit the subscribe button and smash the bell icon.
Setup DUALSHOCK 4 controller on Apple TV, iPad or iPhone

Turn on Voice Control on iPhone, iPad and iPod Touch

Setup XBOX controller on Apple TV, iPad or iPhone + Games

Setting up the XBOX Controller on Apple TV

Hi Guys and welcome to 123myIT, in this video we will show you how to Setup XBOX wireless controller on Apple TV, iPad or iPhone.

One of the new features with iOS 13 is that you can pair XBOX controllers with Apple TV, iPad and iPhone. This means you can use the XBOX controller to play games on Apple Arcade as well as iOS supported games.

All right let’s get started its pretty simple on your Apple TV go to Settings > Remotes and Devices.

setup xbox controller
Getting started, use the Apple TV remote to setup the Xbox controller.

Scroll down to Bluetooth. And under BlueTooth you will see other devices.

Next up grab your XBOX controller and put it in pairing mode. To do this Press the XBOX button to turn it on. Then press the connect button for 3 seconds or until the XBOX button starts to flash. The XBOX controller should show up under other devices select it with your AppleTV remote. Once you see the Controller Connected popup you should be good to go.

Connect the XBOX to your

Let’s connect the XBOX controller to your iPad or iPhone. Go into Settings > BlueTooth. And just toggle on the BlueTooth switch. Again put your controller in Pairing mode. And tap your controller to connect it.

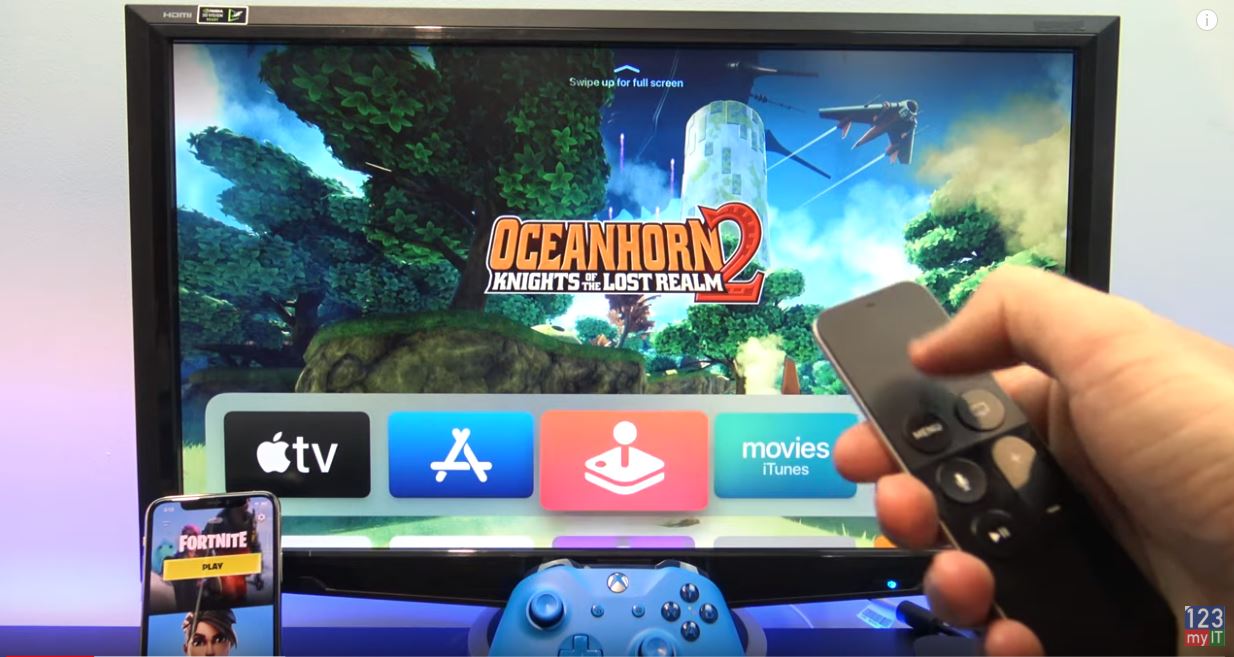
Awesome lets go test out some games. On Apple TV just go into Apple Arcade and sign in with your Apple ID. Its free for the first month. The game I have played most is one called OceanHorn2. The games on Apple Arcade are pretty basic at the moment so don’t expect to the blown away. But they are ok for a bit of fun. OceanHorn2 is a Adventure Role Play game.

Lets check out some games on the iPad or iPhone. Not all iOS games will work with the XBOX controller. But when you load a game that does it should tell you at the bottom of the screen.

The game I am playing now is called real racing 3. In real racing 3 you can change your views in the car and also look behind you. This iPhone 11 pro does a good job with the sound and games can be quite fun on a bigger iPad screen. If racing is not your thing there is loads of other games like fortnight and actually having a controller will give you some advantage over other mobile players as the controller is much easier to use. Sonic Racing game on Apple TV is also a bit of fun.

Also guys don’t forget to check out my other videos such as How to setup DUALSHOCK controller on Apple TV, iPad and iPhone. And do me a favour hit the subscribe button and smash the bell icon.
Turn on Voice control on iPhone or iPad

10 iPhone settings that you should turn off straight away

Setup DUALSHOCK 4 controller on Apple TV, iPad or iPhone

Making the DUALSHOCK 4 work with Apple TV

Hi Guys and welcome to 123myIT, in this video we will show you how to Setup Dualshock 4 controller on Apple TV, iPad or iPhone.One of the new features with iOS 13 is that you can pair Dualshock 4 controllers with Apple TV, iPad and iPhone. This means you can use the Dualshock 4 controller to play game on Apple Arcade and iOS supported games.

All right let’s get started its pretty simple on your Apple TV go to Settings > Remotes and Devices.

setup dualshock 4 controller
Use the Apple TV remote to setup DualShock 4 controller.

Scroll down to Bluetooth. And under BlueTooth you will see other devices.

Next up grab your DualShock controller and put it in pairing mode. To do this hold down the PS and sharing buttons for 3 seconds or until the light starts flashing on the top. The DualShock controller should show up under other devices select it with your AppleTV remote. Once you see your Controller Connected popup you should be good to go.

Lets connect the DualShock to your iPad or iPhone. Go into Settings > BlueTooth. And just toggle on the BlueTooth switch. Again put your controller in Pairing mode. And tap your controller to connect it.

Apple TV Games

Awesome lets go test out some games. On Apple TV just go into Apple Arcade and sign in with your Apple ID. Its free for the first month. The game I have played most is one called OceanHorn2. The games on Apple Arcade are pretty basic at the moment so don’t expect to the blown away. But they are ok for a bit of fun. OceanHorn2 is a Adventure Role Play game.

Lets check out some games on the iPad or iPhone. Not all iOS games will work with the DualShock controller. But when you load a game that does it should tell you at the bottom of the screen.

The game I am playing now is called real racing 3. In real racing 3 you can change your views in the car and also look behind you. This iPhone 11 pro does a good job with the sound and games can be quite fun on a bigger iPad screen. If racing is not your thing there is loads of other games like fortnight and actually having a controller will give you some advantage over other mobile players as the controller is much easier to use. Sonic Racing game on Apple TV is also a bit of fun.

Also guys don’t forget to check out my other videos such as Turn on Voice control on iPhone or iPad. And do me a favour hit the subscribe button and smash the bell icon.
10 iPhone settings that you should turn off straight away

Forgotten Passcode on iPad, iPhone, or iPod Touch 2019