Hi guys and welcome to 123myIT. In this video, we will show you how to create a macOS Big Sur Installer Drive.
Creating a Mac Big Sur USB Installer drive is super easy and all you need is a Mac and a 16GB or larger USB drive.
Which USB drive to use?
I like to make a USB copy so I can do a clean install of MacOS on any Mac. Over this video I do a follow up video to show you how you can use this USB to do a clean install of MacOS on any Mac. The USB drive that I will use has both USB C and USB 3 ports so it should work on any of the new Macs in the future.
If you want to buy one of these here is the Amazon link. 👉 https://amzn.to/3gM67UN
Step 1 – Download MacOS Big Sur – Big Sur USB Installer
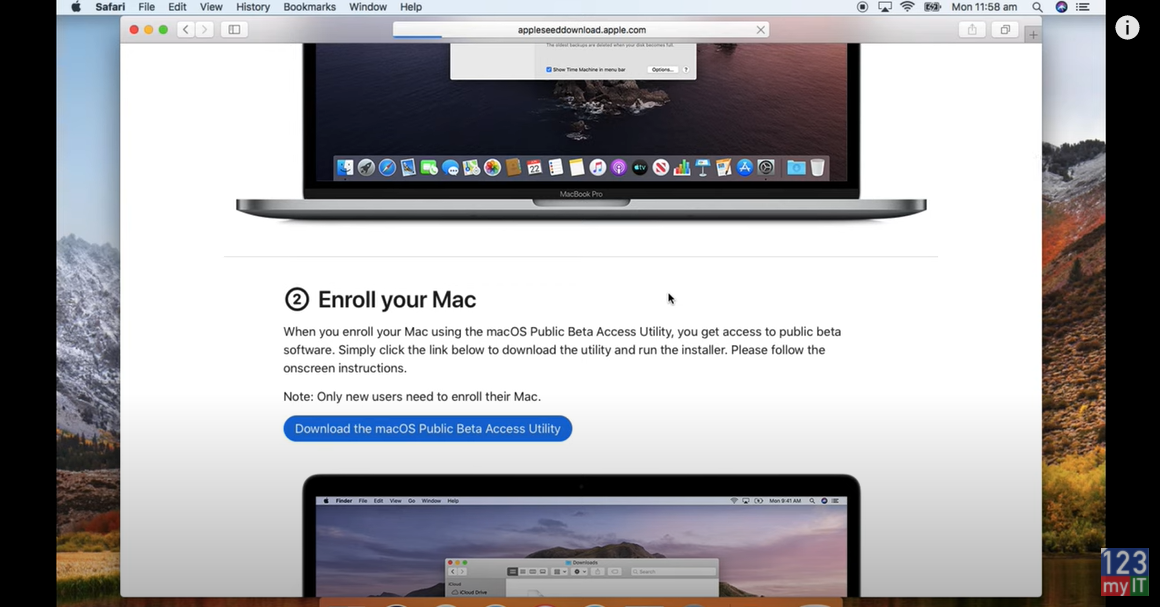
Ok, open up a Safari Browser and head over to beta.apple.com. Sign in with your Apple ID. Go ahead an enrol your Mac. After you have done that scroll down to where it says Download the macOS public access beta.

Go into the Downloads folder and open up the public beta file you just downloaded. Double click on the file to open its up. Then click ok And install. Once installed close the feedback assistant. When the App store opens up. When it does click download on the Big Sur page.
So once its downloaded go into the Apple menu and just quit any of the Applications you have open.
Step 2 – Create MacOS Big Sur Drive
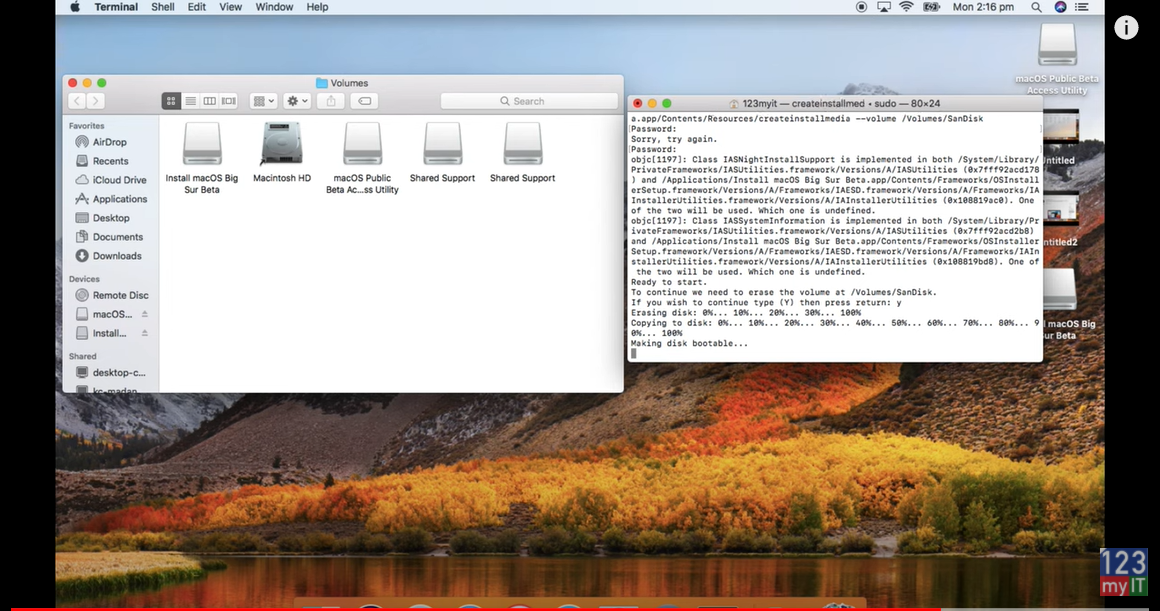
Click go in finder then open Applications and right click the Big Sur application and click show package contents. Open contents and Resources folders and find the createinstallmedia file. Move your window to the left. Go to finder and type in terminal. Drag you terminal window to the right. In the terminal window type sudo then space. And then drag and drop the createingstallmedia file into the terminal window. Next Type –volume and then space again. And then go back to the finder menu. Click go then click go to folder.
Create Install Media File
In the box there type /volumes then click go. The step is to plug in your USB drive. Your USB should show up in the Volumes now. And you can see the SanDisk just appeared. So the next step is to drag the usb into your terminal window. Just a reminded that the next step will wipe the USB drive. So back it up if you need too. Go ahead and type in your password. Hit Y and hit return on your Keyboard.

Once that has finished you should be good to go. To use the USB hold down your ALT option key on the when you start you Mac and select the bootable MacOS USB drive.
Guys don’t forget to check out my other videos such as Transfer Data iPhone to Huawei. And do me a favour if you know anyone who might need this video please share it will them, hit the subscribe button and smash the bell icon.
