This video will show you how to create MacOS Catalina USB installer drive. This installer drive can be used to do a clean install of MacOS Catalina on any Mac.
Step 1 – Download MacOS Software
You will need to open up a Safari browser and navigate to beta.apple.com. Click on Sign in or join up if you haven’t already. Type in your Apple ID when prompted.
Next up you want to scroll down to where it says “Get Started” and Enroll your Mac. Then the next menu to look out for is the Download the MacOS Public Beta. You will be able to upgrade this version to full version when its released, some time in September 2019. Once downloaded open your beta file and run through the prompts.
Close the installer windows by going to the Apple menu and into the Install MacOS Beta and then quit Install MacOS.
Step 2 – Create MacOS Catalina drive
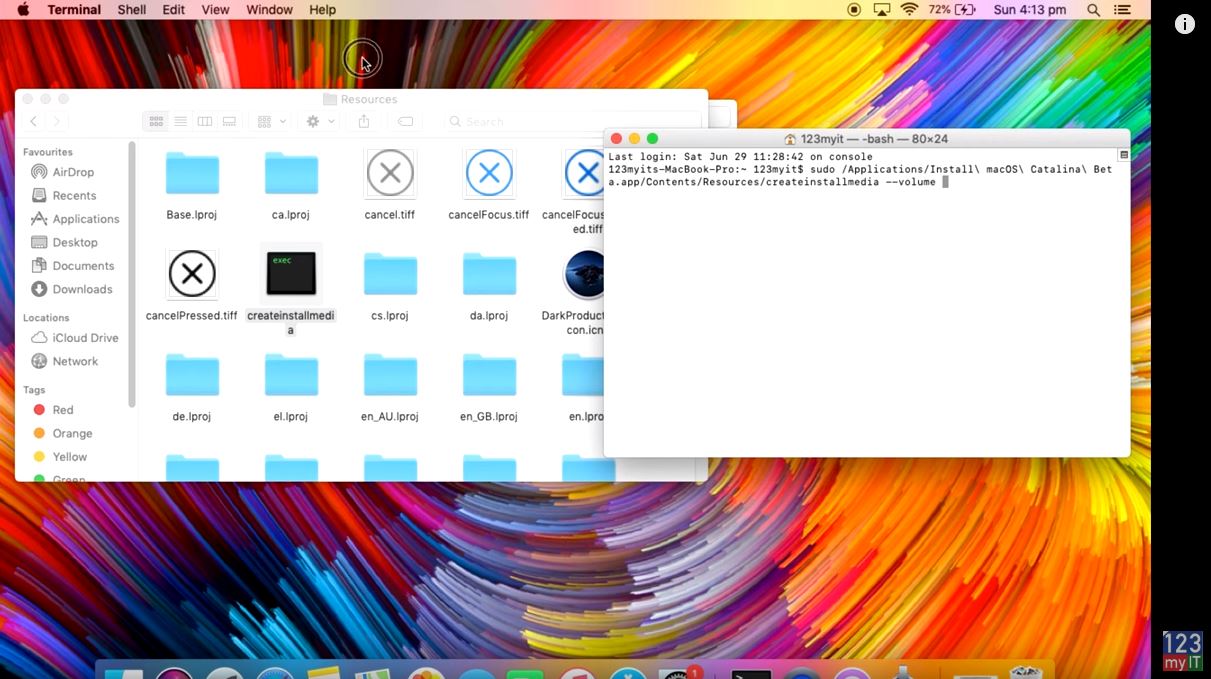
Go into your Finder menu, then click on Go. Then go down to Applications, find your Install MacOS Catalina app. Right click it and go to show package contents. Go into Contents and go into Resources folder. Then find the create install media file. Drag that Windows to the left side of the screen to give yourself some space.
Go into Finder and do a search for Terminal window. Move your Terminal window to the right so you can see both windows. In the Terminal window type sudo space. Then drag your create install media file into the Terminal window. It should look something like the picture below.

After that type in –Volume and then press space again. Next go back up to the Go menu then down to Go to folder. In the text box type /Volumes and click on Go.
Plug in your USB to the Mac. I use a SanDisk version but you can buy your own version here. 🔥 Do you want a USB drive like the one in the video? Click here. https://amzn.to/2NqJI5k
Step 3 – Create MacOS USB
Go back into your Volumes folder and you should see your SanDisk USB or whatever USB you are using should appear. Click and drag it into your Terminal window. press Return and the next step will wipe and data on the USB. Type Y and press Return again on your Keyboard. Double click on your USB drive and you should see the installer file. Your drive has been created and you are ready to do a clean install of MacOS Catalina.
Also guys if you want to see more of my videos like share files iPhone to Mac click the links now and help me out by hitting the Subscribe button and smashing the bell icon.
Share files iPhone to Mac with AirDrop
