How to Delete Internet Explorer History

This video will show you how to Delete Internet Explorer History.

Hi All,
Since everyone uses web browsers so much these days. I decided to make a few videos on how to clear the web history and reset the browser back to factory defaults.
If you find you are having funny issues like browser is closing and crashing and you are getting funny popup and odd behaviour then its probably time to set the browser back to factory defaults.
When you use the browser so much you want it to be running as fast as possible so I suggest following these steps every few months or so.

In this video I have used Windows 8 and Internet Explorer 10. You may find that it looks a little bit different but it should be very simular for Internet Explorer 8 and 9.

Step 1. Click on Internet Explorer and open a Window.

Open IE

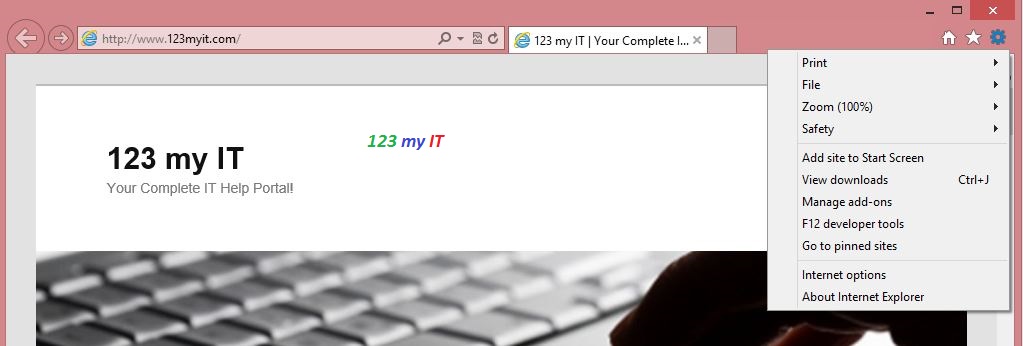
Step 2. Click on the Cog icon in the top right hand corner of the browser and then click on Internet Options.

Internet Options

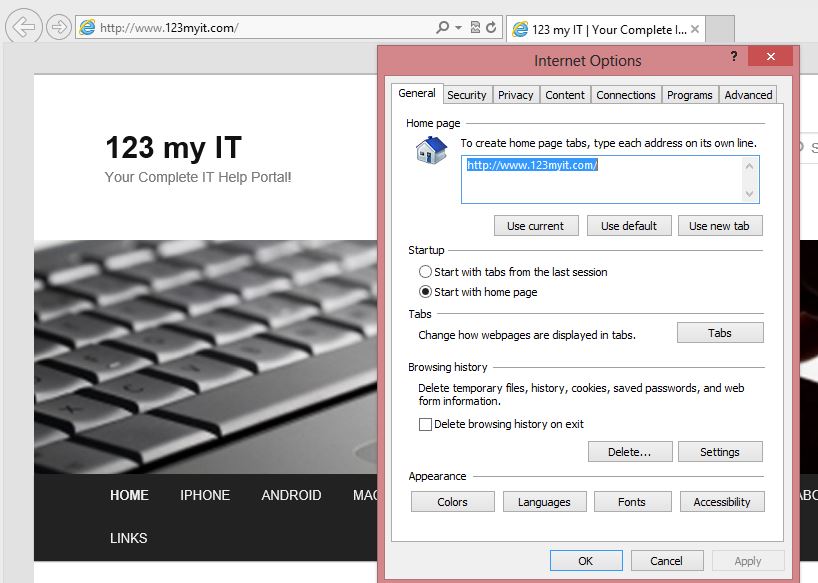
Step 3. Make sure you are in the General Tab, and then under the Browsing history heading click Delete.

Browsing History Menu

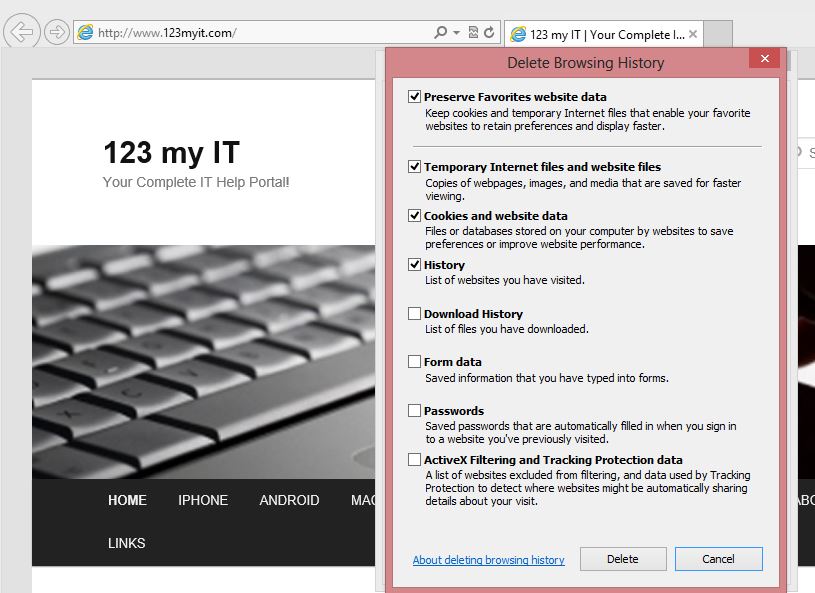
Step 4. Once you have done step 3, you will see a Browsing History Window pop up. In this Window you can choose what items you want to delete from Internet Explorer.
If you are having problems with your browser then I suggest you delete everything. However if you have passwords saved in your Internet Explorer then please make sure you know what those passwords are before you press delete.
The following options will appear.
* Preserve Favorites website data
* Temporary Internet files and website files
* Cookies and website data
* History
* Download History
* Form data
* Passwords
* ActiveX Filtering and Tracking Protection data

Delete Browser History

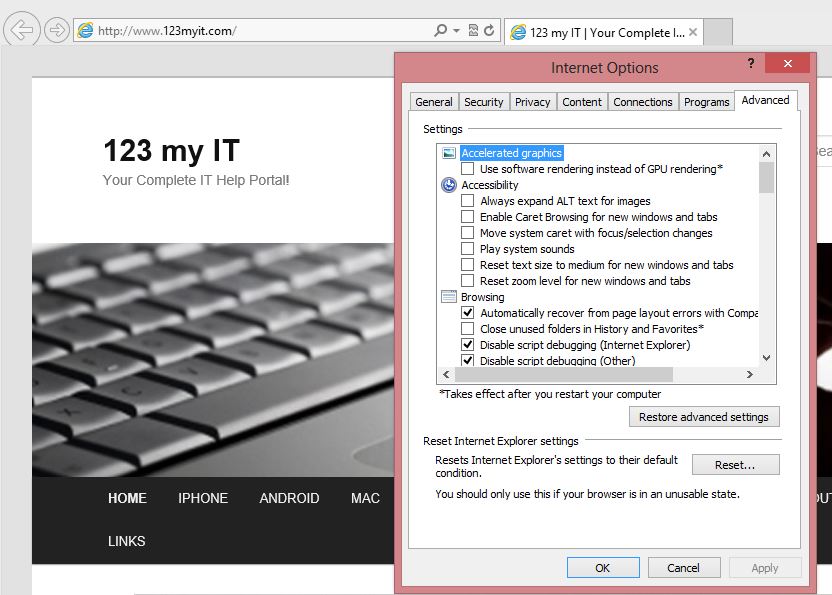
Step 5. If you just wanted to delete the history then you don’t need to do the next step. However if Internet Explorer is doing strange things then you should probably try and do this next step and set it back to factory defaults. Go back to the Internet Options menu and click the Advanced Tab, then click Restore Advanced Settings and click Reset.

Internet Explorer Advanced Settings

Once this is done, restart your Browser windows and you will need to setup your search providers and homepage again. However your browser should now be in the same state it was when you first started using your PC.

Number Of Malicious Apps Attacking Smartphone Users Has Skyrocketed

Malicious Android Apps

A new report has revealed that the number of apps containing malware reached 718,000 just last month. This is an increase of 350,000 up from the end of last year.
Some of the most common malicious apps are attempting to sign users up to pricey premium services which charge outrageous amounts for simply sending and receiving text messages for example.
According to Jonathan Oliver, Trend Micro’s software architecture director for Australia and New Zealand, there’s been a recent increase in the number of ‘genuine malware’ out there.
This type of malware knows how to take advantage of the vulnerabilities of the Android and how to access and steal sensitive information.
FAKEBANK is one example. It imitates genuine banking apps and steals usernames and passwords.
Cybercriminals make these apps by taking genuine apps and then installing the malicious software in them. Then they offer them for sale on the app store either for free or at a large discount.
According to Oliver, Android phones are more susceptible to attacks over iPhones because the Android app store is more open.
Oliver continued on to say that Australia is still a major target for cybercriminals as more and more people are using their phones for mobile banking purposes.

Apple’s Charger Trade In Program Following Electric Shock Scare

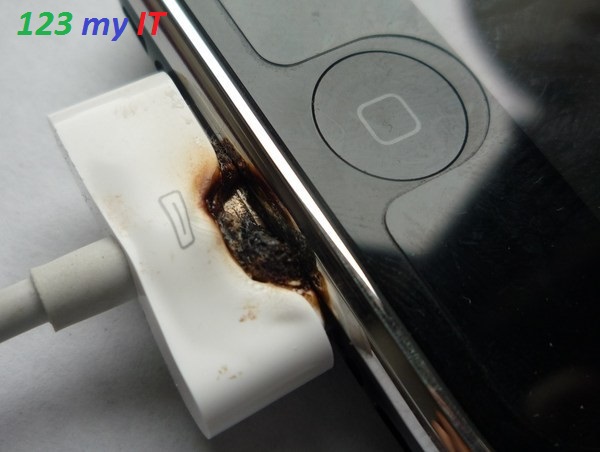
Burnt out Apple Charger

Burnt out Apple Charger

Apple have launched a charger trade in program following reports of a women in China being electrocuted while using her iPhone while it was charging.
Concerns that more electrocutions might follow caused by unsanctioned chargers for Apple gadgets being used prompted the company to create the trade-in scheme.
As of the 16th of April, people who have purchased counterfeit or third-party chargers for Apple products will be able to exchange them for the certified Apple models, at the price of $US10.
While Apple acknowledges that not all counterfeit or third party chargers are dangerous, some that have not been properly designed can pose a serious safety hazard and people who are concerned about their own chargers should participate in the trade-in program.
In order to participate in the scheme consumers must bring in to an Apple store or authorised Apple service provider their old chargers and the device(s) they use the charger for.
Serial numbers on devices will need to be verified for the trade-in program which will run until the 18th of October.

How to Extract Audio from Video with VLC – Game of Thrones Ringtone

Time for a bit of fun!!!
This video will show you how to Extract Audio from Video using VLC. This is the first part to creating a Game of Thrones Ring Tone. More to come soon.

How to Resize an Image Picture on a Mac

Hi All
So I thought I would post up and easy guide on how to resize a picture on a Mac.
I want to try and spread out the Tutorials evenly so I will try and do one per day on each topic.
When sending emails with images via email, most free email servers like Yahoo or Google have a limit on how many images you can send at once. Usually it’s around 10 meg in size. To get around this you can resize your image to make them smaller so that you will be able to attach more images to the email.
Making the pictures smaller will also allow you to upload and download them faster and when adding images to a website will allow them to load faster in the viewers web browser.
Resizing a picture on a Mac is quick and painless when you know how to do it and it the software is already built into your Mac OS X. So you have no reason not to be able to this yourself.

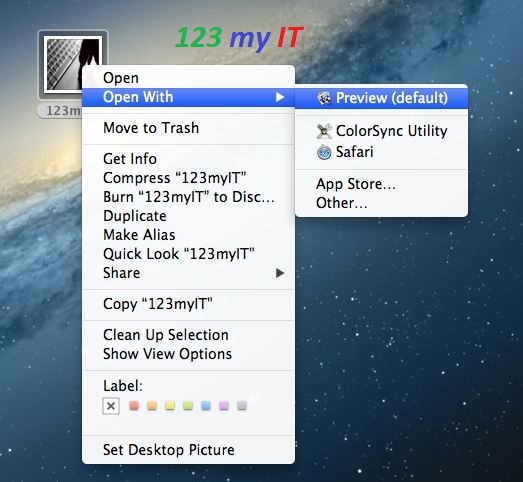
Step 1. Once you have the image you want to resize. Right click and select Open With. Then click Preview Default.
The image then should open up and you can then go to the next step.

Preview Image Mac

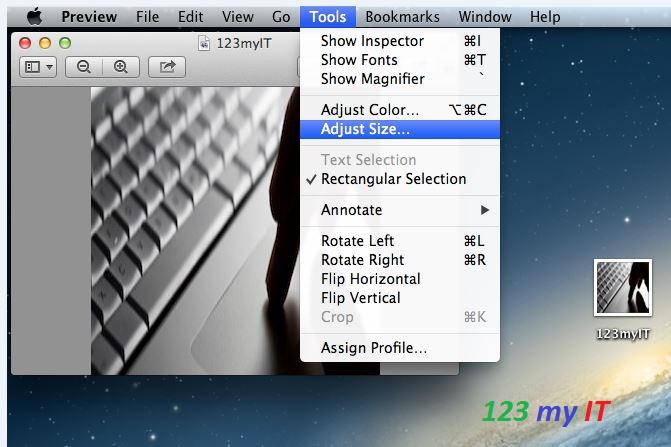
Step 2. Once you have the image previewed, the next step is to click on Tools in the Apple menu bar then click Adjust Size.

Preview Adjust Image

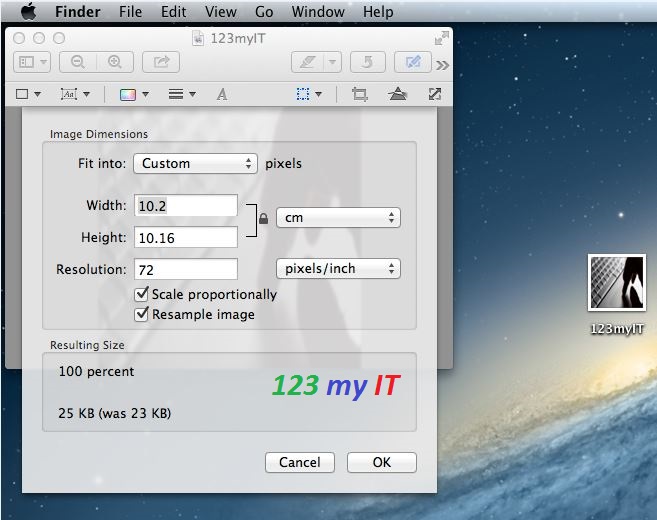
Step 3. You will then have a screen that you can change the details of the image. For example if you wanted to change the width and height of a picture your can select the number in the Width field and the results of the change you make will display below under Resulting Size.

Width Change Image

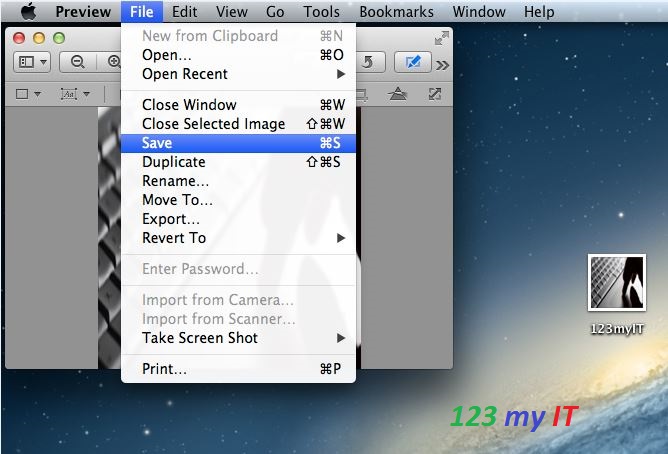
Step 4. Click ok to apply your changes to the image and then to save the changes go to File and then Save. Once you have made this change you’re done!

Save Image Resize

Step 5. Go to Preview and Quit Preview and you have now closed the Preview software.

Things to Note If you want to resize an image for webpages 100-200 KBs is usually the best size to use.
Warning if you select Save instead of save as it will save over the top of your current image.
Setup Yahoo mail on a Mac using Mac Mail
Clone OS X Lion and Mountain Lion to a USB drive